Quick Start
- Author
- por Alexandro Martínez
- a year ago
On this quick-start tutorial, you'll get a glimpse of every SaasRock feature.
Requirements:
Steps
1. Installation
💿 1.1. Install all the dependencies:
npm installIf you get any issues, try with yarn.
💿 1.2. Rename the .env.example file to → .env.
💿 1.3. Seed the database:
npx prisma migrate dev --name initYou should get the following output:
🌱 The seed command has been executed.If you get any issues, try updating the database and seeding manually:
npx prisma db push
npx prisma db seed
By default, the codebase seeds the following data (using the prisma/seed.ts file):
1 admin user: Credentials are defined by the
ADMIN_EMAILandADMIN_PASSWORDenv variables.2 tenant users: john.doe@company.com and luna.davis@company.com.
2 tenants: Acme Corp 1 and Acme Corp 2.
1 linked account between these tenants.
2 blog posts.
2 custom entities: Employee and Contract.
NOTE
If you're using sqlite, you can restart your database by deleting the generated prisma/dev.db file + the prisma/migrations folder, and run the command again.
💿 1.4. Start the application:
npm run dev
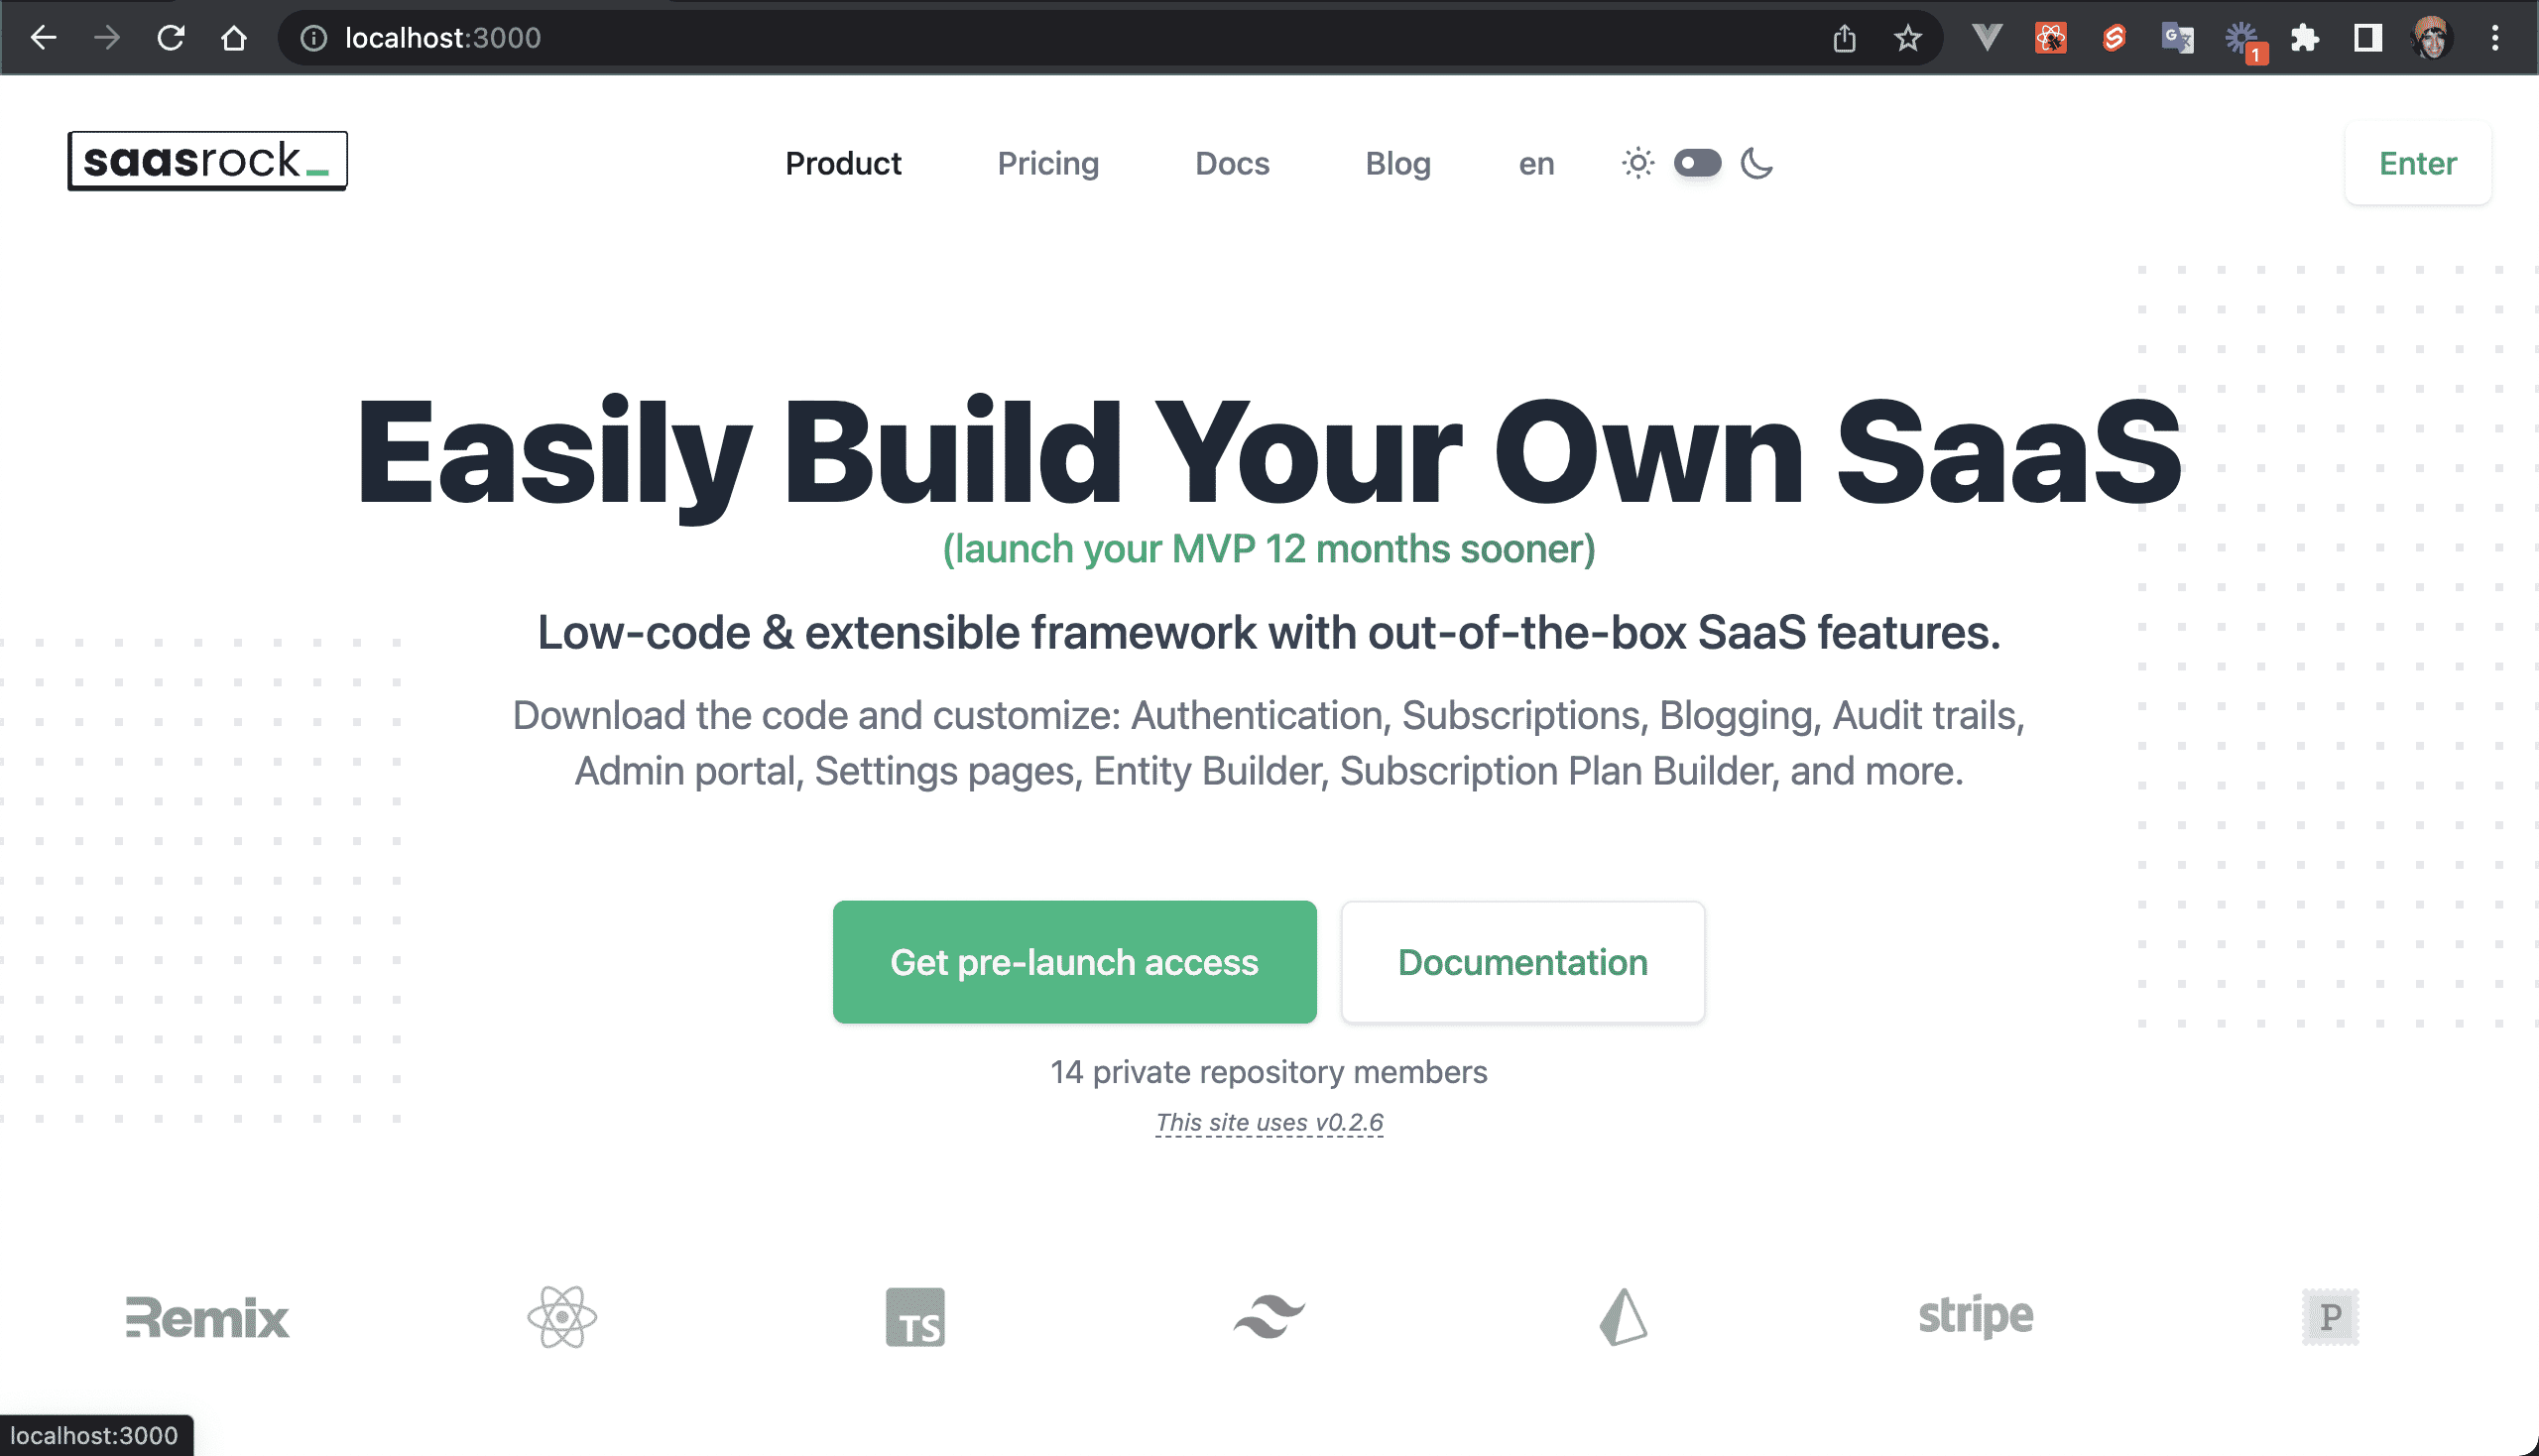
Open localhost:3000, you'll see the landing page:
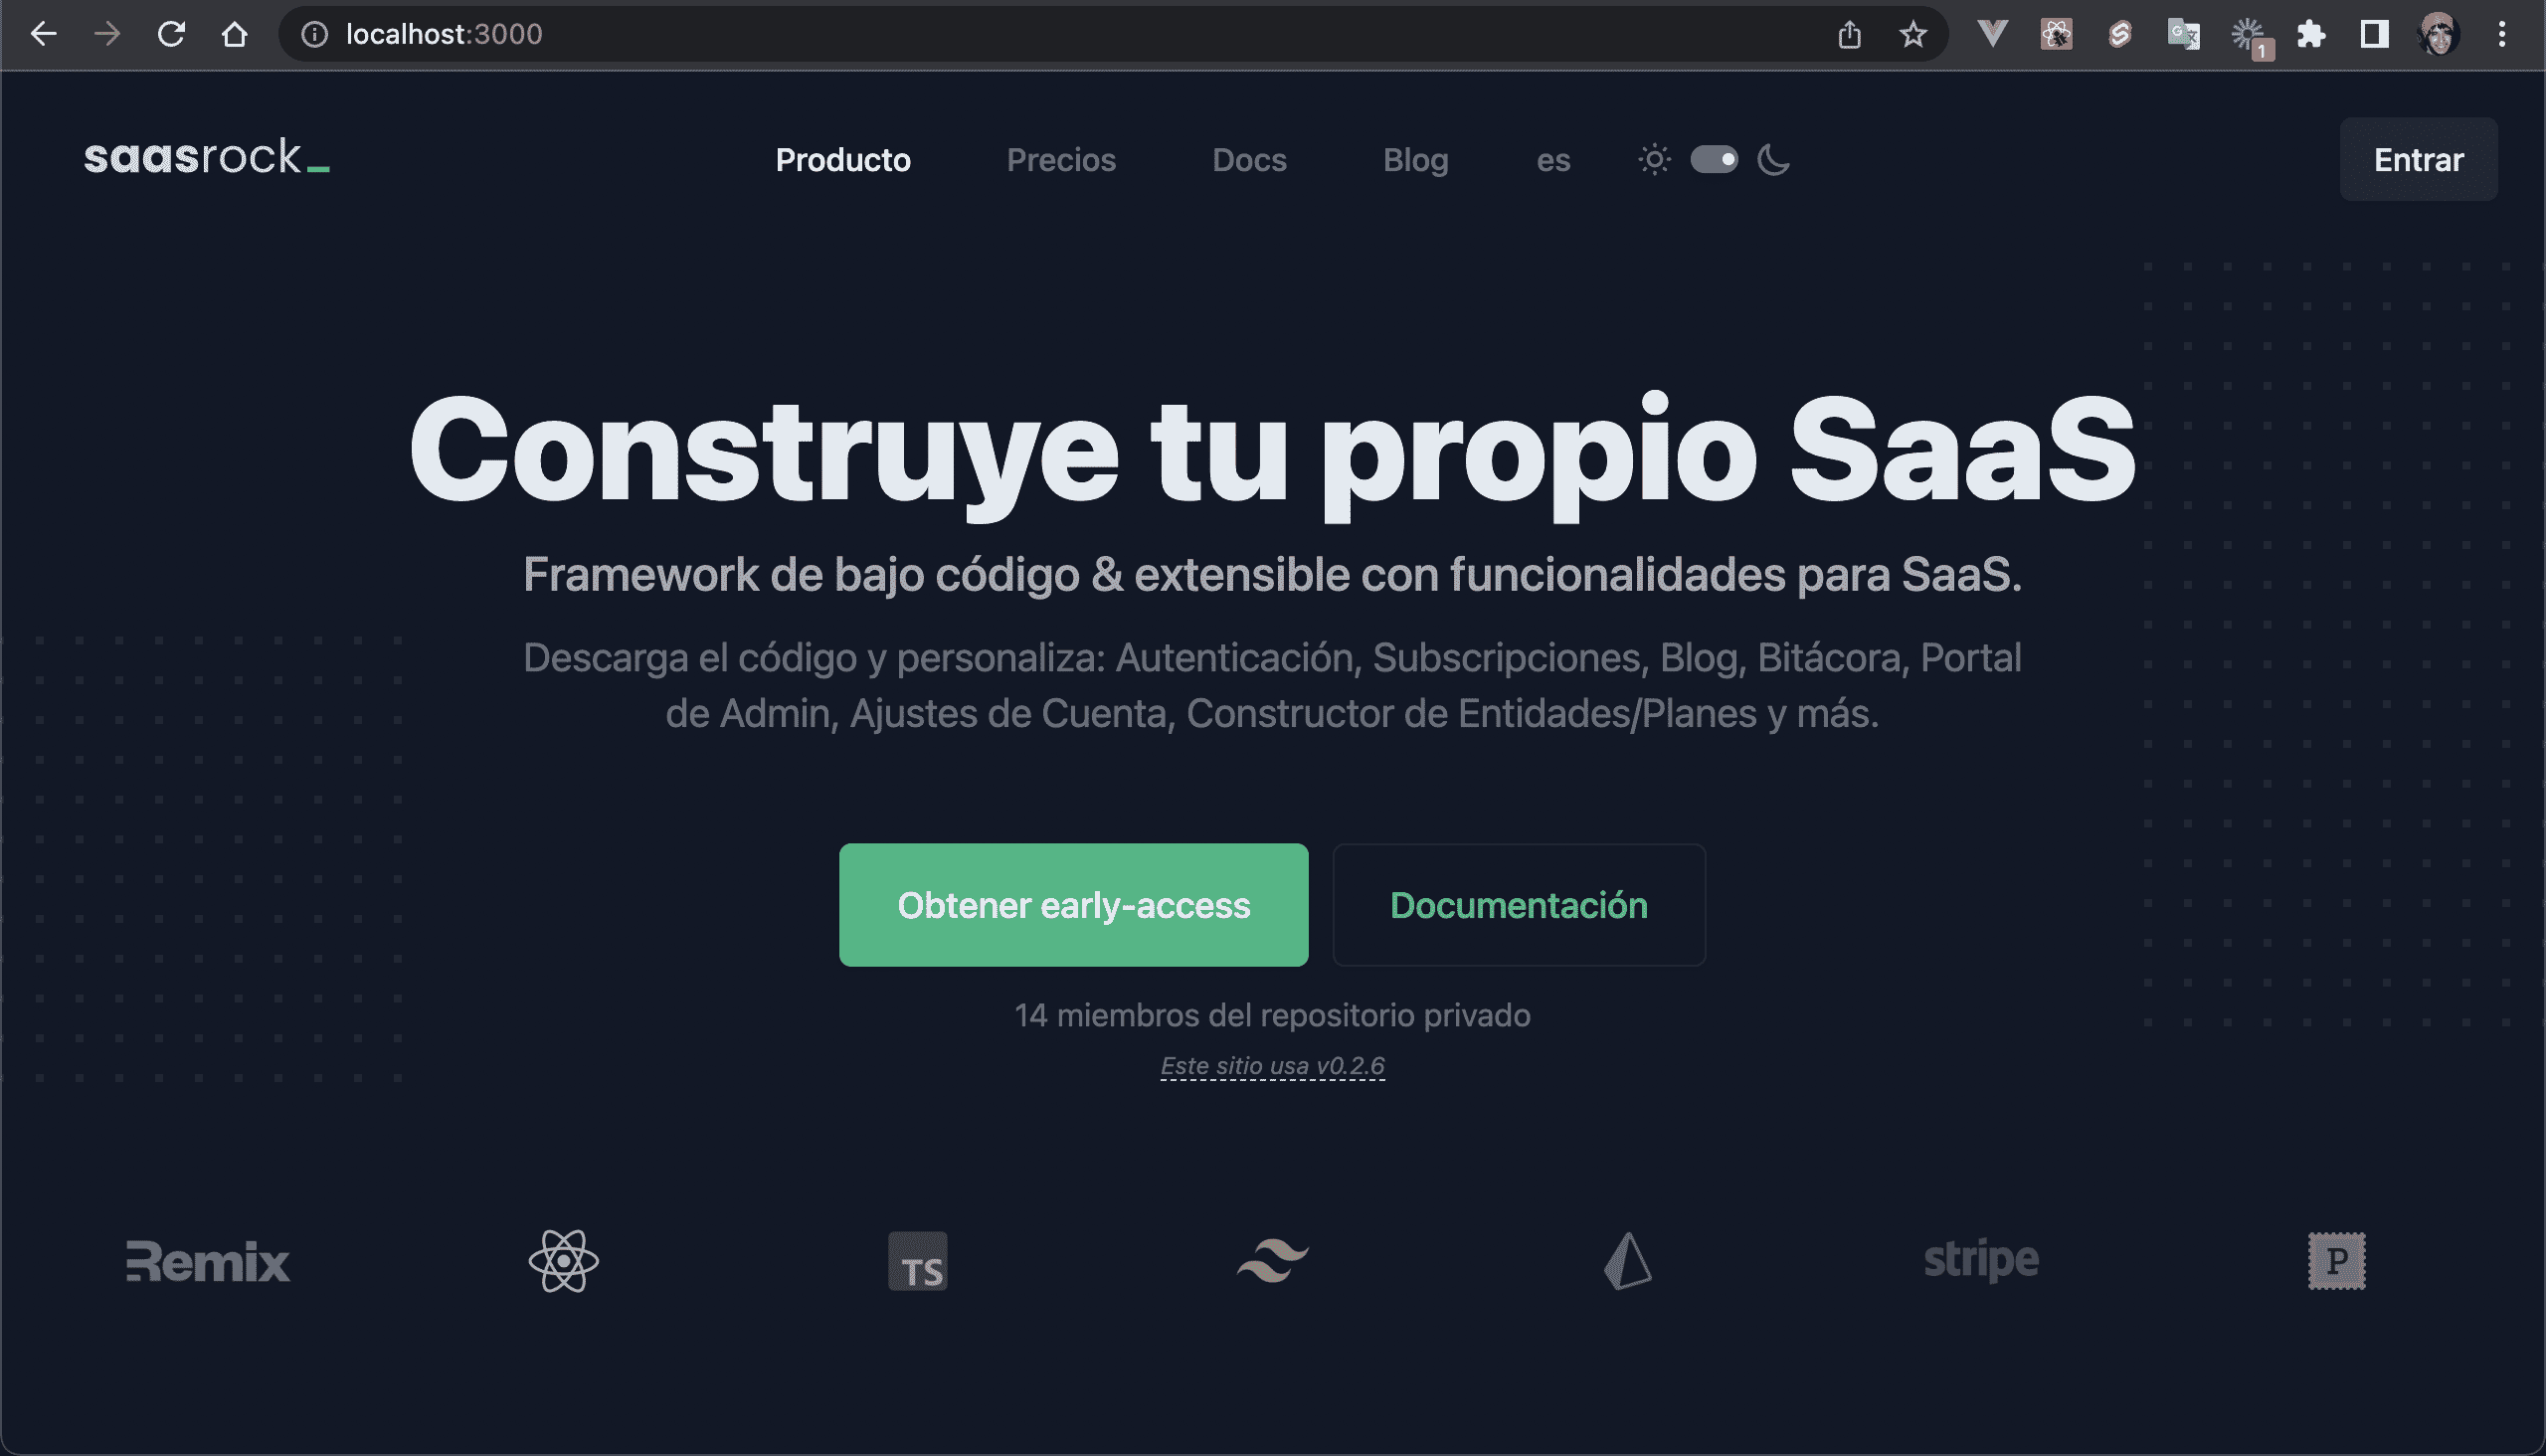
💿 1.5. Switch to Dark Mode and Select the Spanish language from the Navbar items:
2. Set up Subscription Plans
💿 2.1. Set up the STRIPE_SK env variable and restart the app. Click here to view your Stripe secret key.
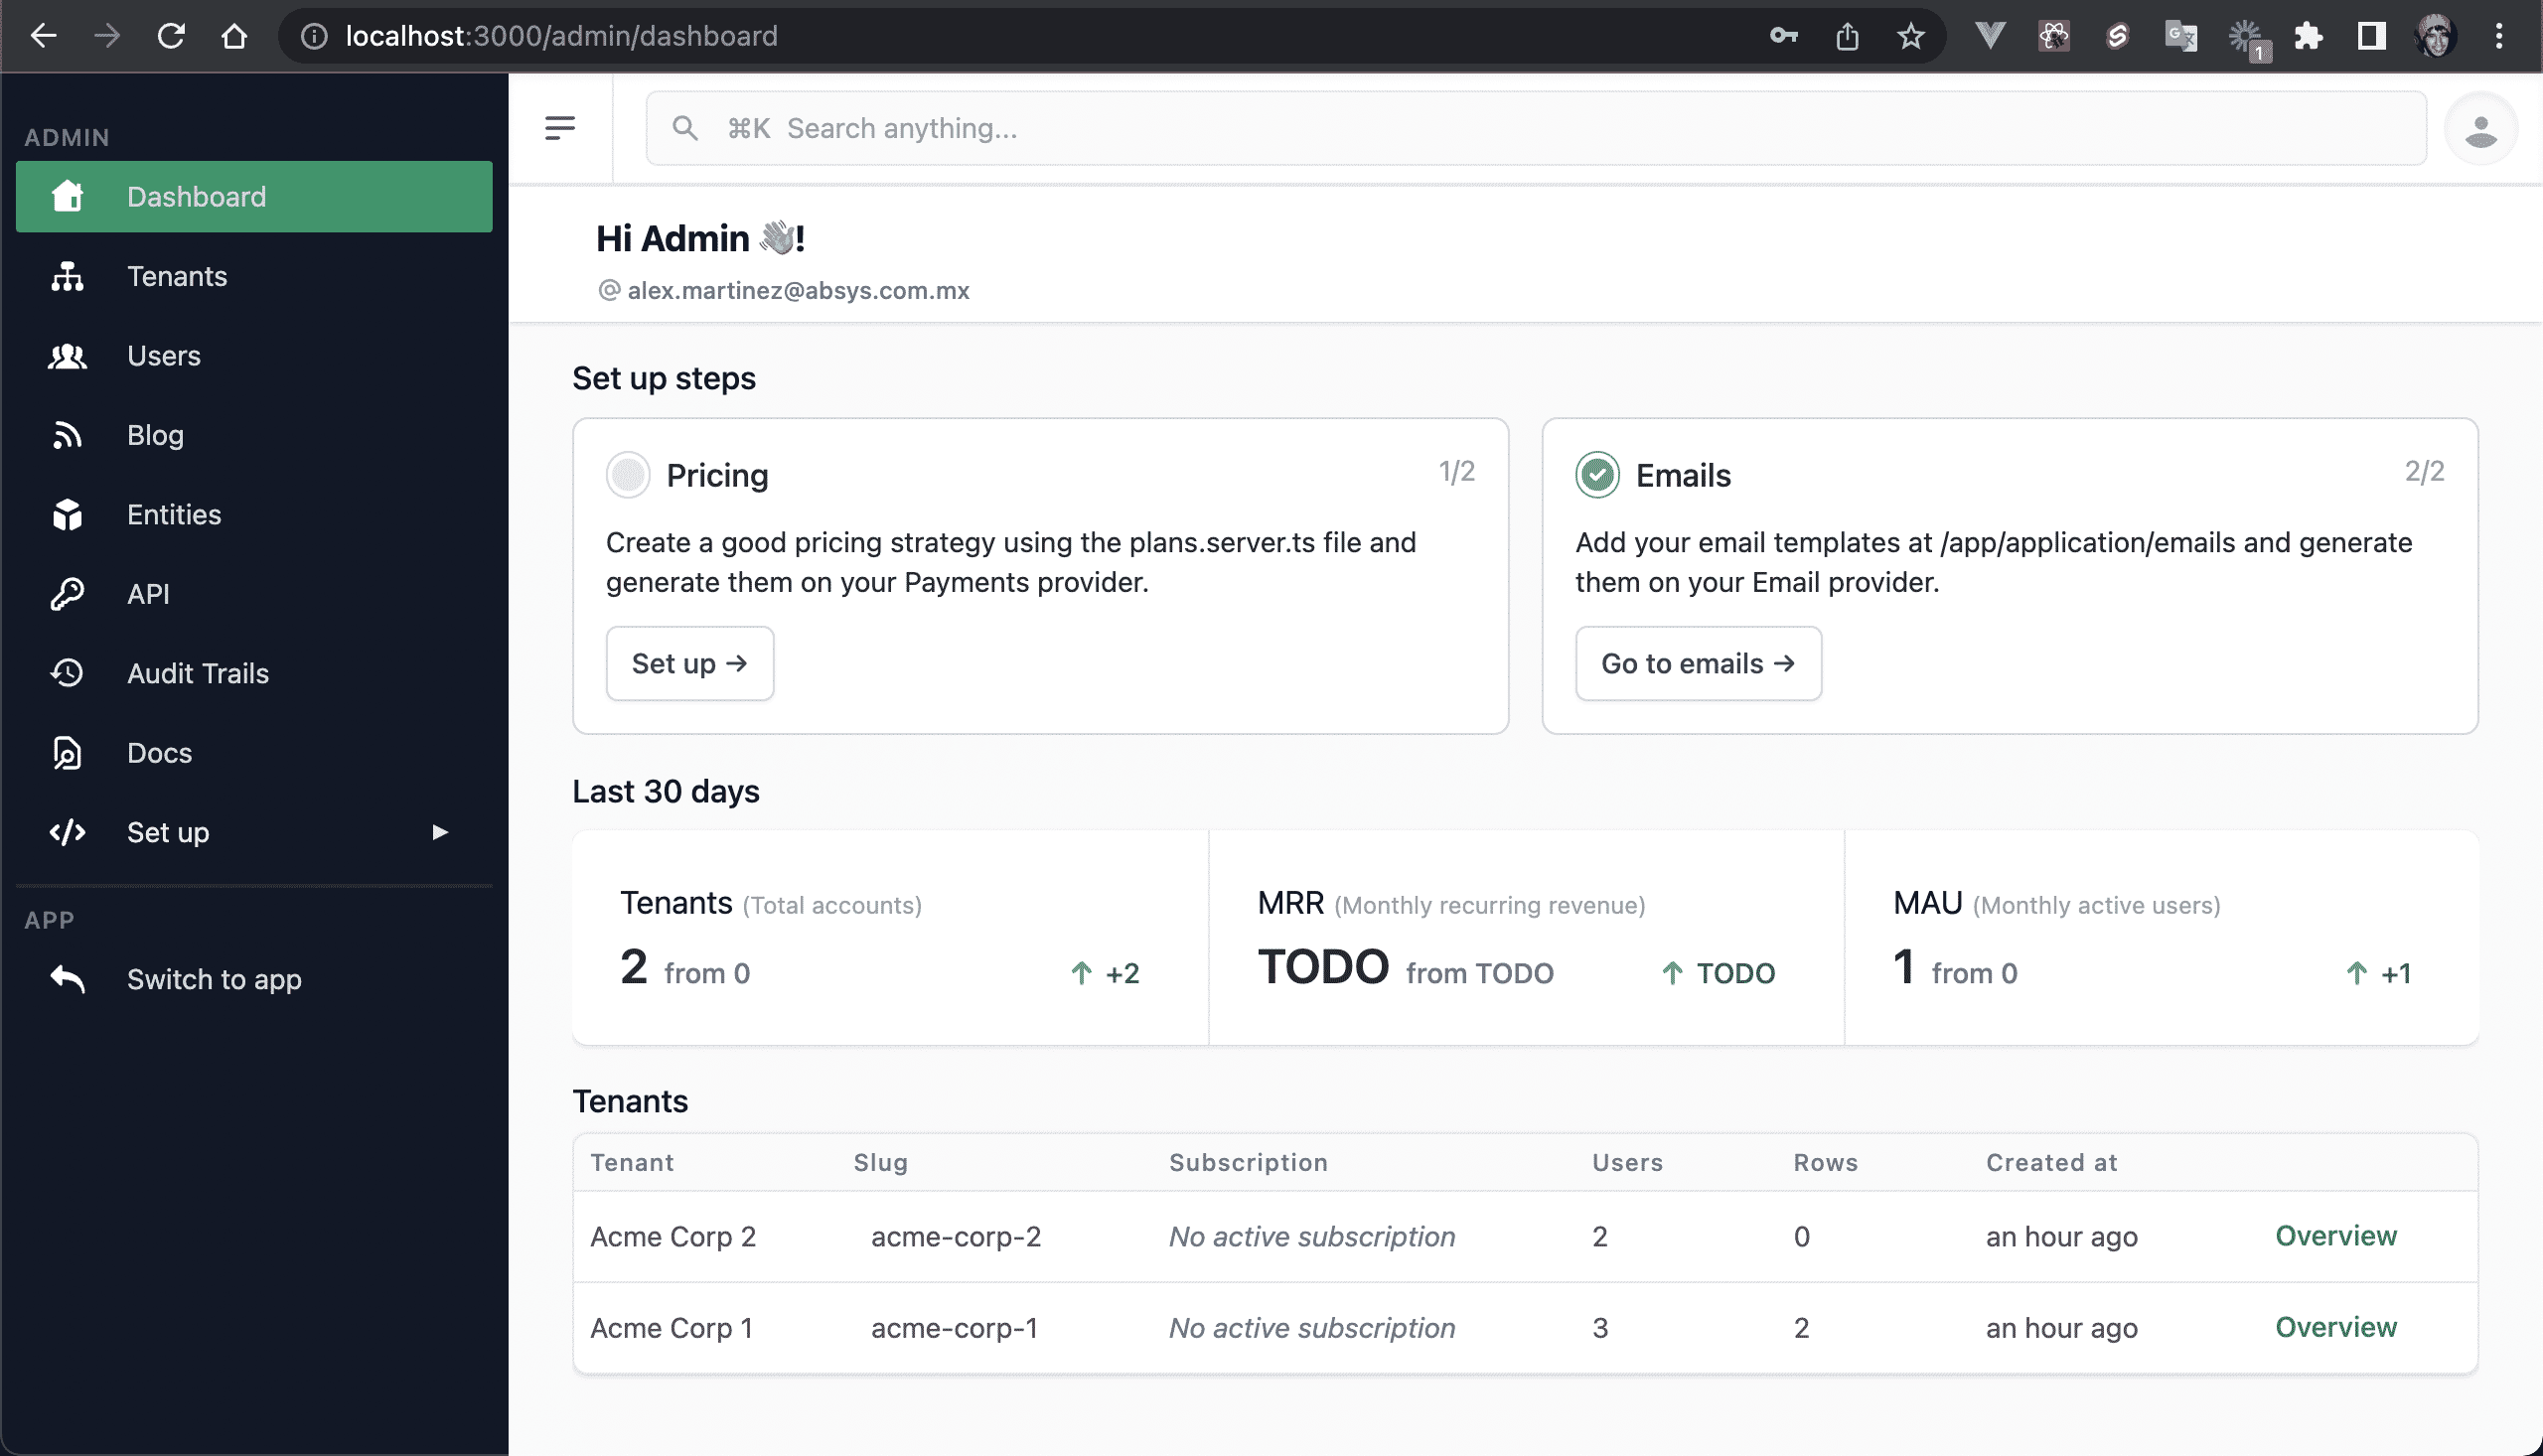
💿 2.2. Log in as your admin user (ADMIN_EMAIL and ADMIN_PASSWORD env variables).
You will see the Admin Dashboard:
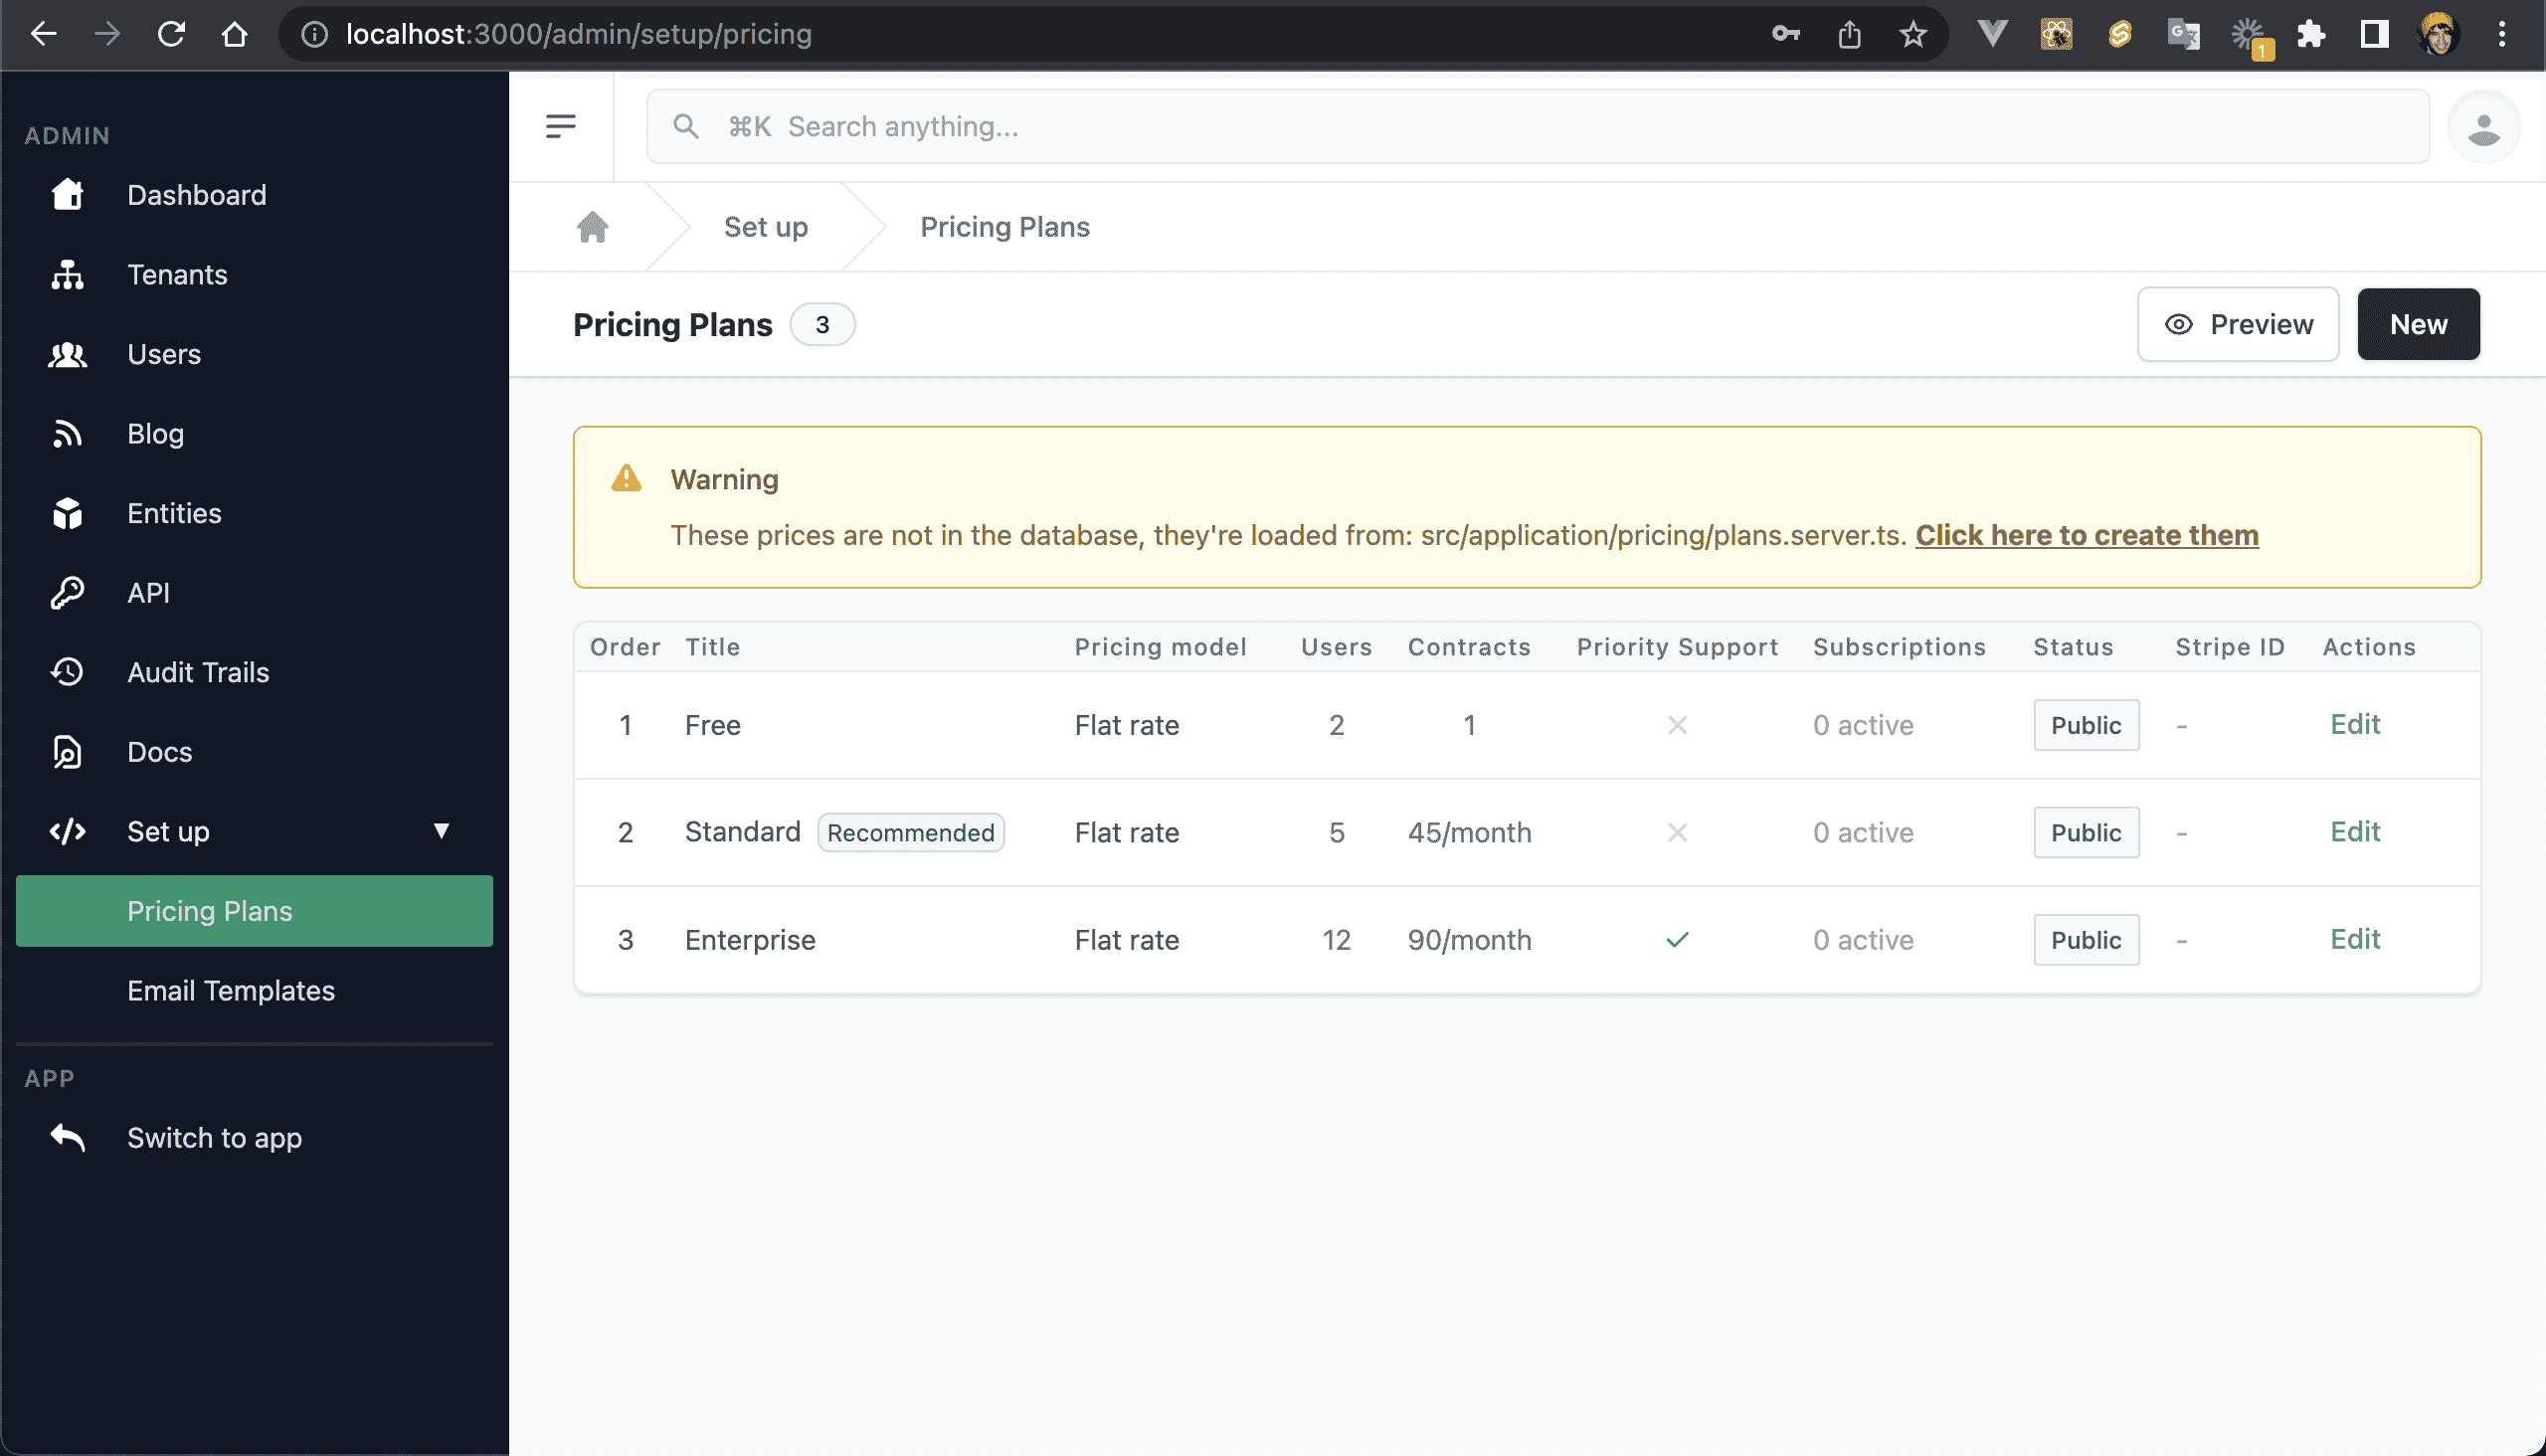
💿 2.3. Click on "Pricing → Set up", or click the sidebar item "Set up → Pricing Plans".
NOTE
You can change the default pricing plans on the plans.server.ts file
💿 2.4. Click on "Click here to create them".
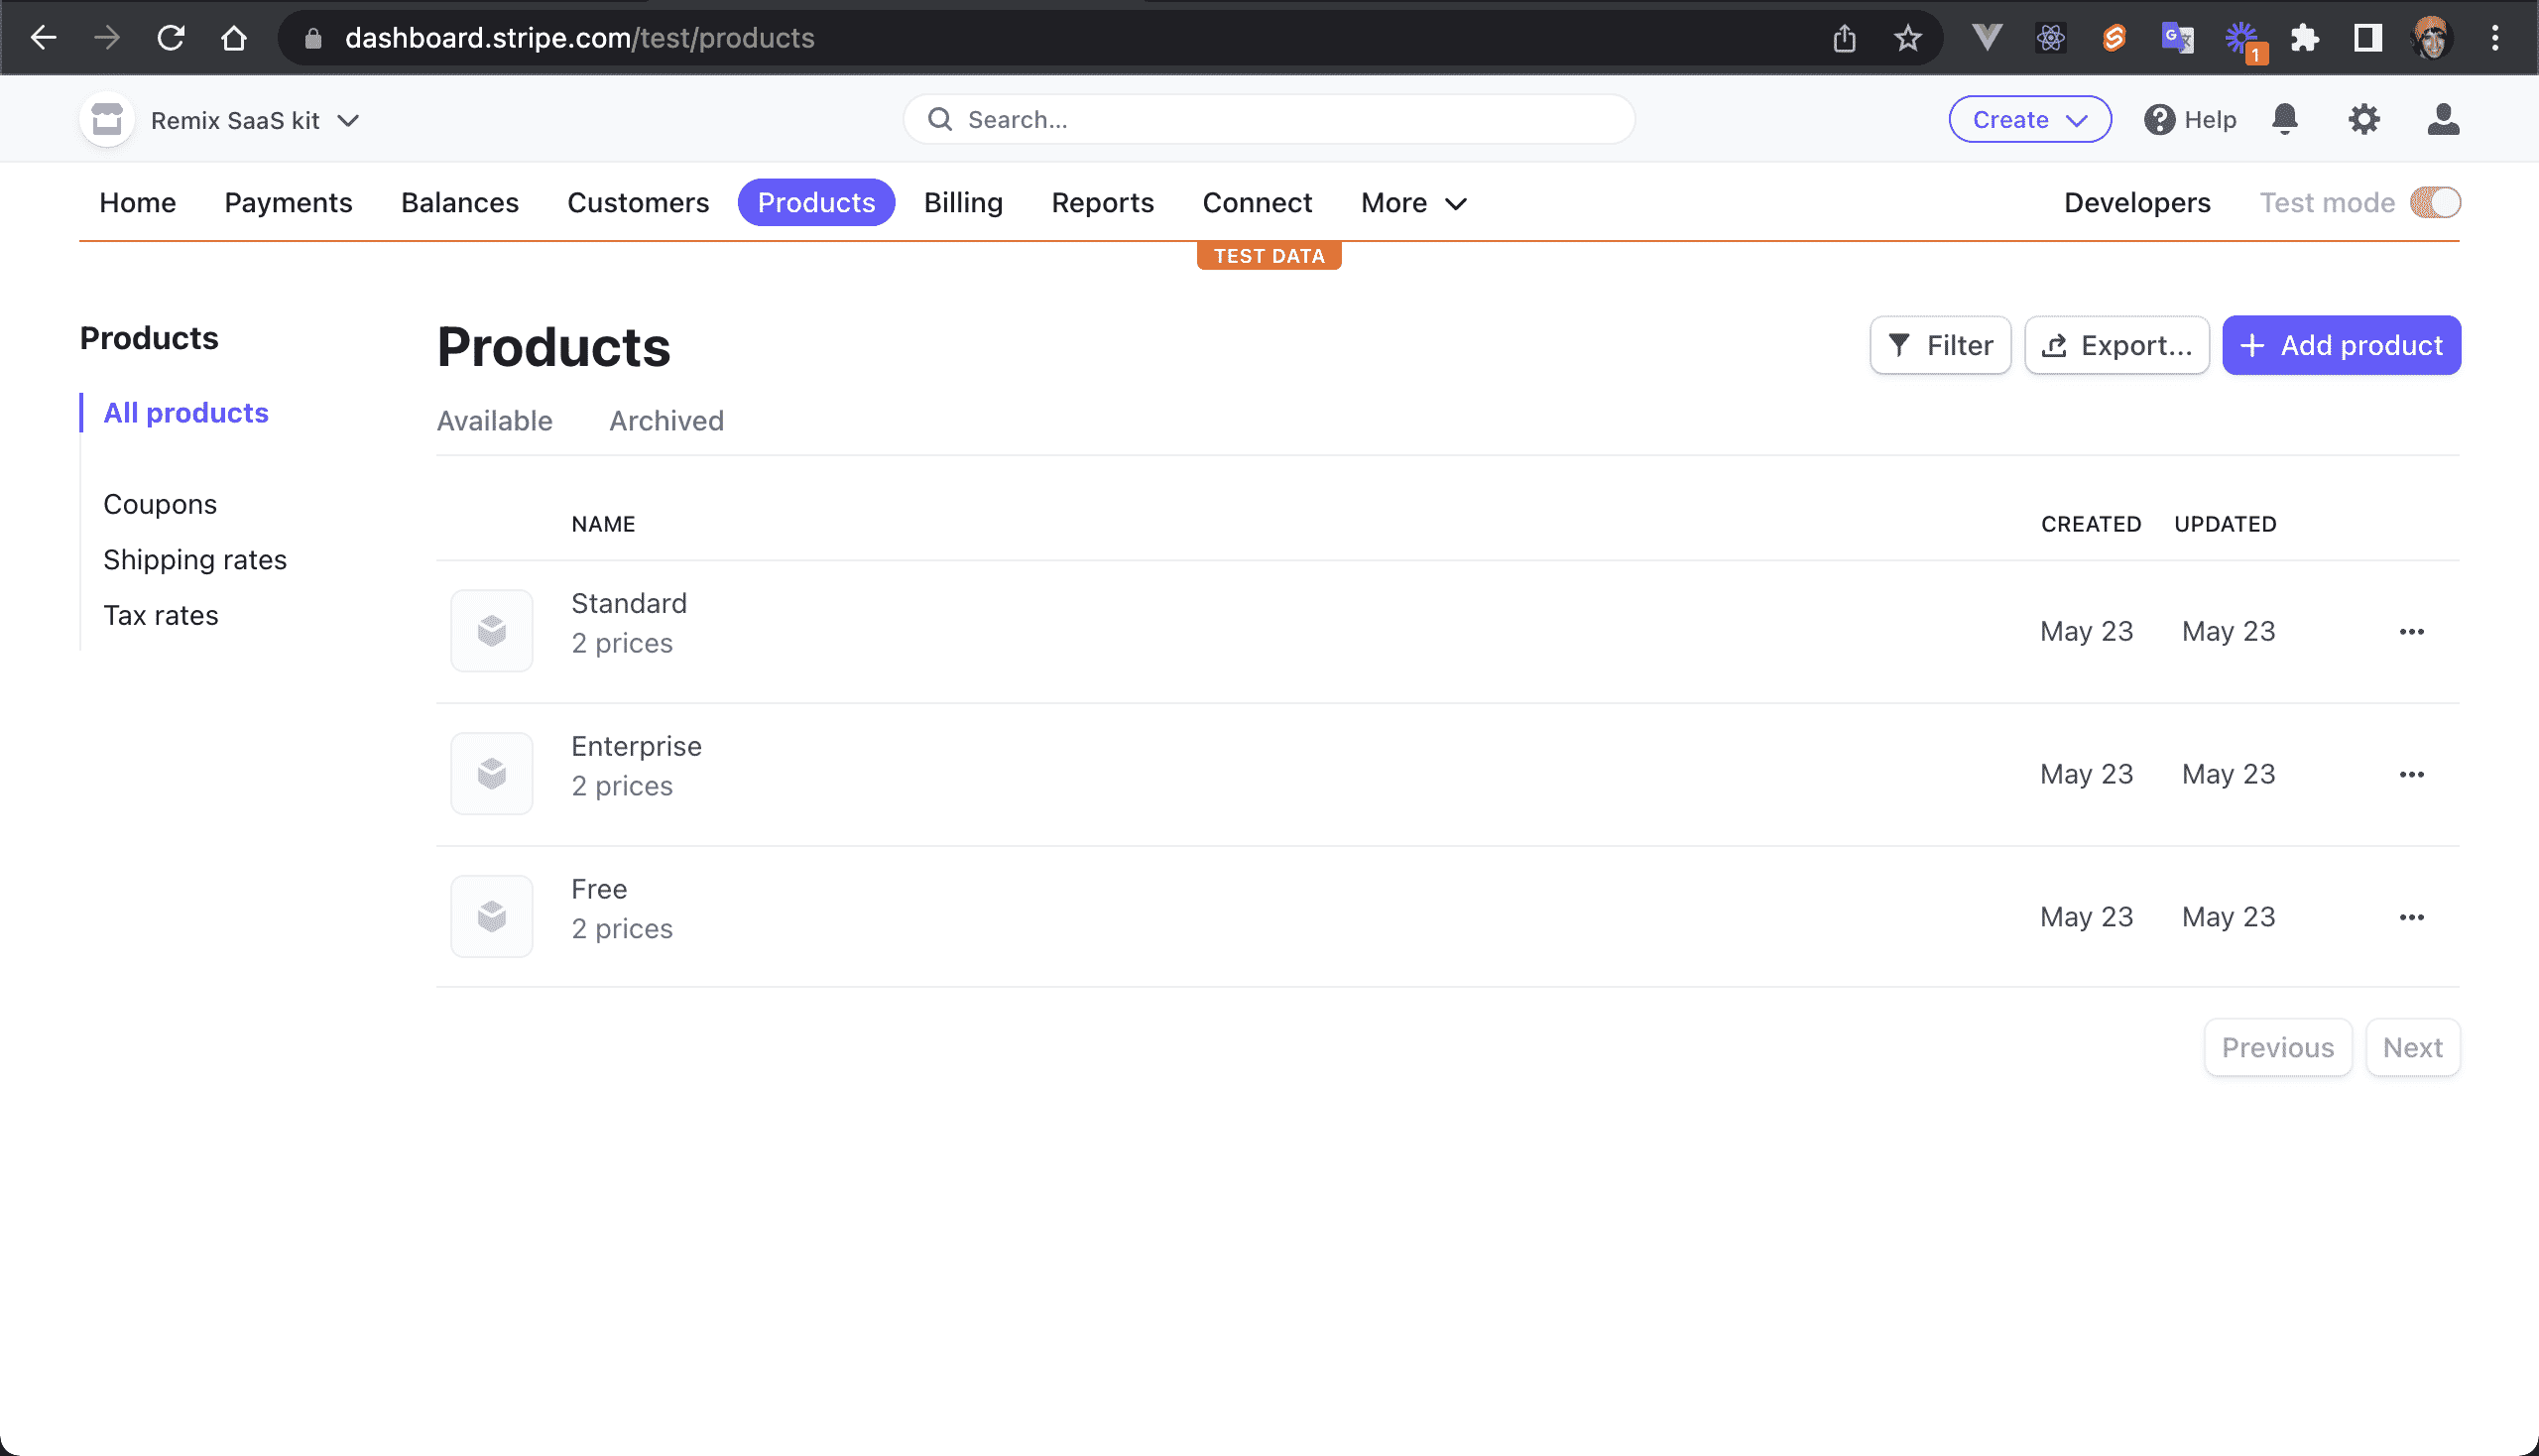
Navigate to your Stripe Dashboard to see the created Products:
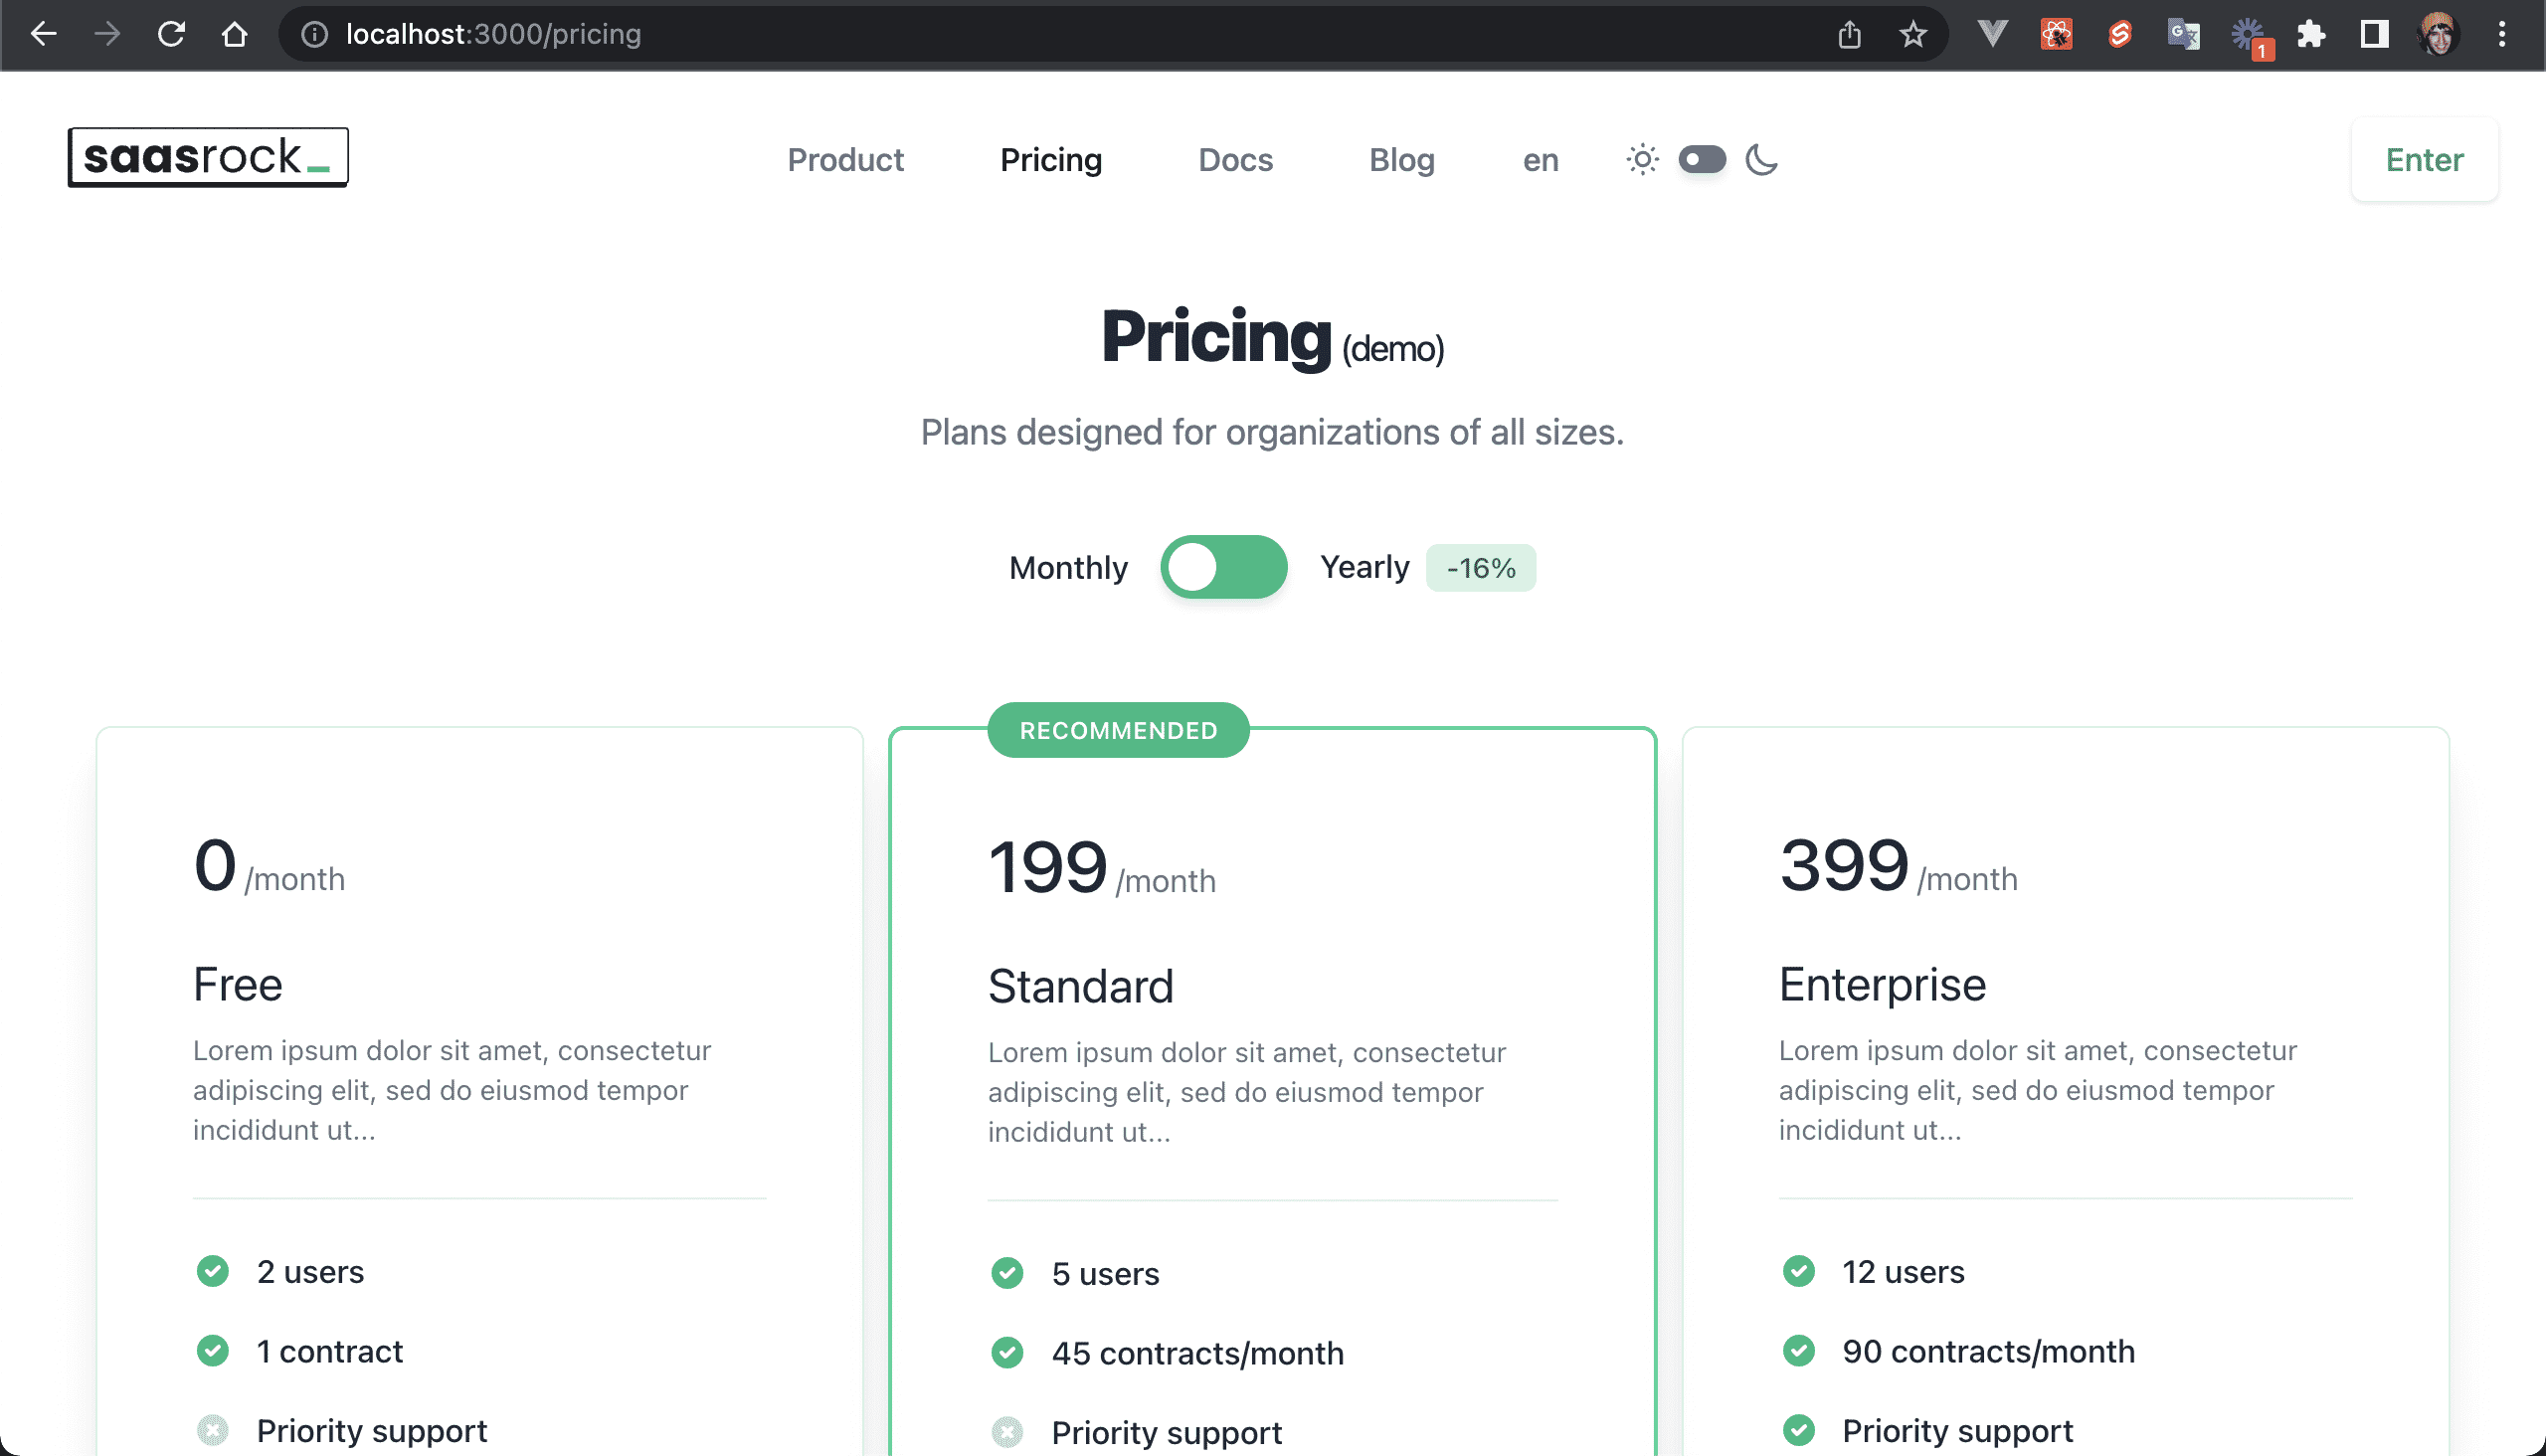
💿 2.5. Visit your Pricing page at /pricing.
You will see the recently created pricing plans:
3. Set up Transactional Email Templates (OPTIONAL)
NOTE
You can skip this step, but you will not get emails. To skip this step, make sure you don't set the env variable values of POSTMARK_SERVER_TOKEN and POSTMARK_FROM_EMAIL.
💿 3.1. Create a Postmark account if you haven't already, they have the best development experience for transactional emails (you can use the code REMIXSAASPOSTMARK for -20%).
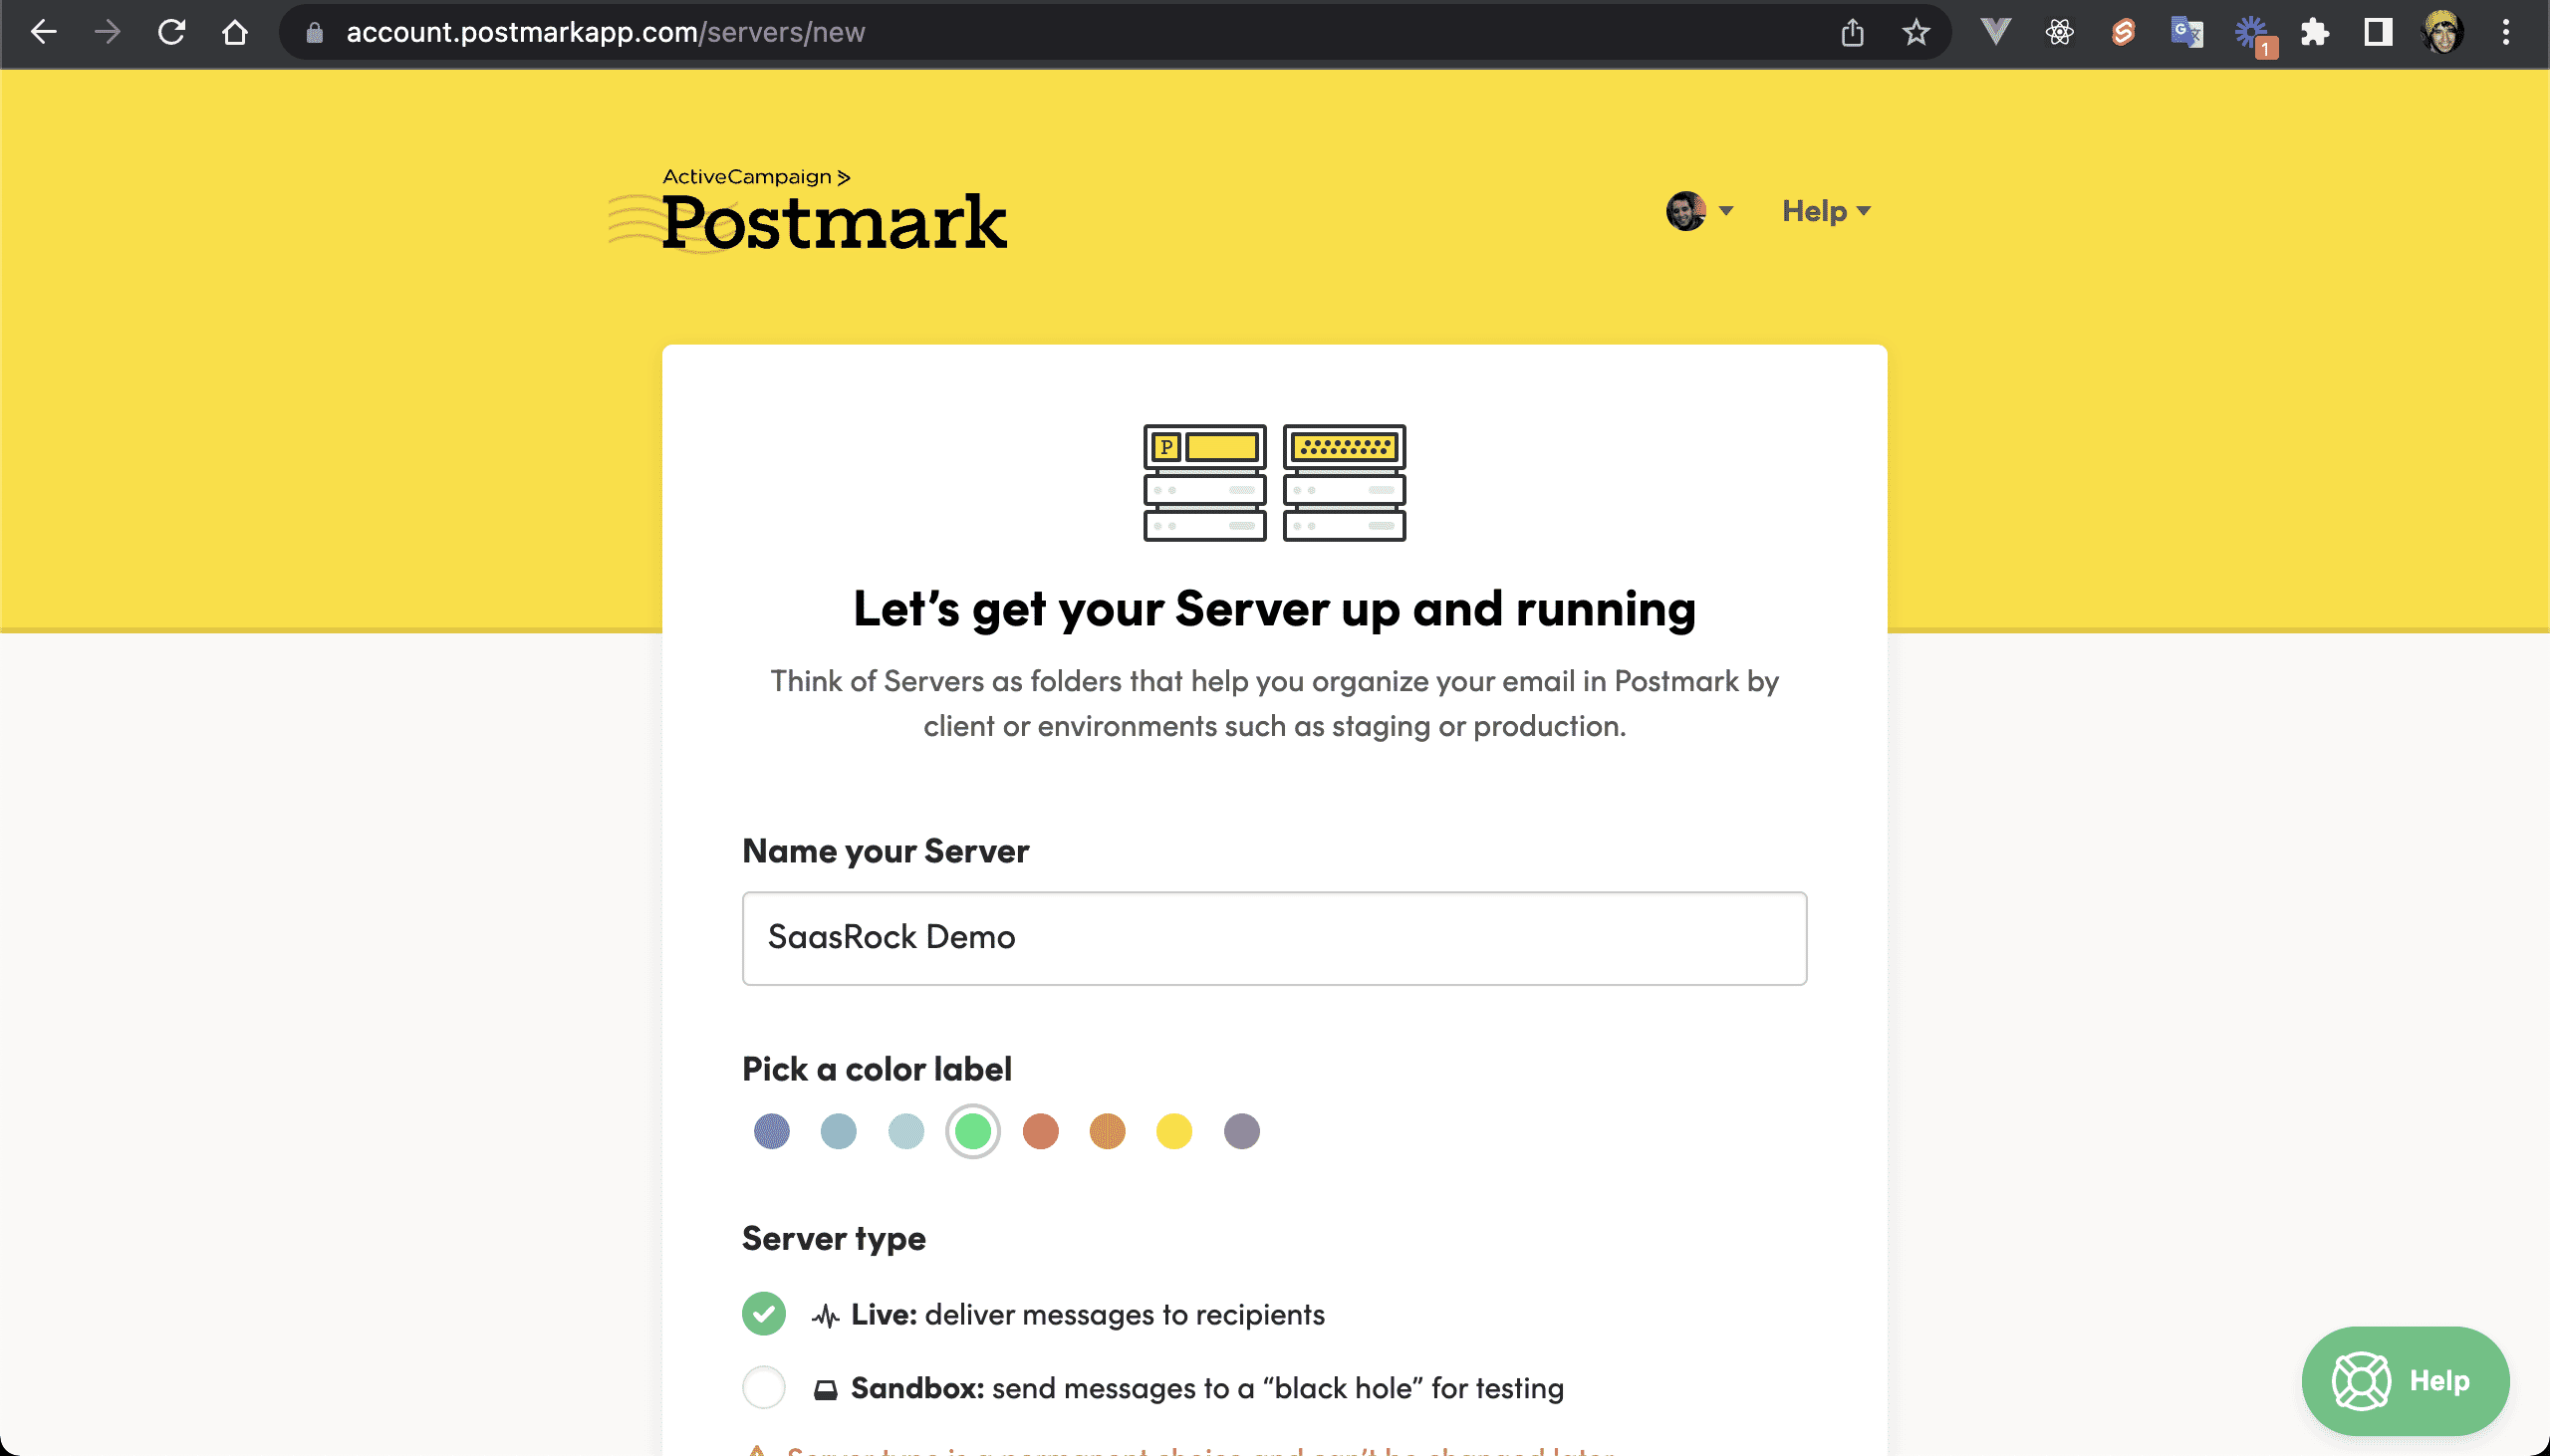
💿 3.2. Create an email server.
💿 3.3. Click on "API Tokens", copy the Server API token, and set it to the POSTMARK_SERVER_TOKEN env variable.
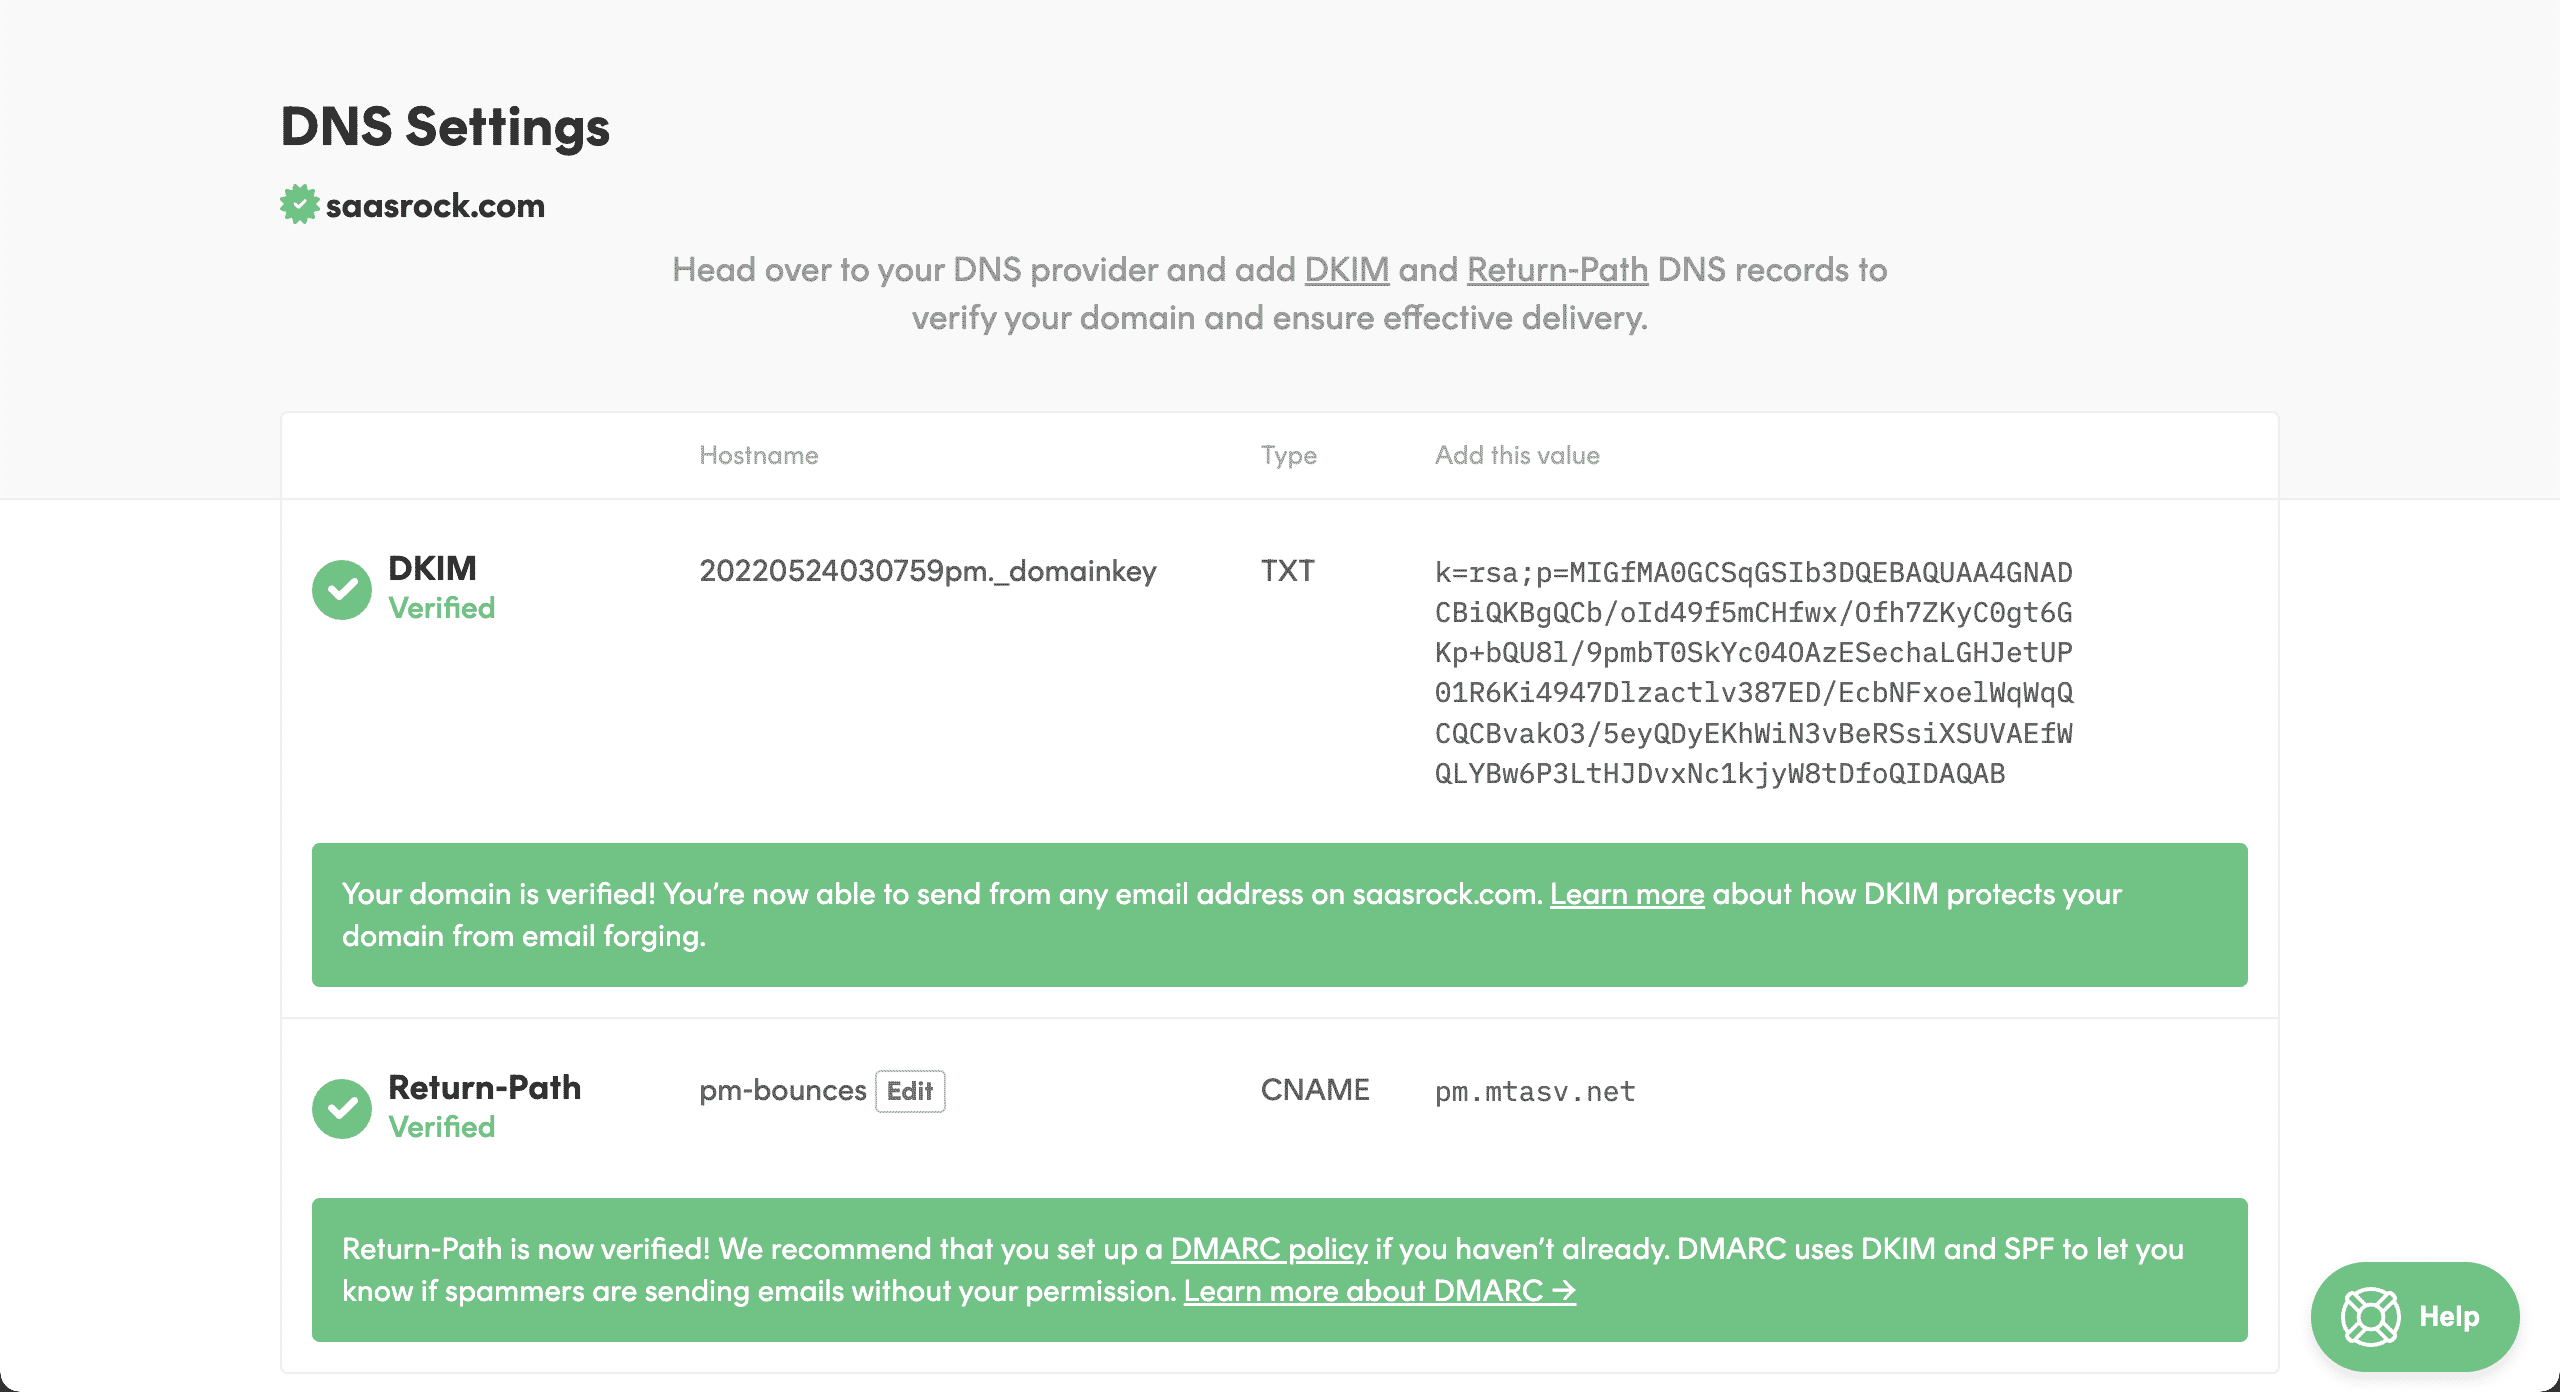
💿 3.4. Add a Domain or Sender signature and set it to the POSTMARK_FROM_EMAIL env variable.
NOTE
In order to use a valid email, you will be asked to verify the domain ownership with TXT and CNAME records.

💿 3.5. Restart the app, log in as your admin user, and click on "Set up → Email Templates".
You can override the default templates at the /public/emails folder.
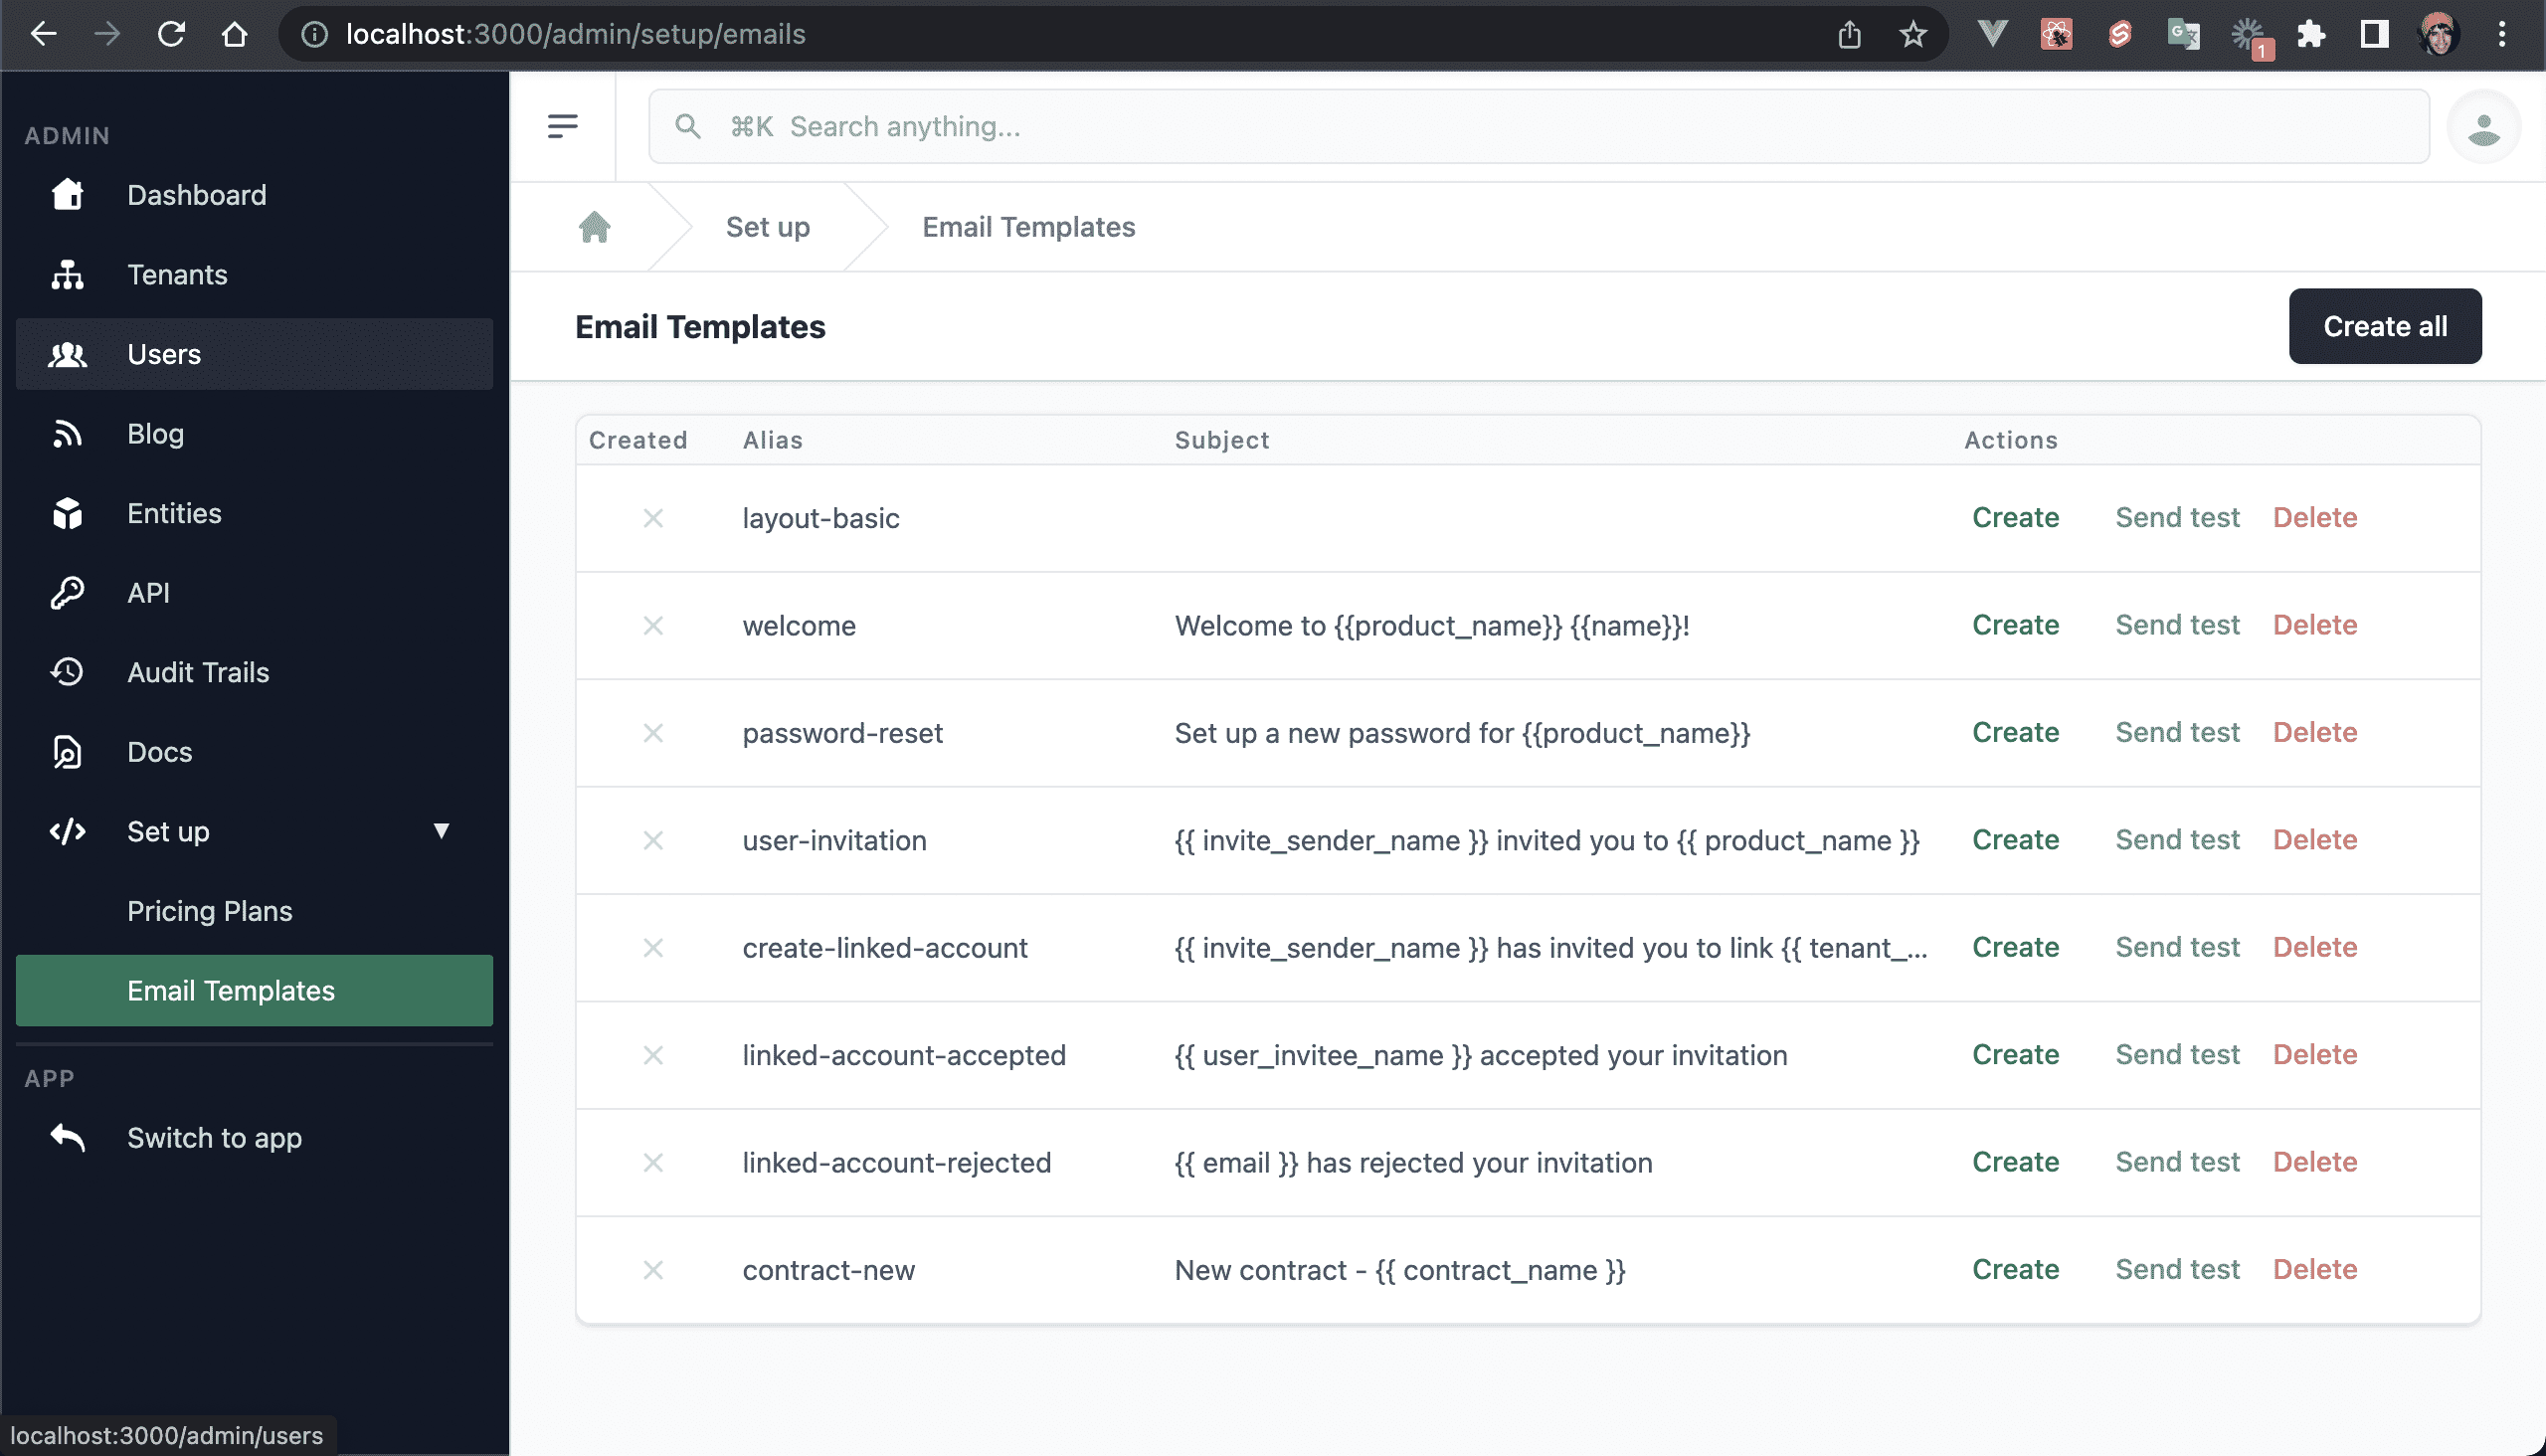
💿 3.6. Click on "Create all".
Navigate to your Postmark Templates to confirm they were created:

4. Creating an Account
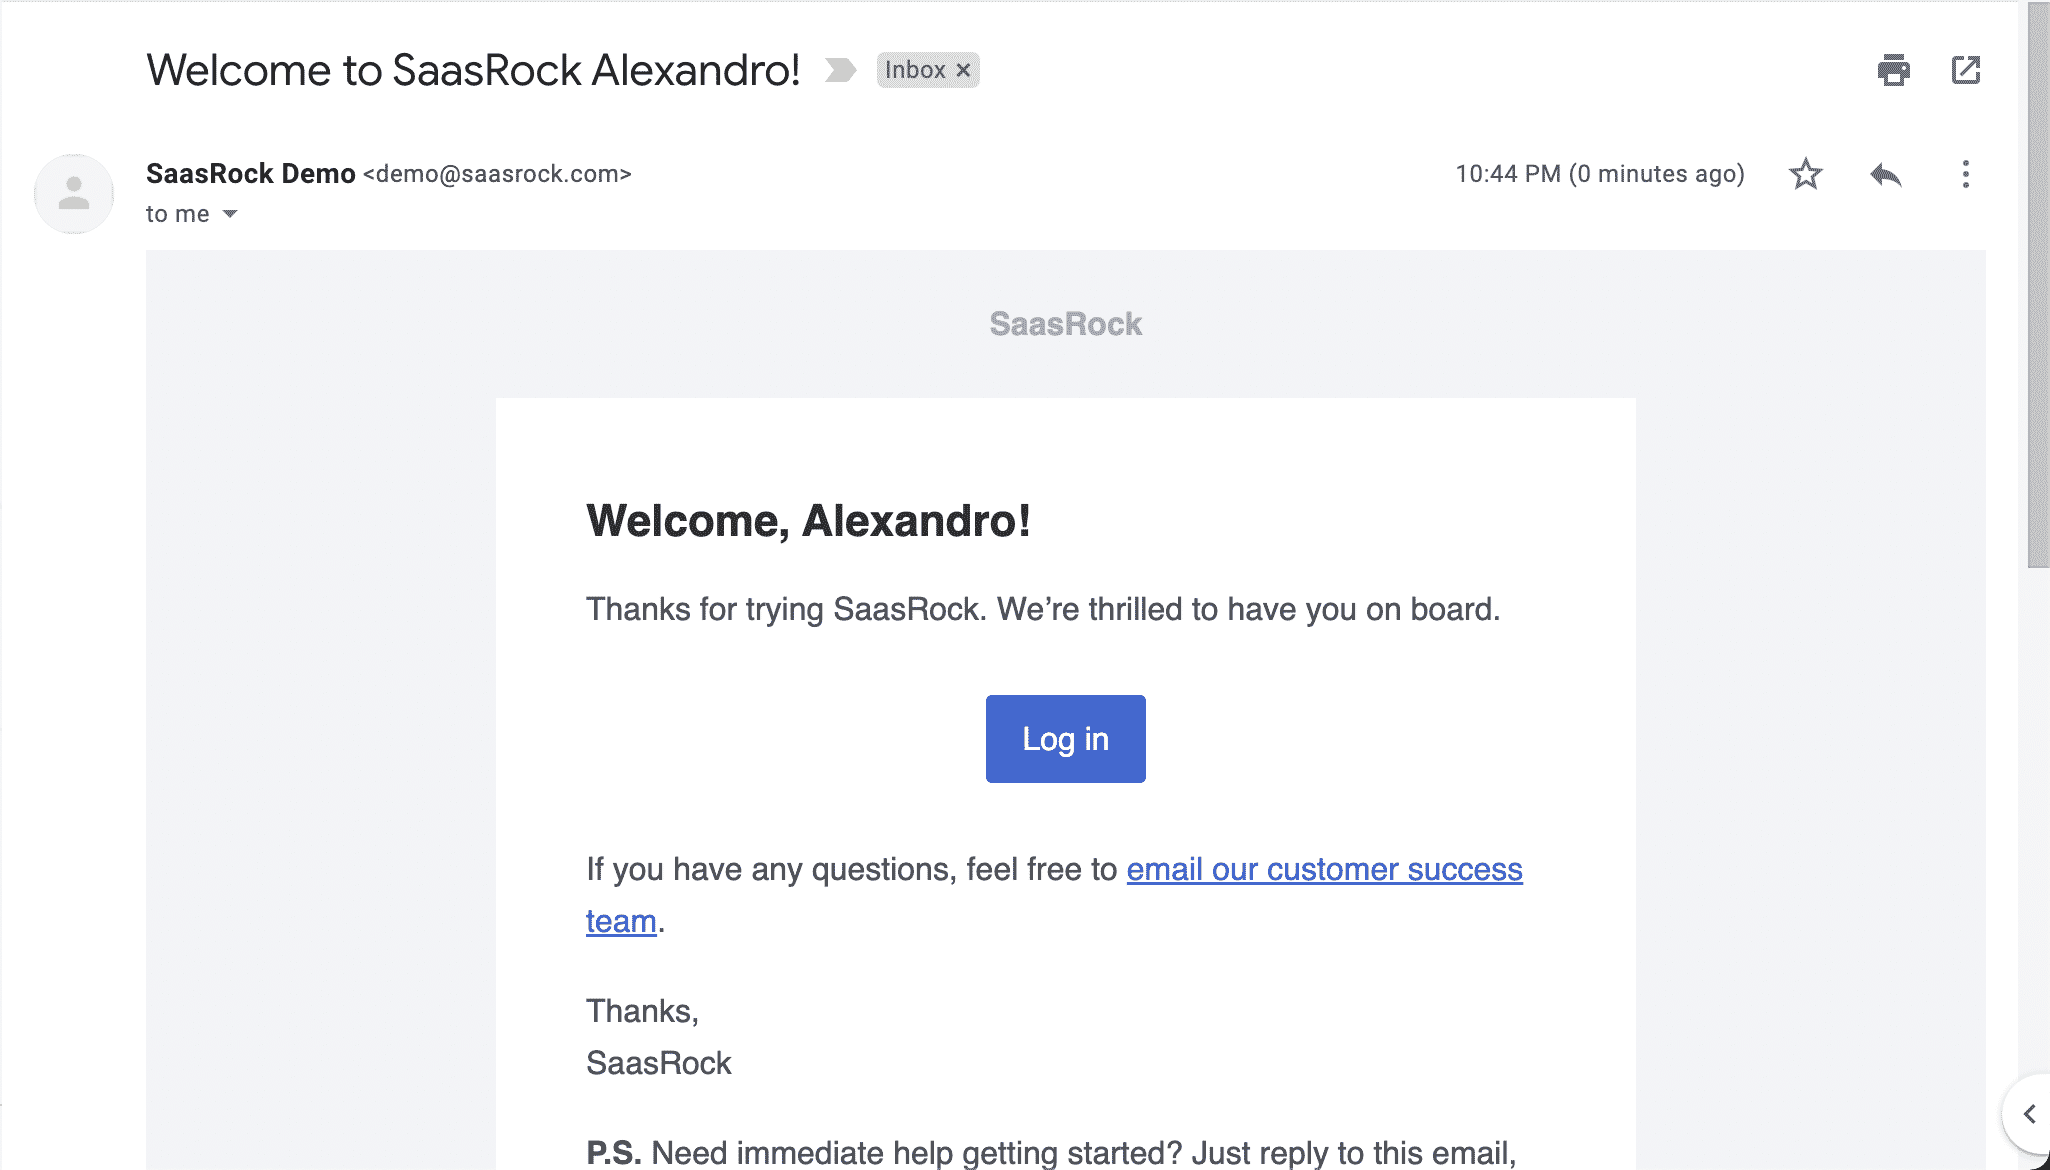
💿 4.1. Go to the /register page, and create an account with a valid email.
If you didn't skip the previous, you should get a Welcome email:
💿 4.2. Click on "Login".
You will be redirected to the App portal Dashboard at /app/:your-tenant-name/dashboard:
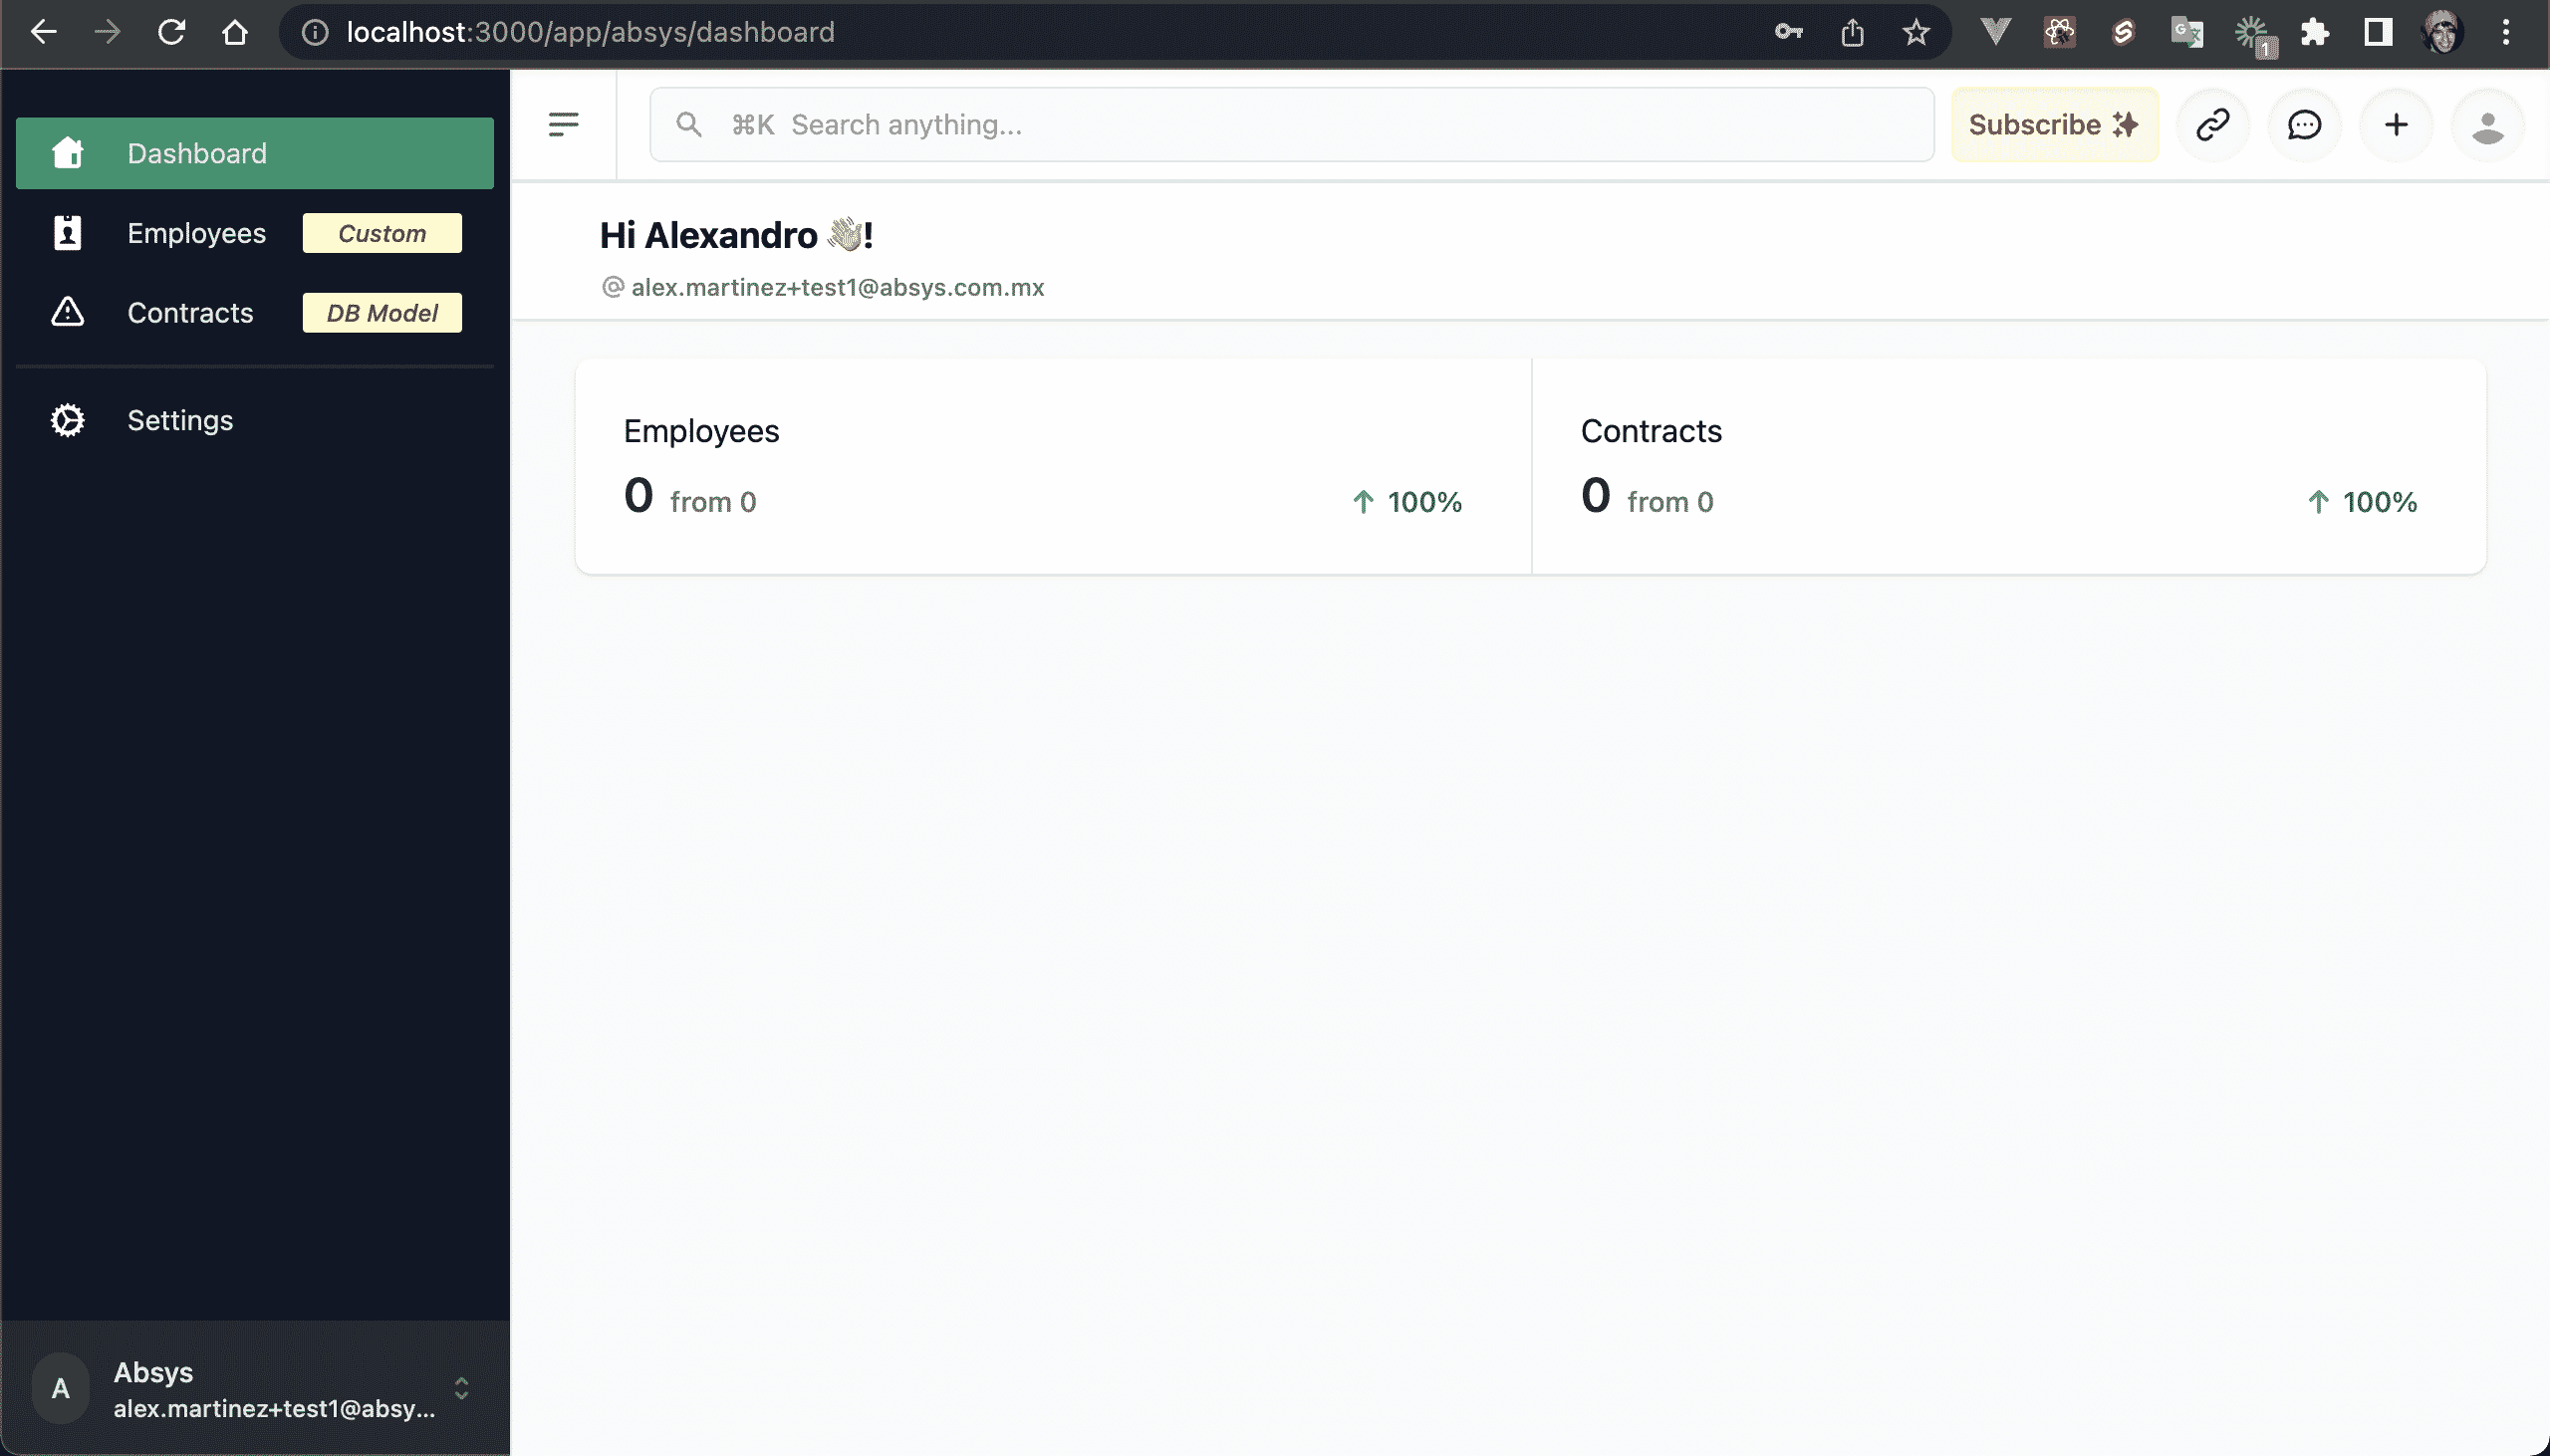
Note there are 3 main sections:
Sidebar
Sidebar Menu: The sidebar items are loaded on the
app/application/sidebar/AppSidebar.tsxfile.Current tenant: Same behavior as the Search bar.
Top
Search bar: This button opens up the Command palette (switch accounts, logout...). You can customize the commands on the
app/components/ui/commandPalettes/AppCommandPalette.tsxcomponent.Top Left Buttons: Subscription, Linked accounts, and Profile buttons.
Content
Dashboard: By default, it loads a summary of the application Custom Entities: Contracts and Employees. You can customize the dashboard on the
app/routes/app.$tenant/dashboard.tsxroute component.
5. Use the App Portal
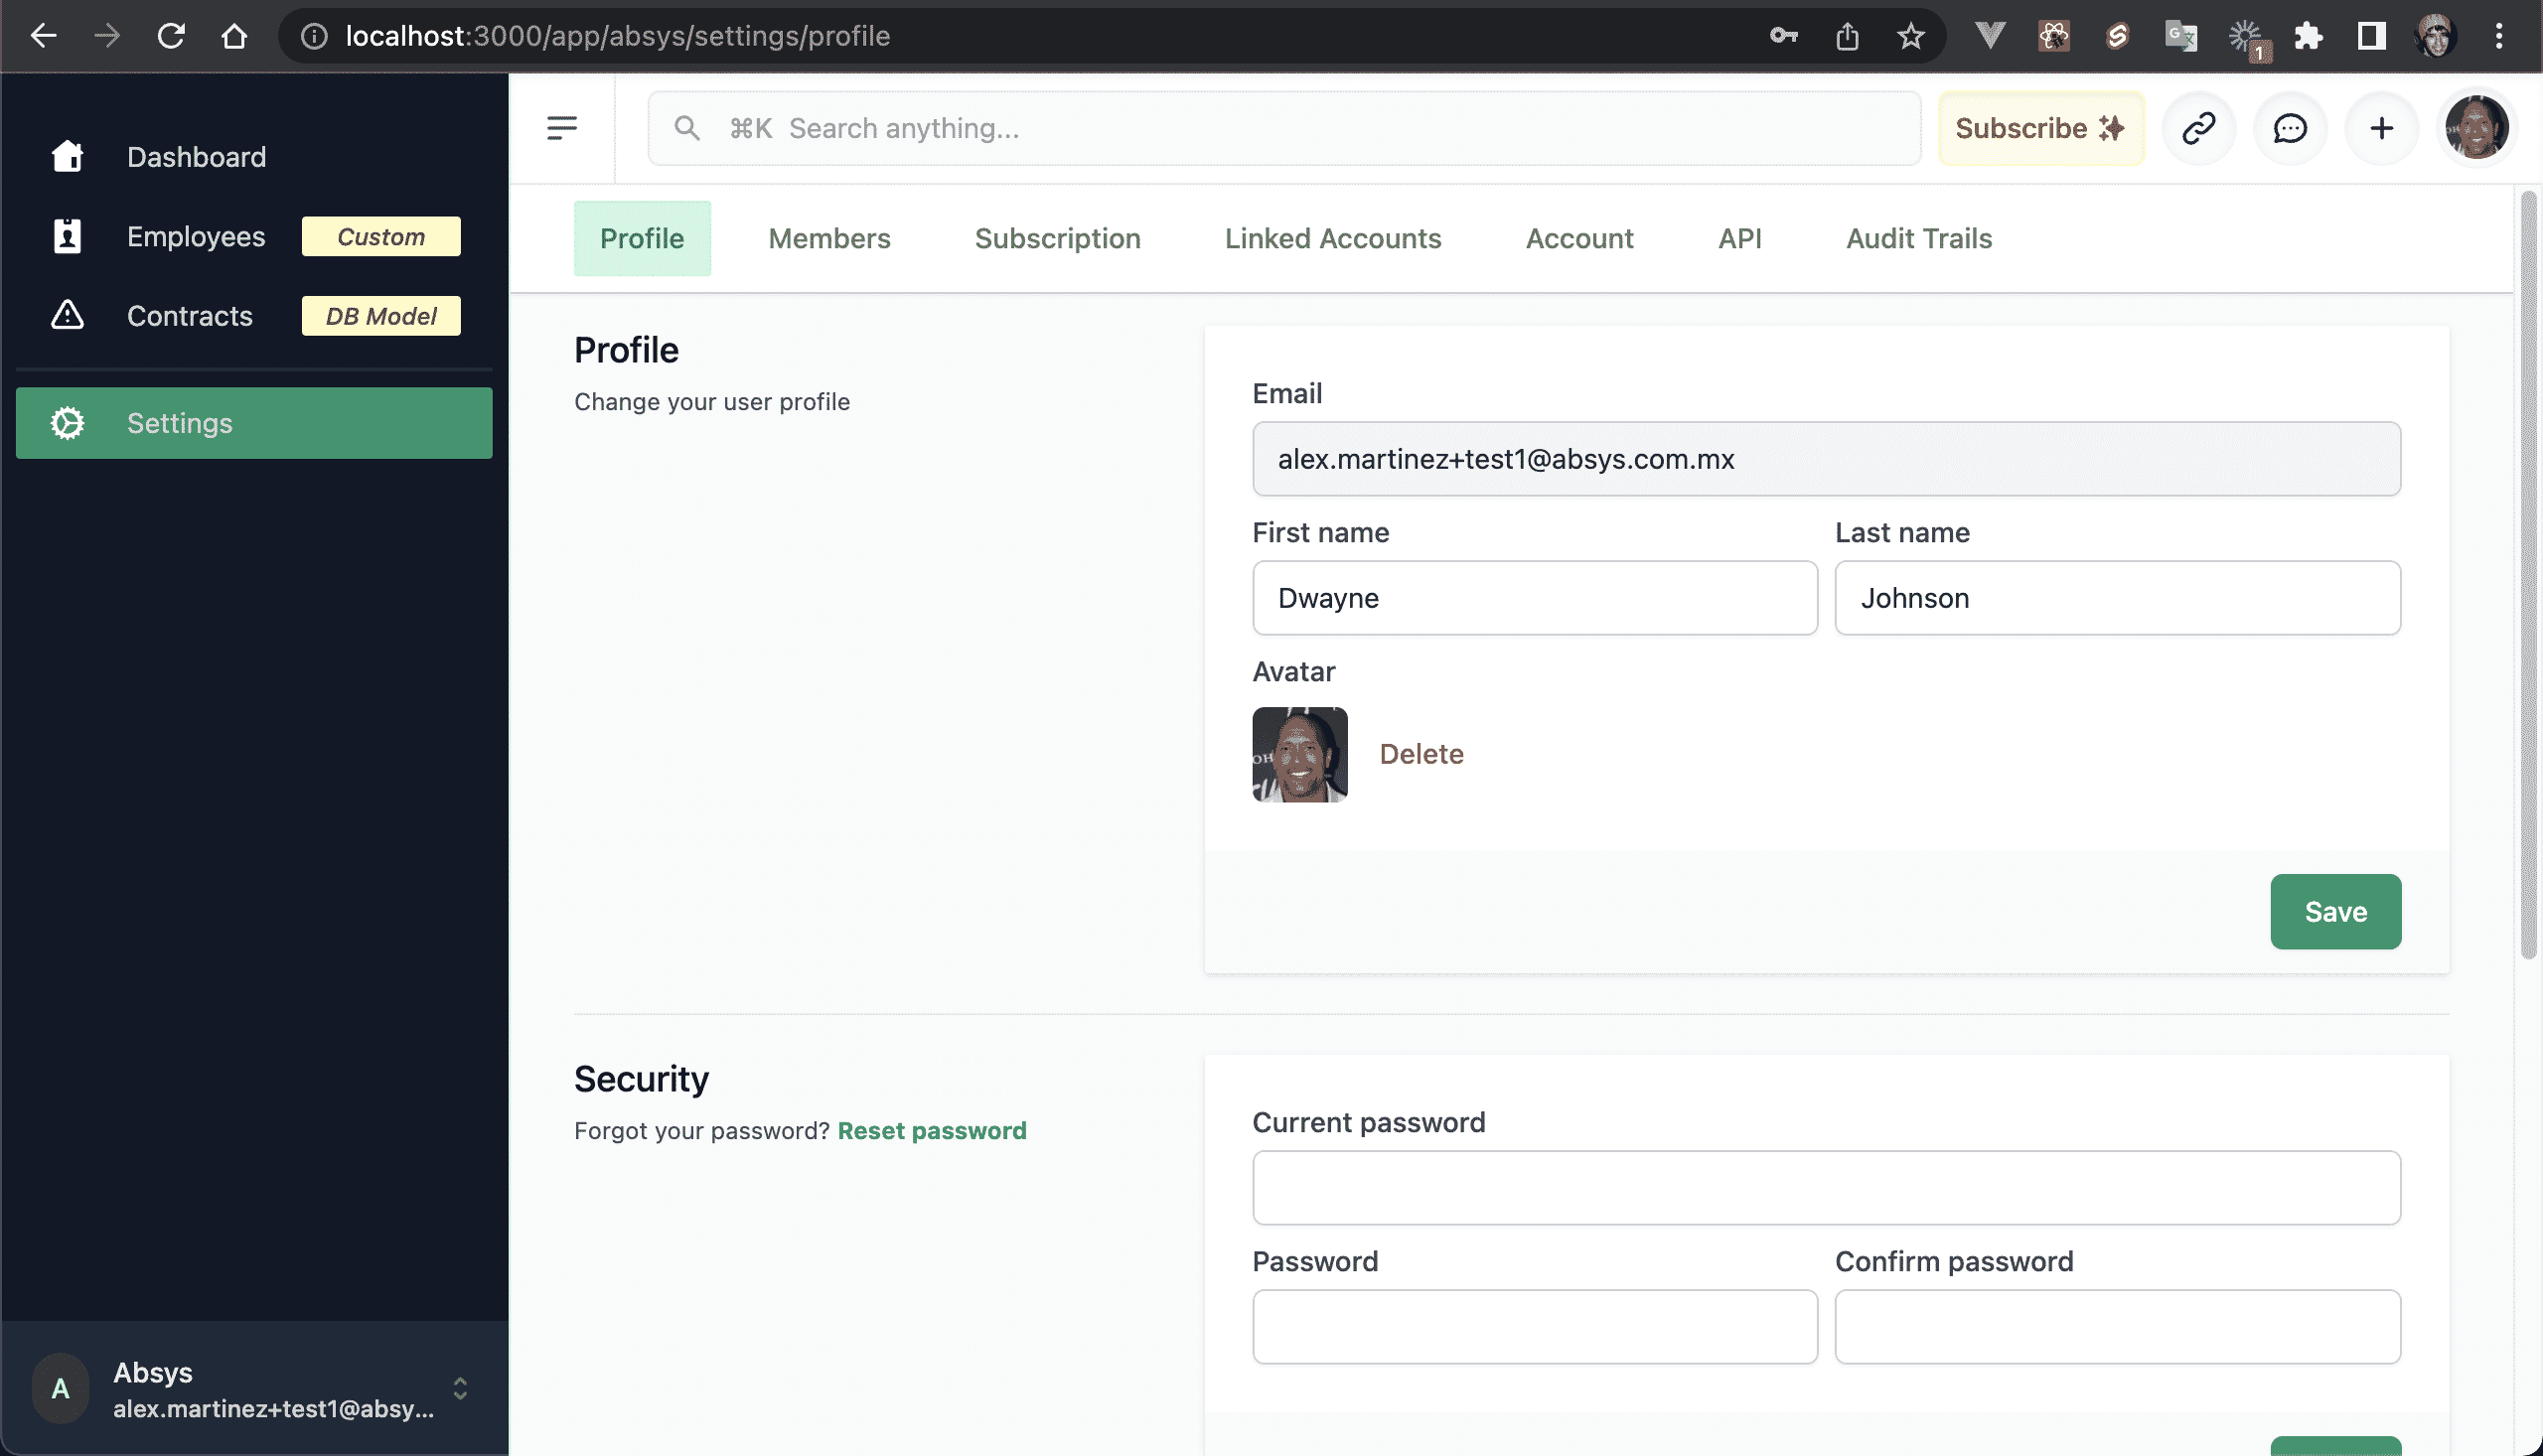
💿 5.1. Go to "Settings → Profile", and change your name and avatar.
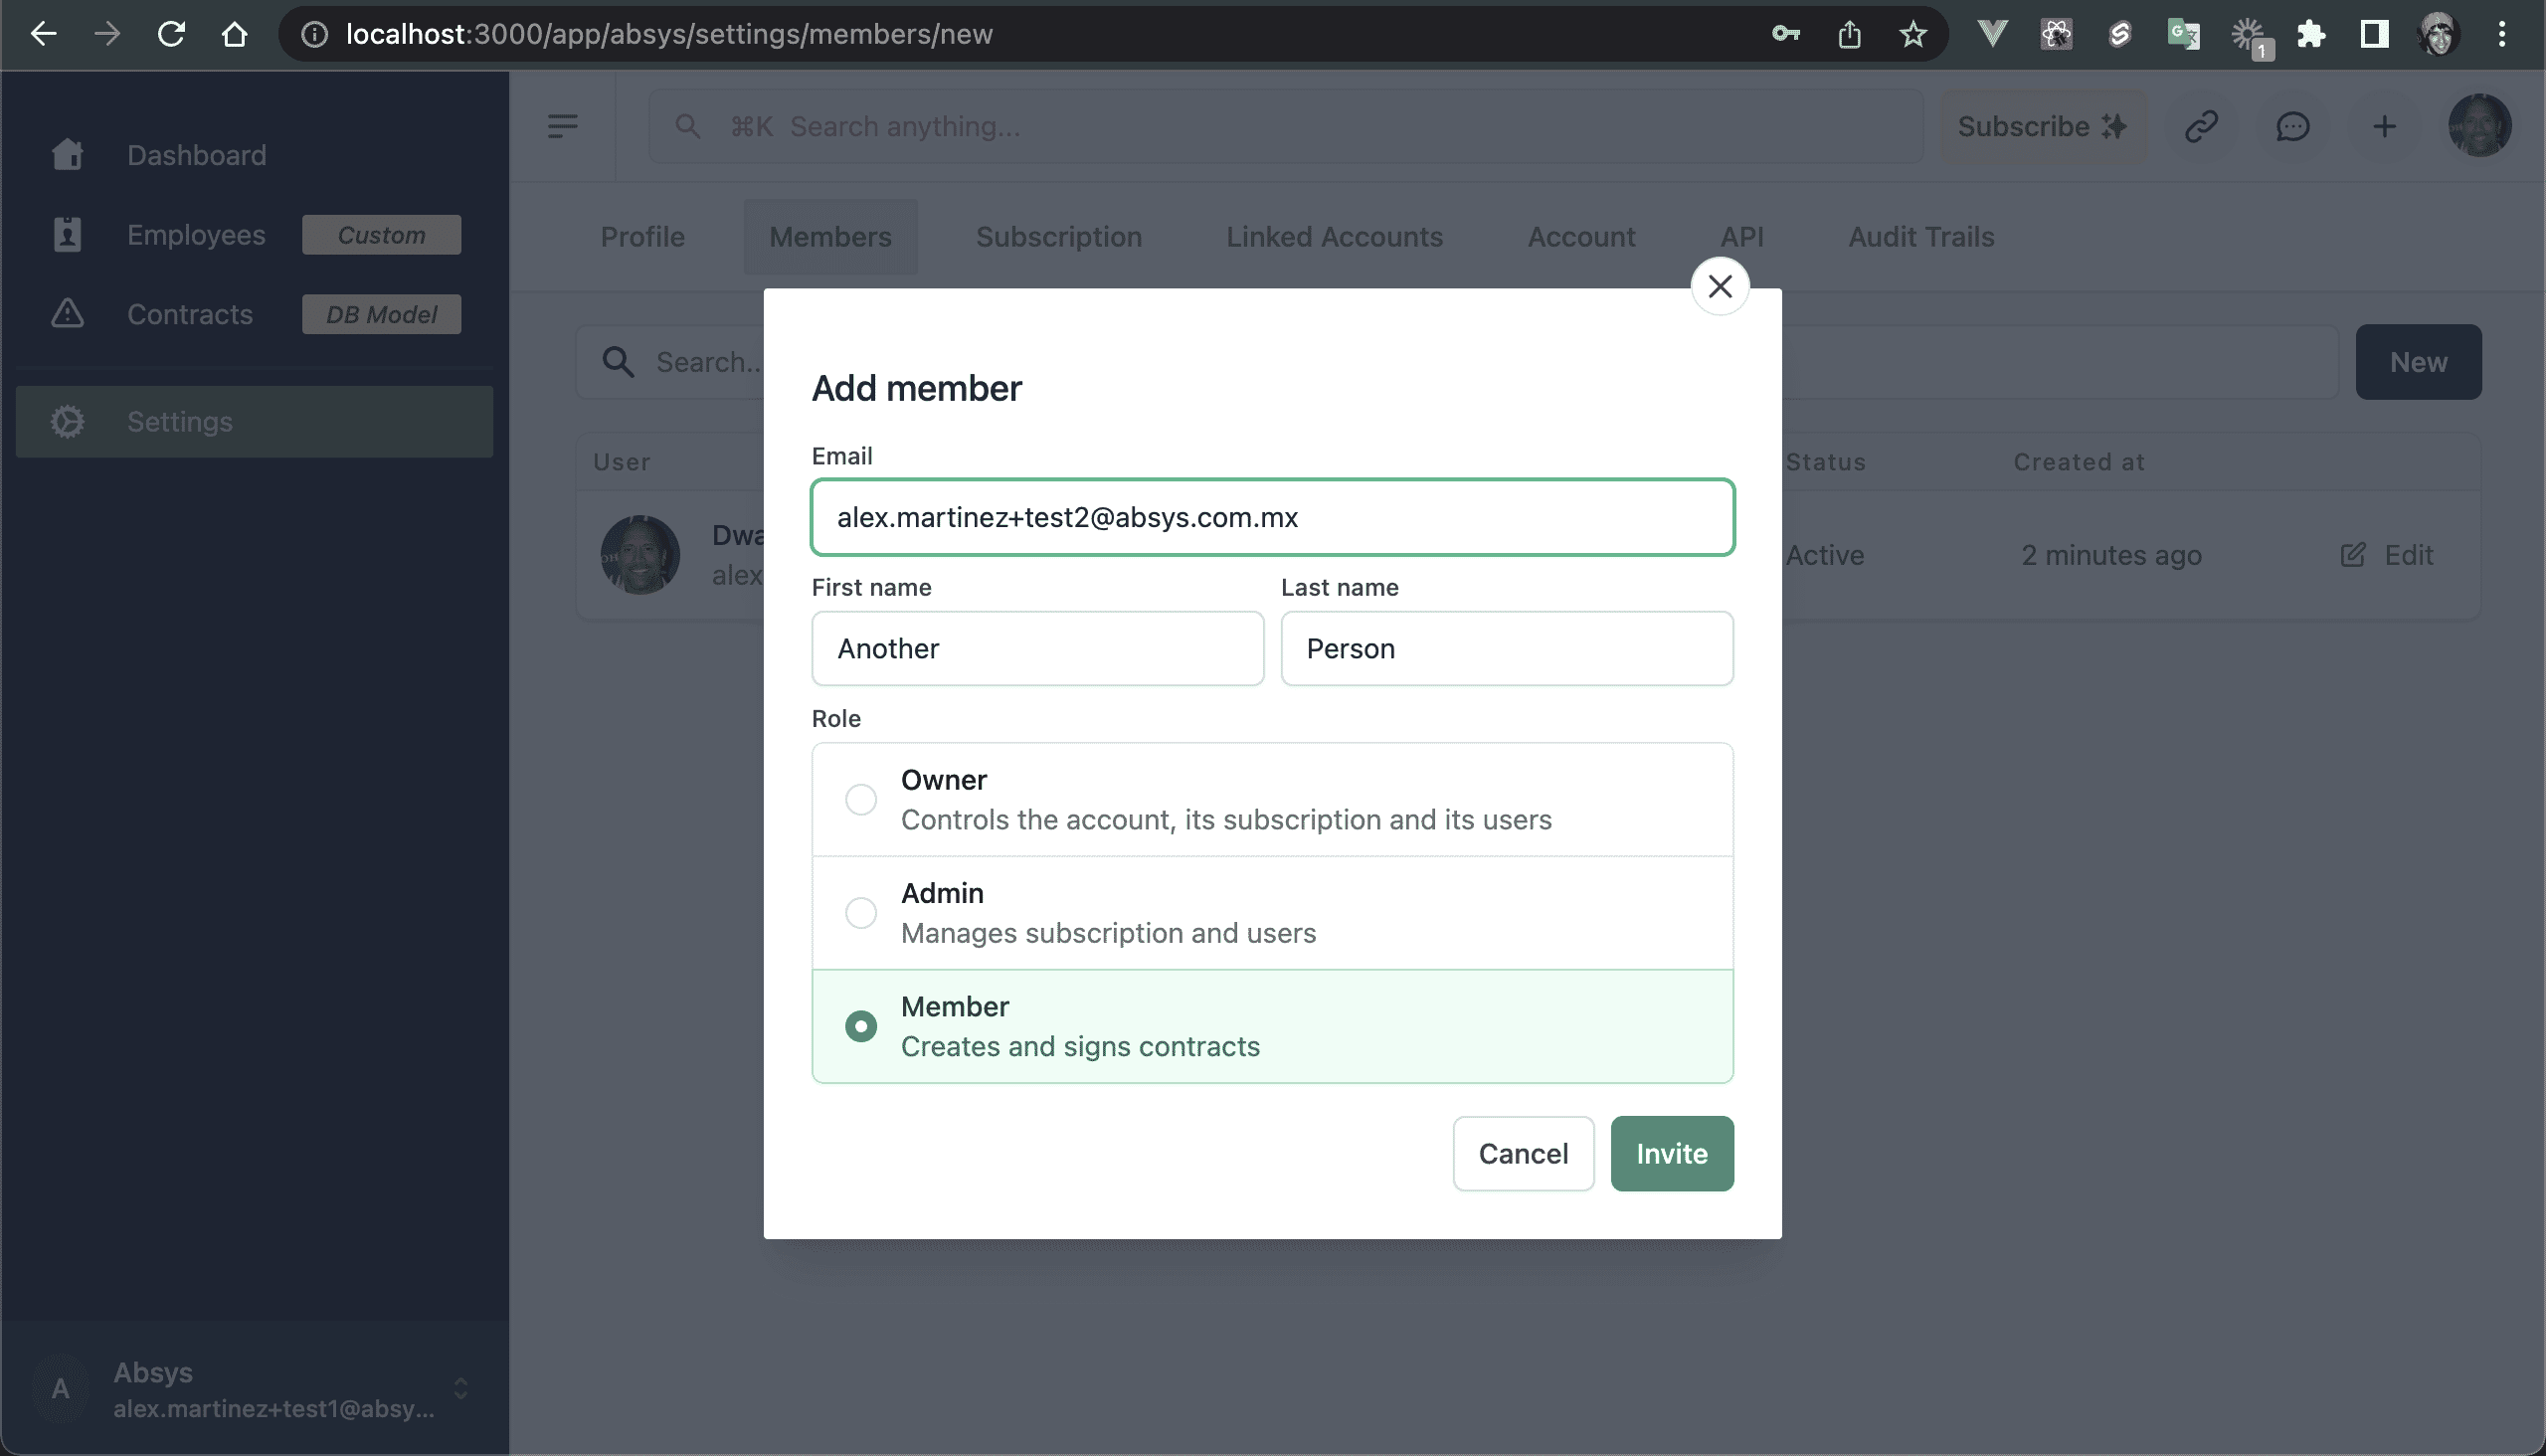
💿 5.2. Go to "Settings → Members", and invite yourself with another valid email.
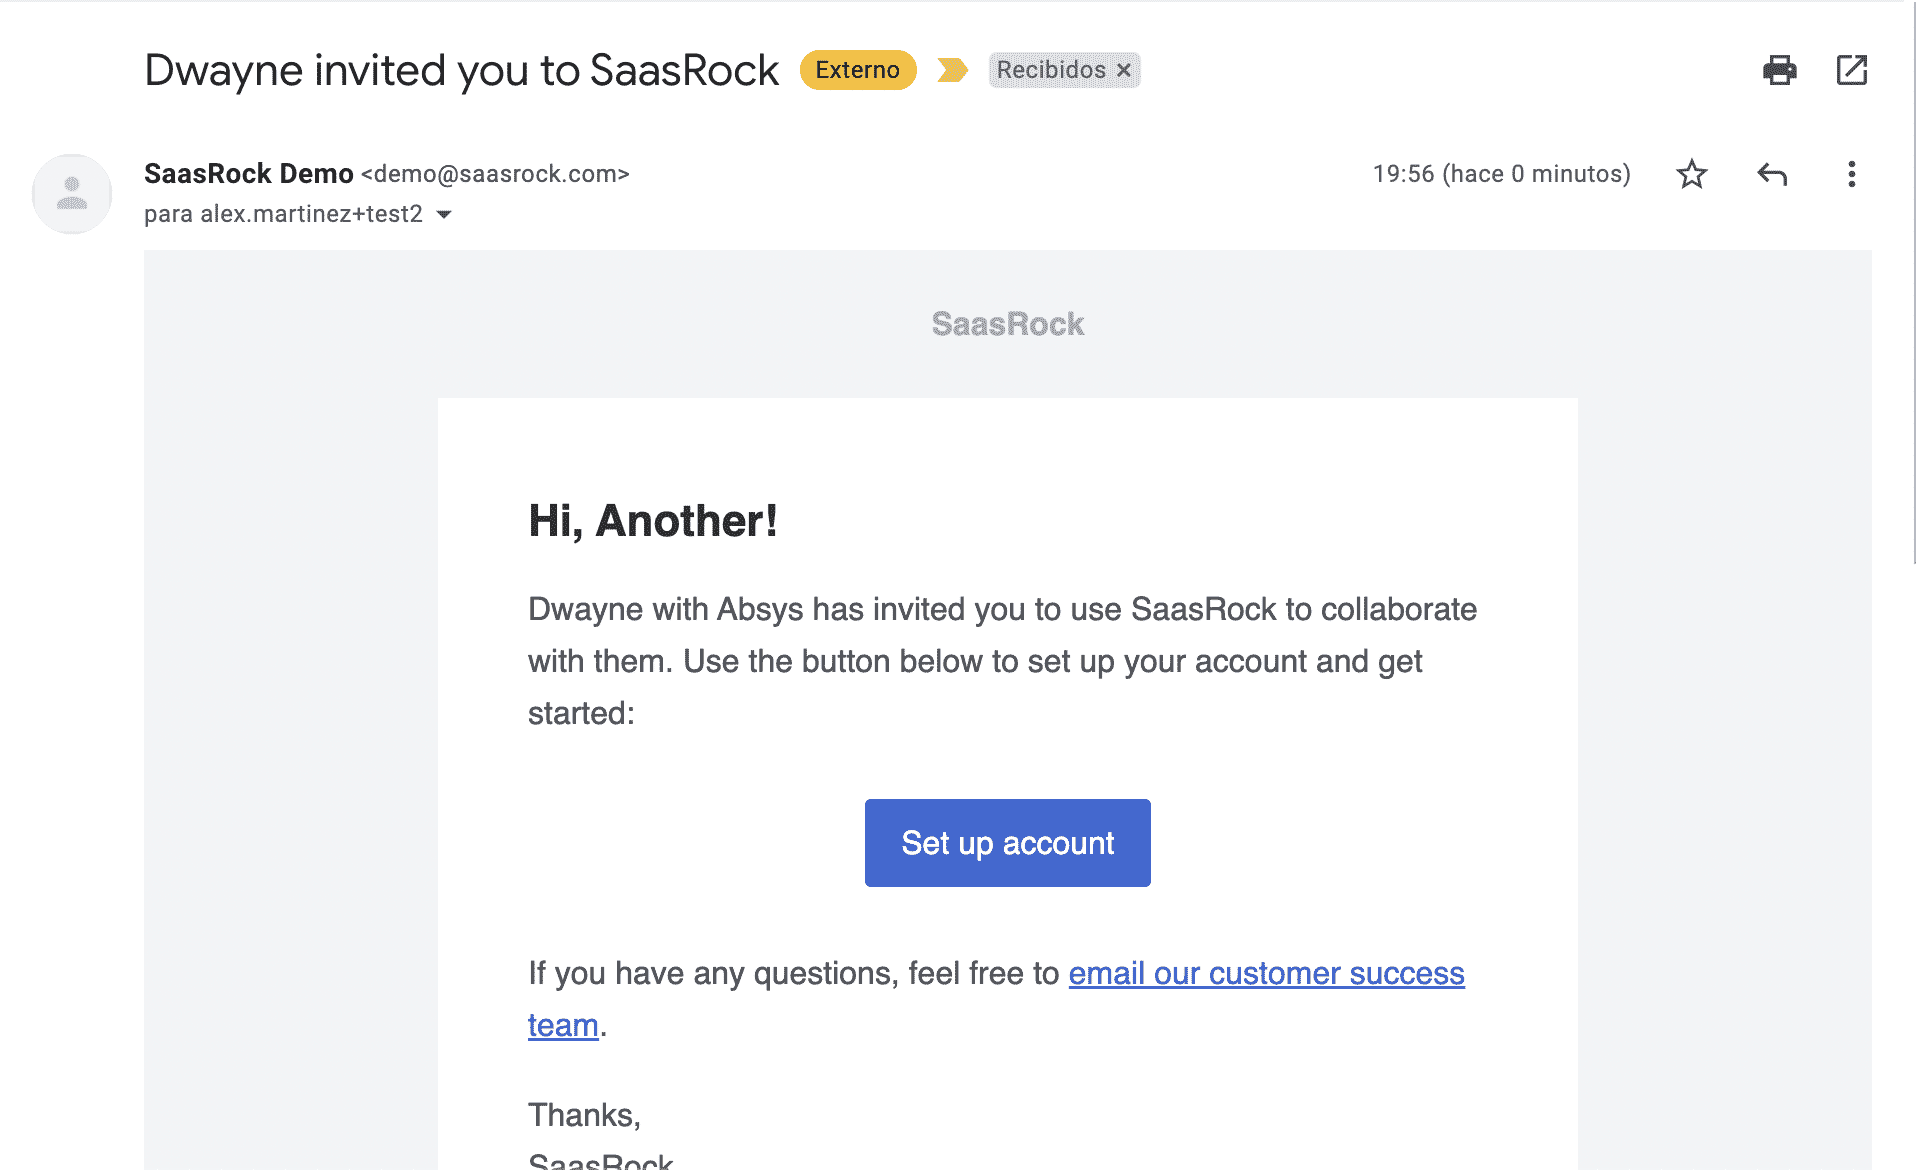
If you didn't step 3, you should get an Invitation email:
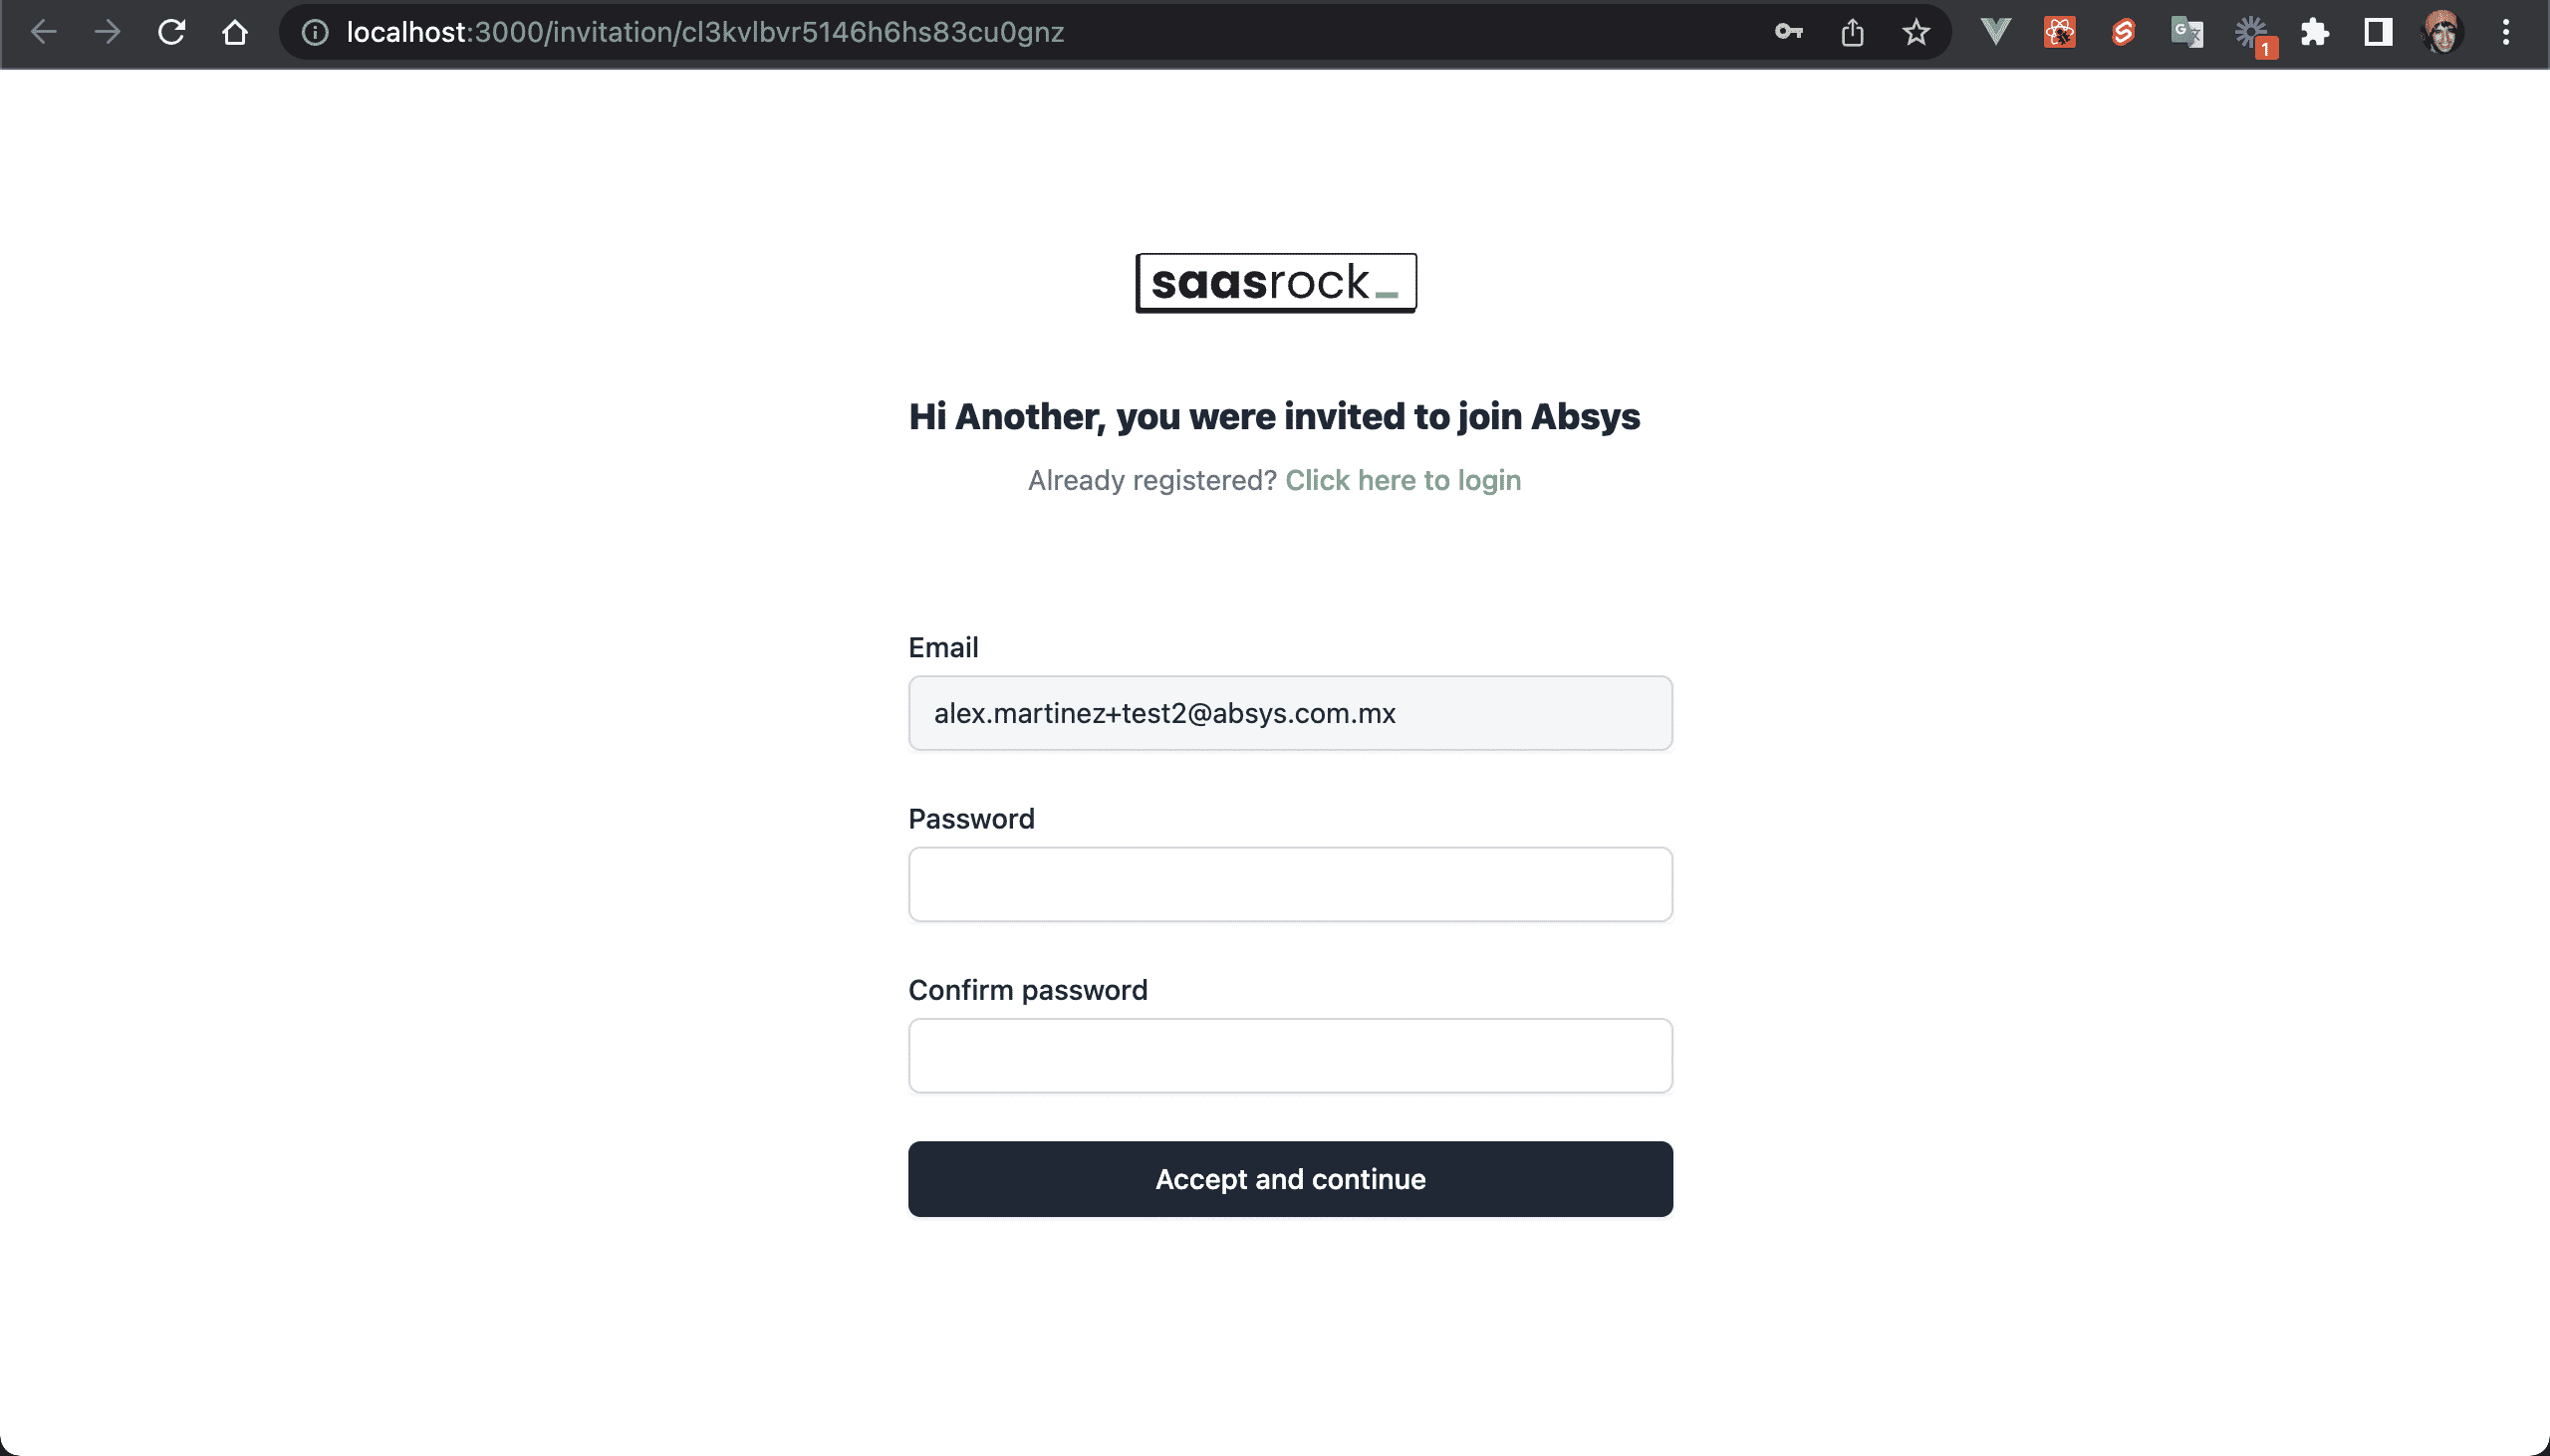
And if you click on the "Set up account" button, it will redirect you to set a password (if you do this, log out and log in as the admin user for this tenant):
💿 5.3. Go to "Settings → Subscription", and subscribe to the "Free" plan, it will redirect you to a Stripe Checkout page, use any testing card.
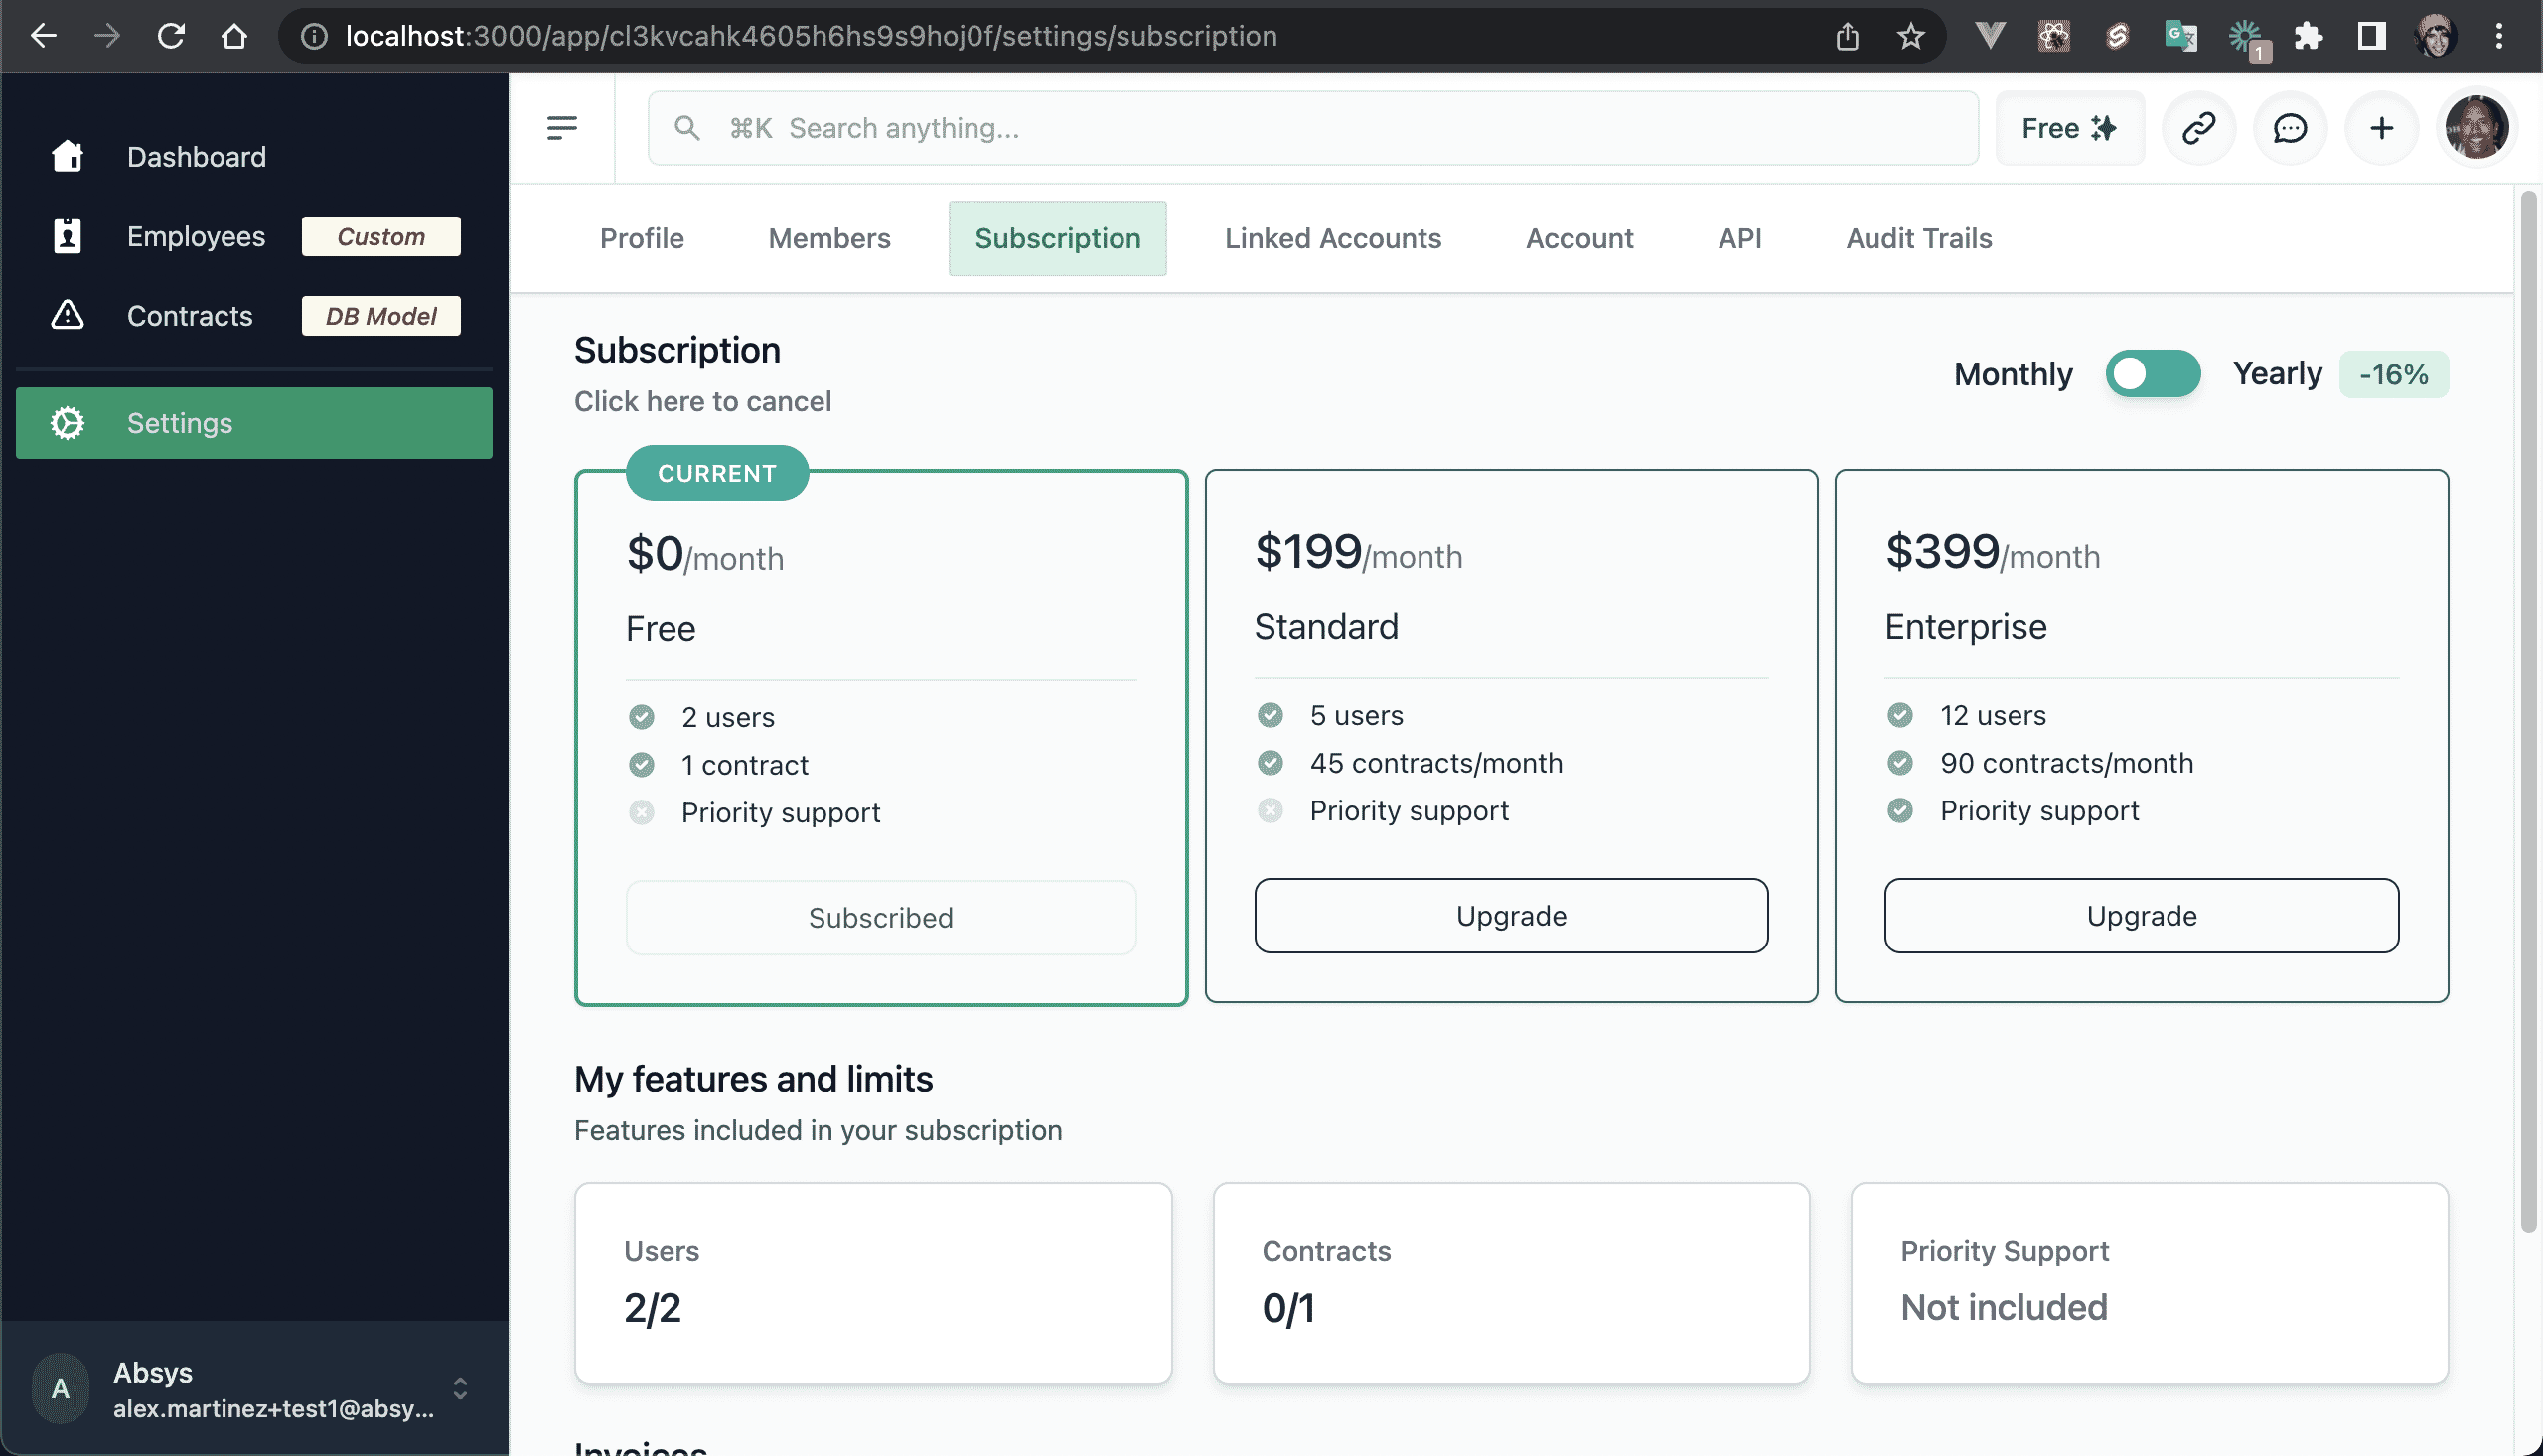
💿 5.4. Try to add another user, it should not let you since the "Free plan" includes 2 users only.
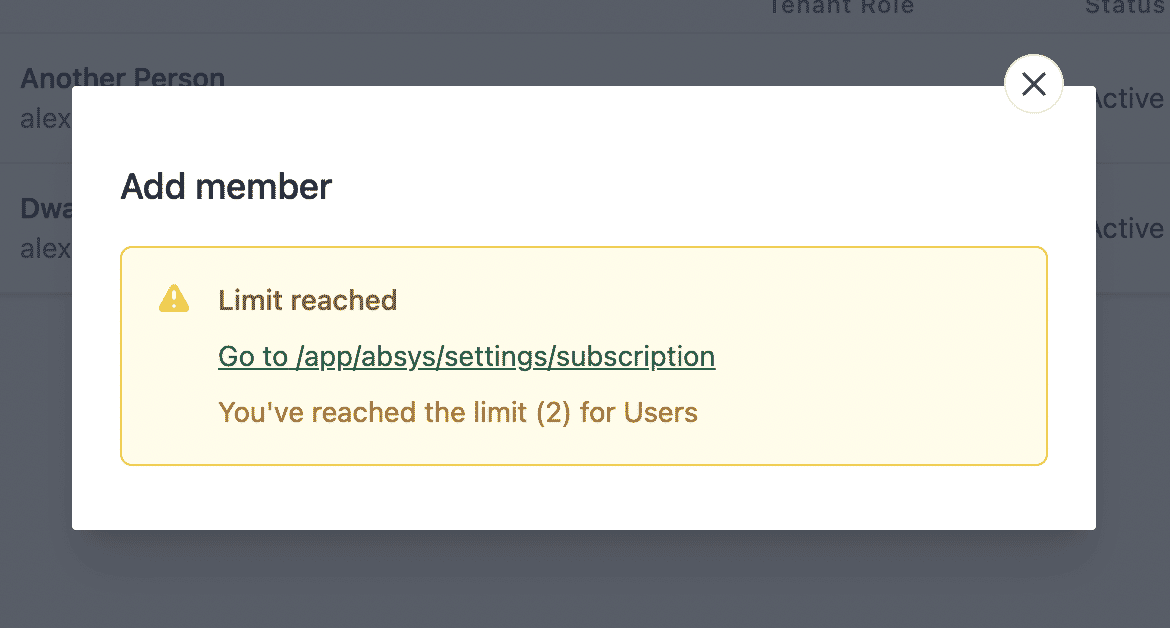
💿 5.5. Go back to "Settings → Subscription", upgrade your plan, and try to add another user. This time you should not get any warnings.
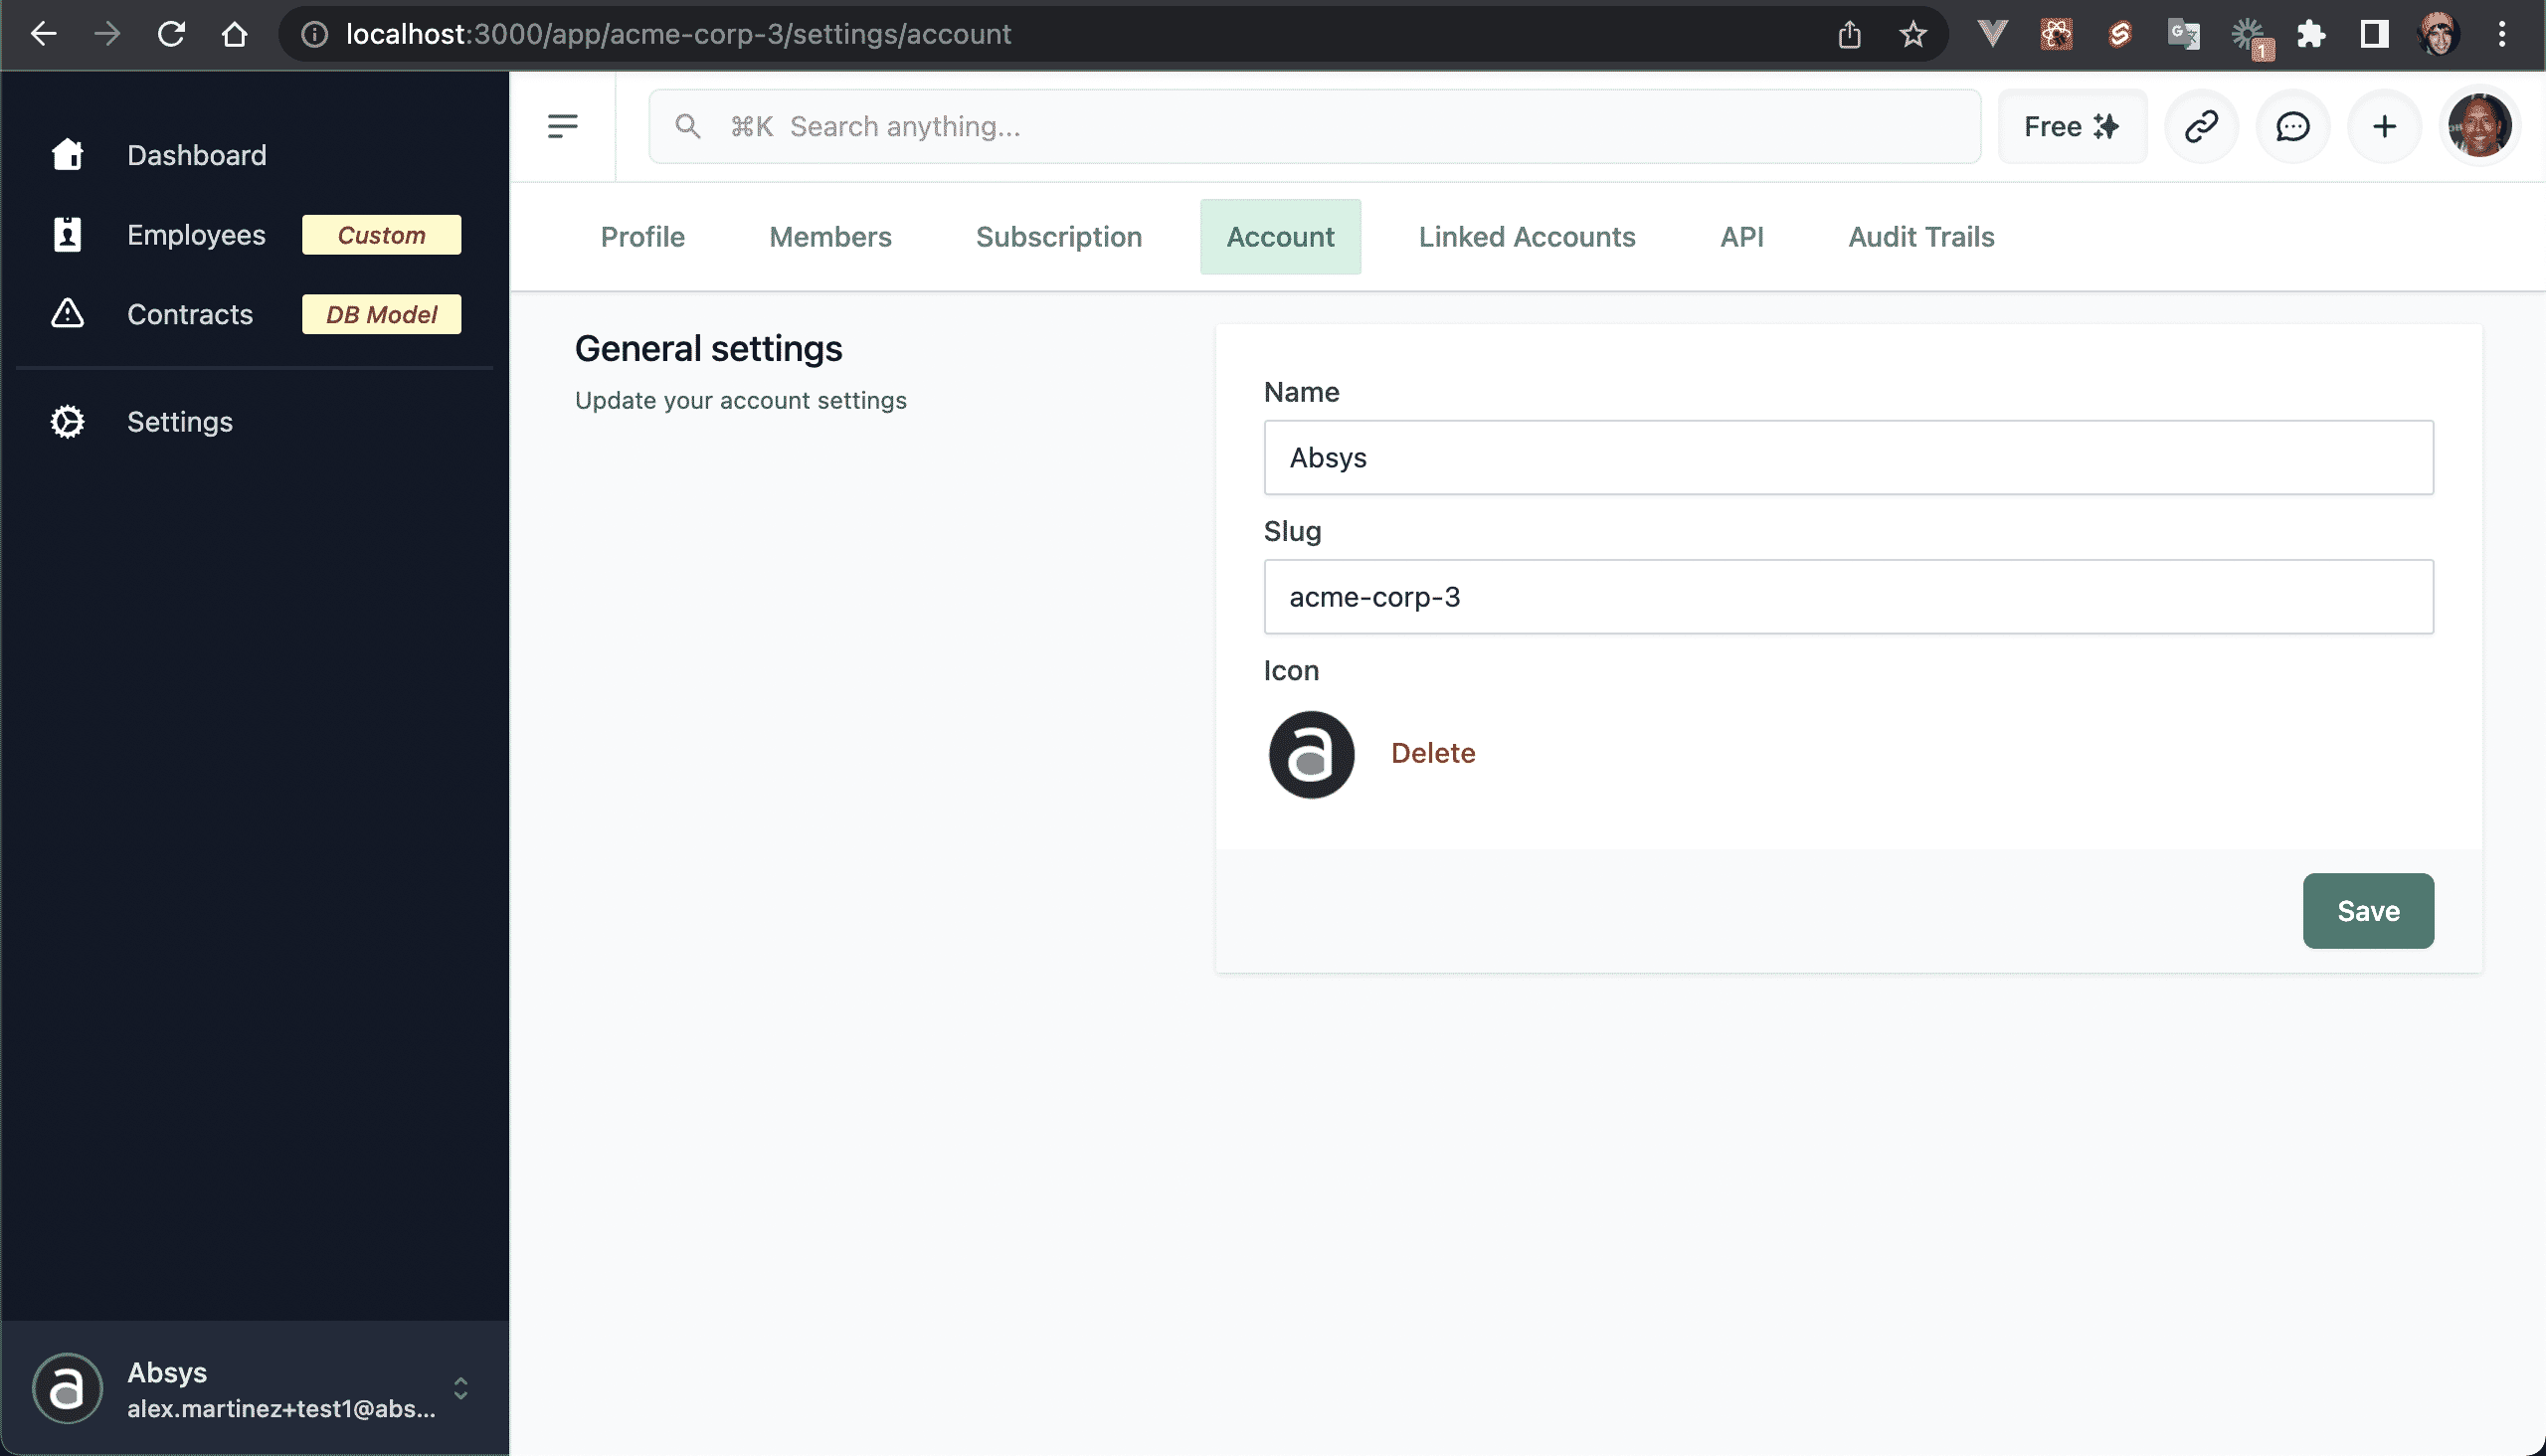
💿 5.5. Go to "Settings → Account", and change the account/tenant name, slug and icon.
NOTE
I changed the account slug to acme-corp-3, notice how it redirected me to /app/acme-corp-3/settings/account.
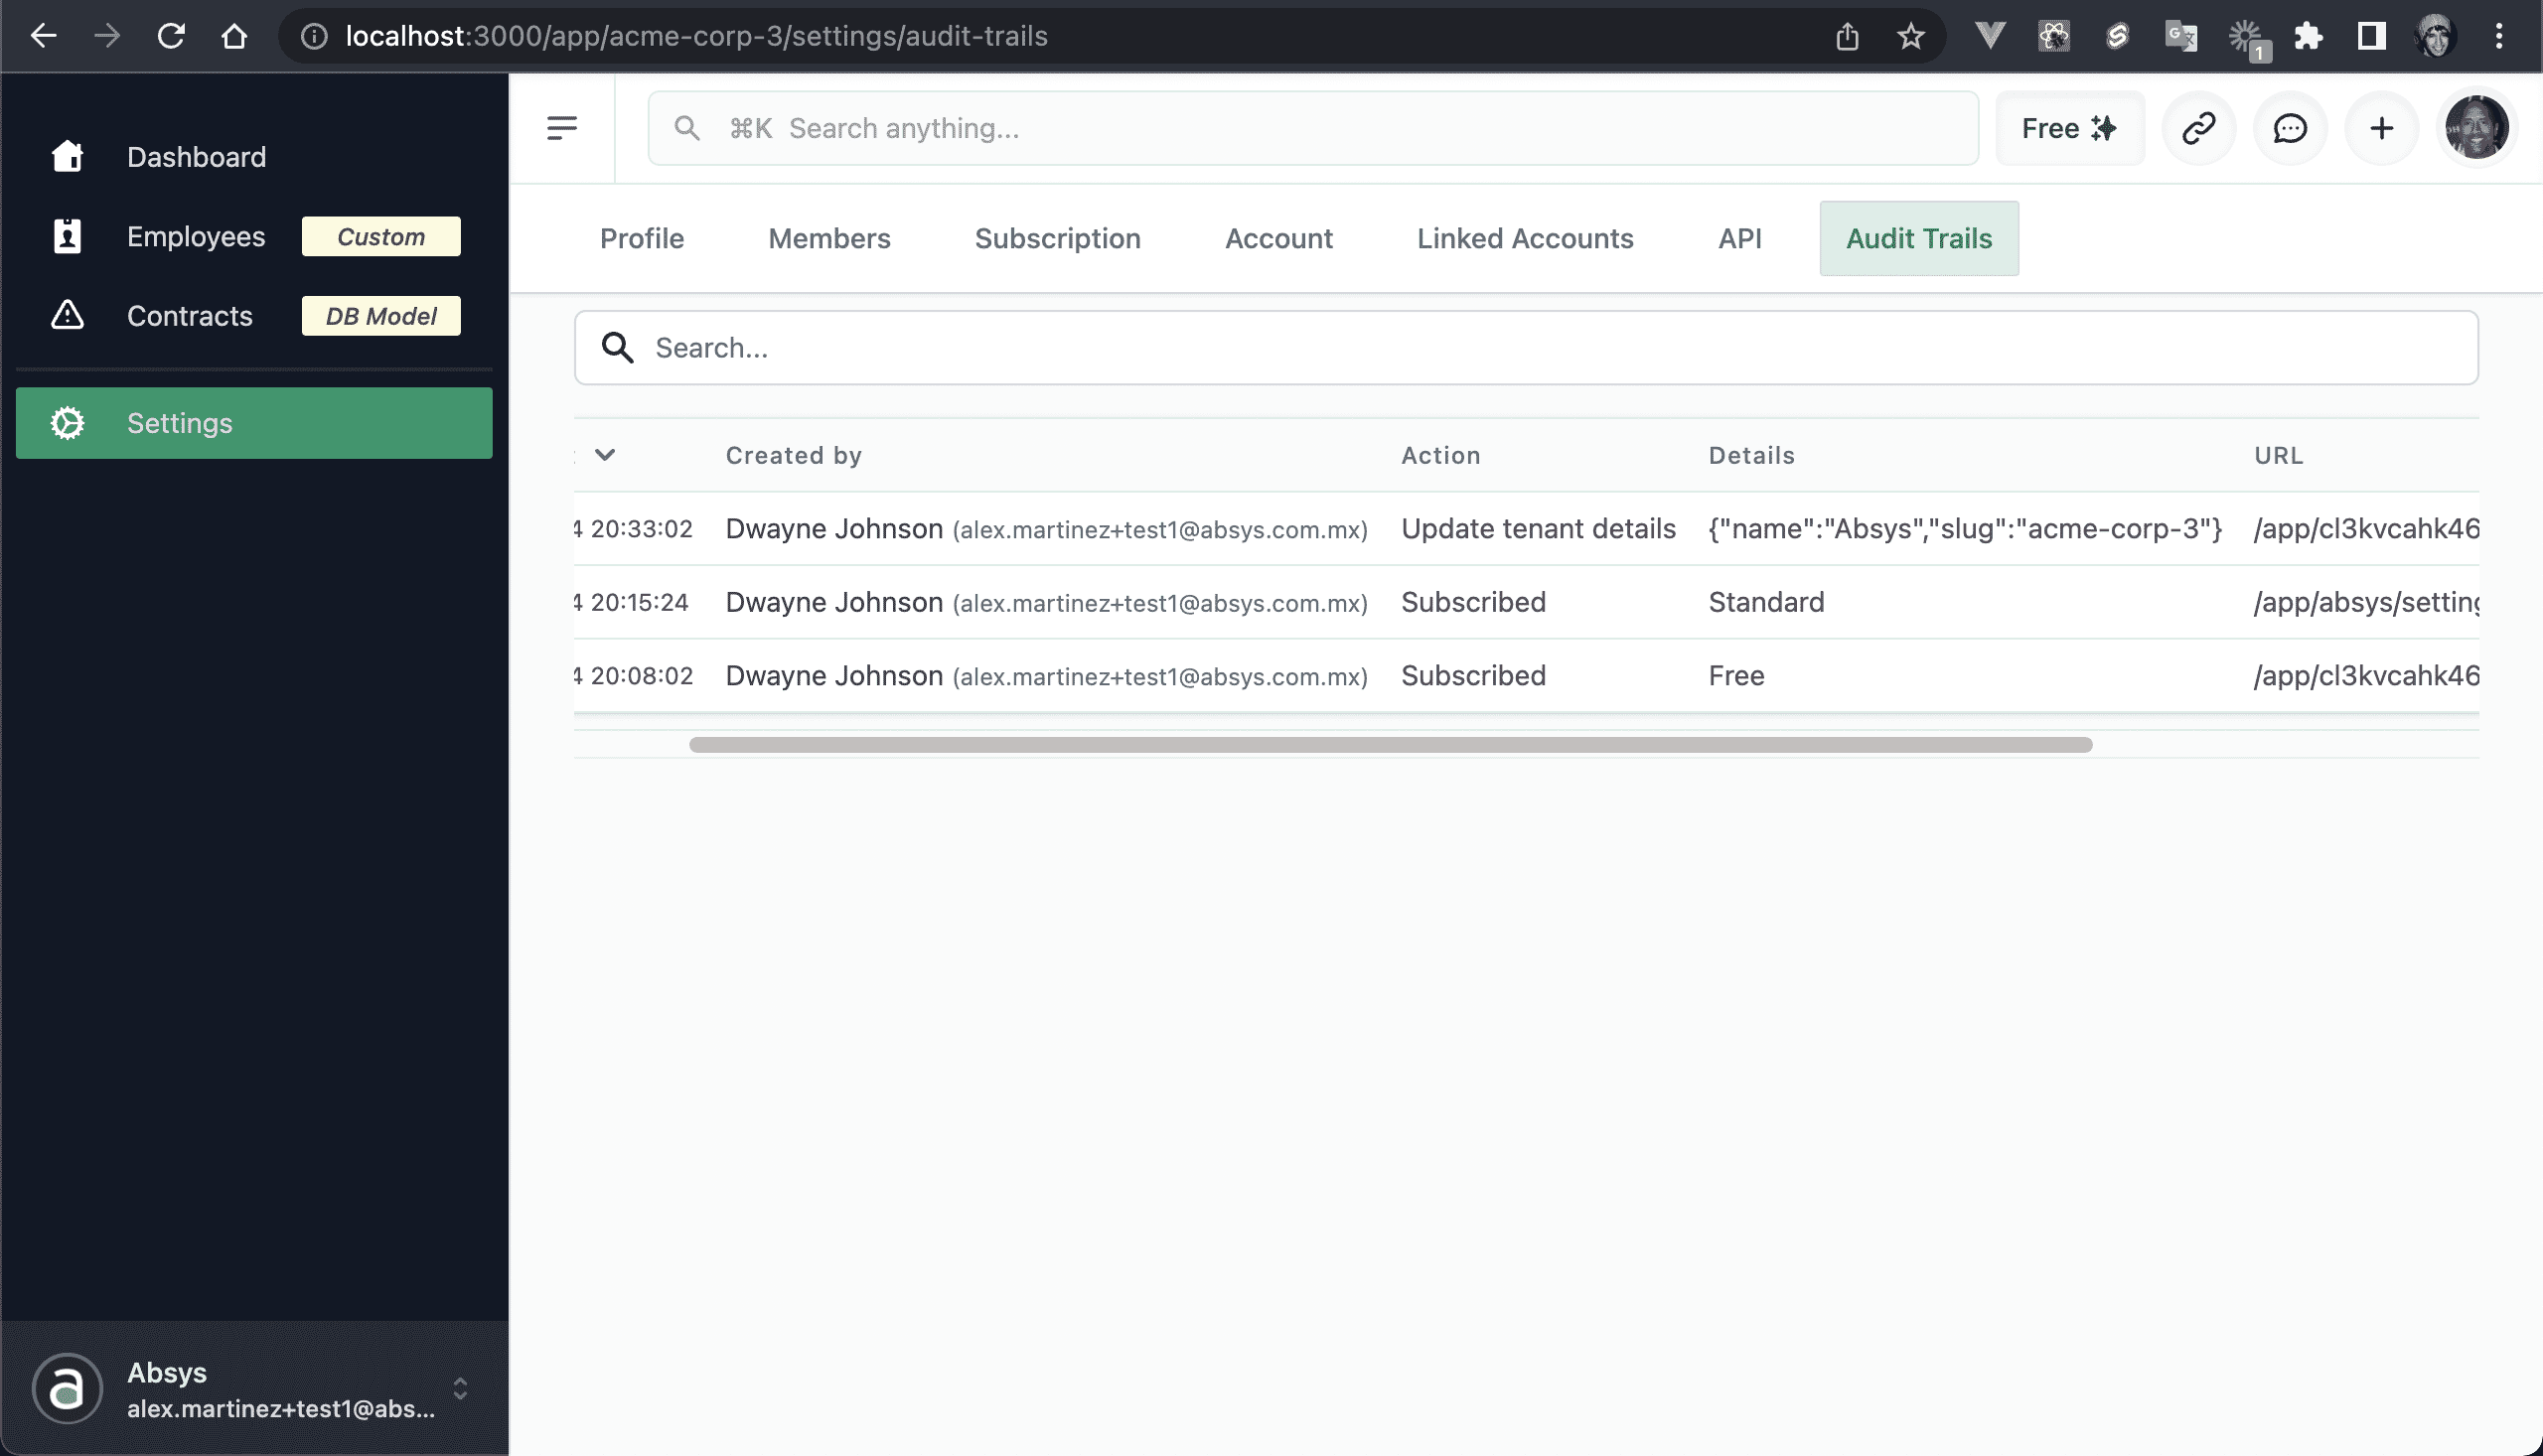
💿 5.6. Go to "Settings → Audit Trails".
You should see at least 3 events:
We subscribed to the Free plan.
We upgraded our plan.
We updated the account details.
6. Using the Autogenerated Views and Forms
By default, the codebase seeds the Entity model with: Employee and Contract.
Employee - Has 4 dynamic properties: First name, Last name, Email, and Salary.
Contract - Has 4 hard-coded properties (DB model columns): Name, Description, Status, and File.
These 2 entities will help you understand the Entity Builder feature.
💿 6.1. Go to "Employees".
This is an autogenerated table view for the Entity "Employee", we plan to add more views: Kanban, Grid, and more.

💿 6.2. We don't have any employees, so click on New.
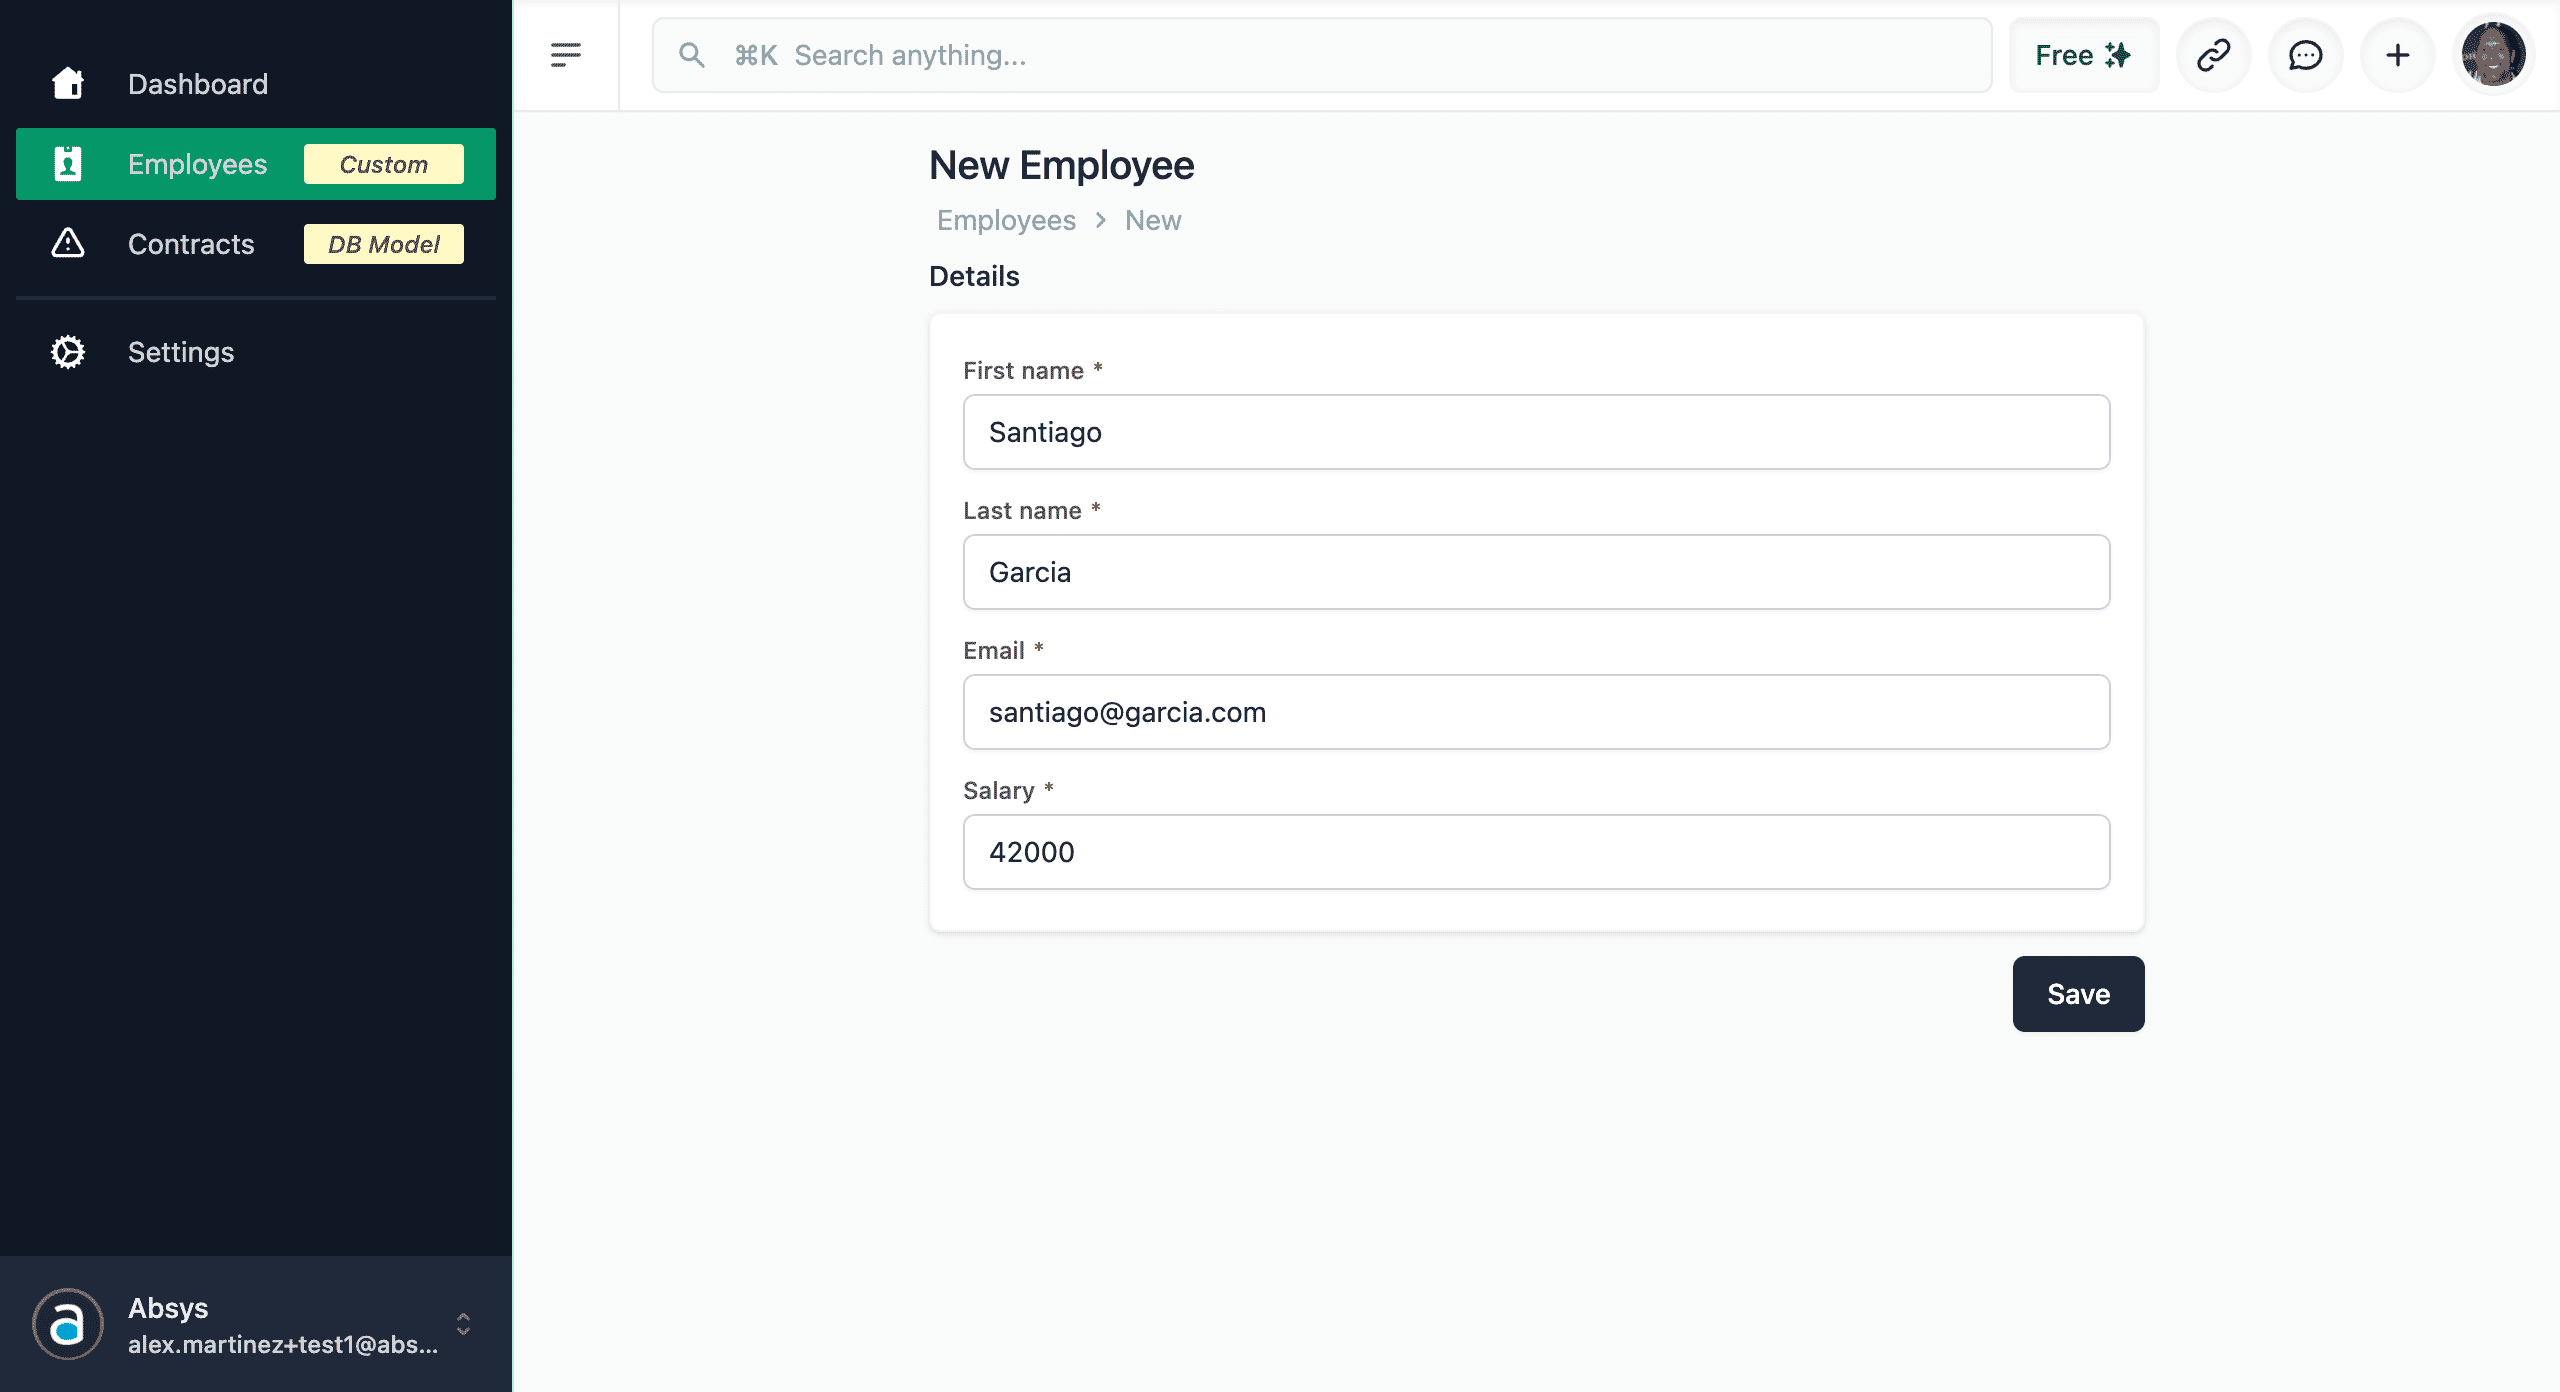
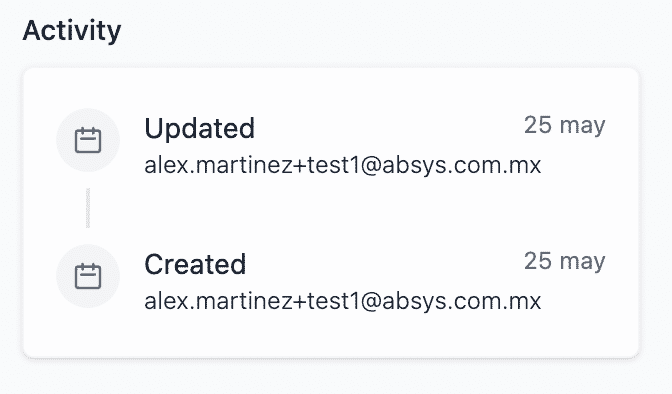
💿 6.3. Edit the employee.
You should now have 2 audit trails: Created and Updated.
NOTE
You can also see these events at /app/:tenant/settings/audit-trails.
7. Adding a Custom Property
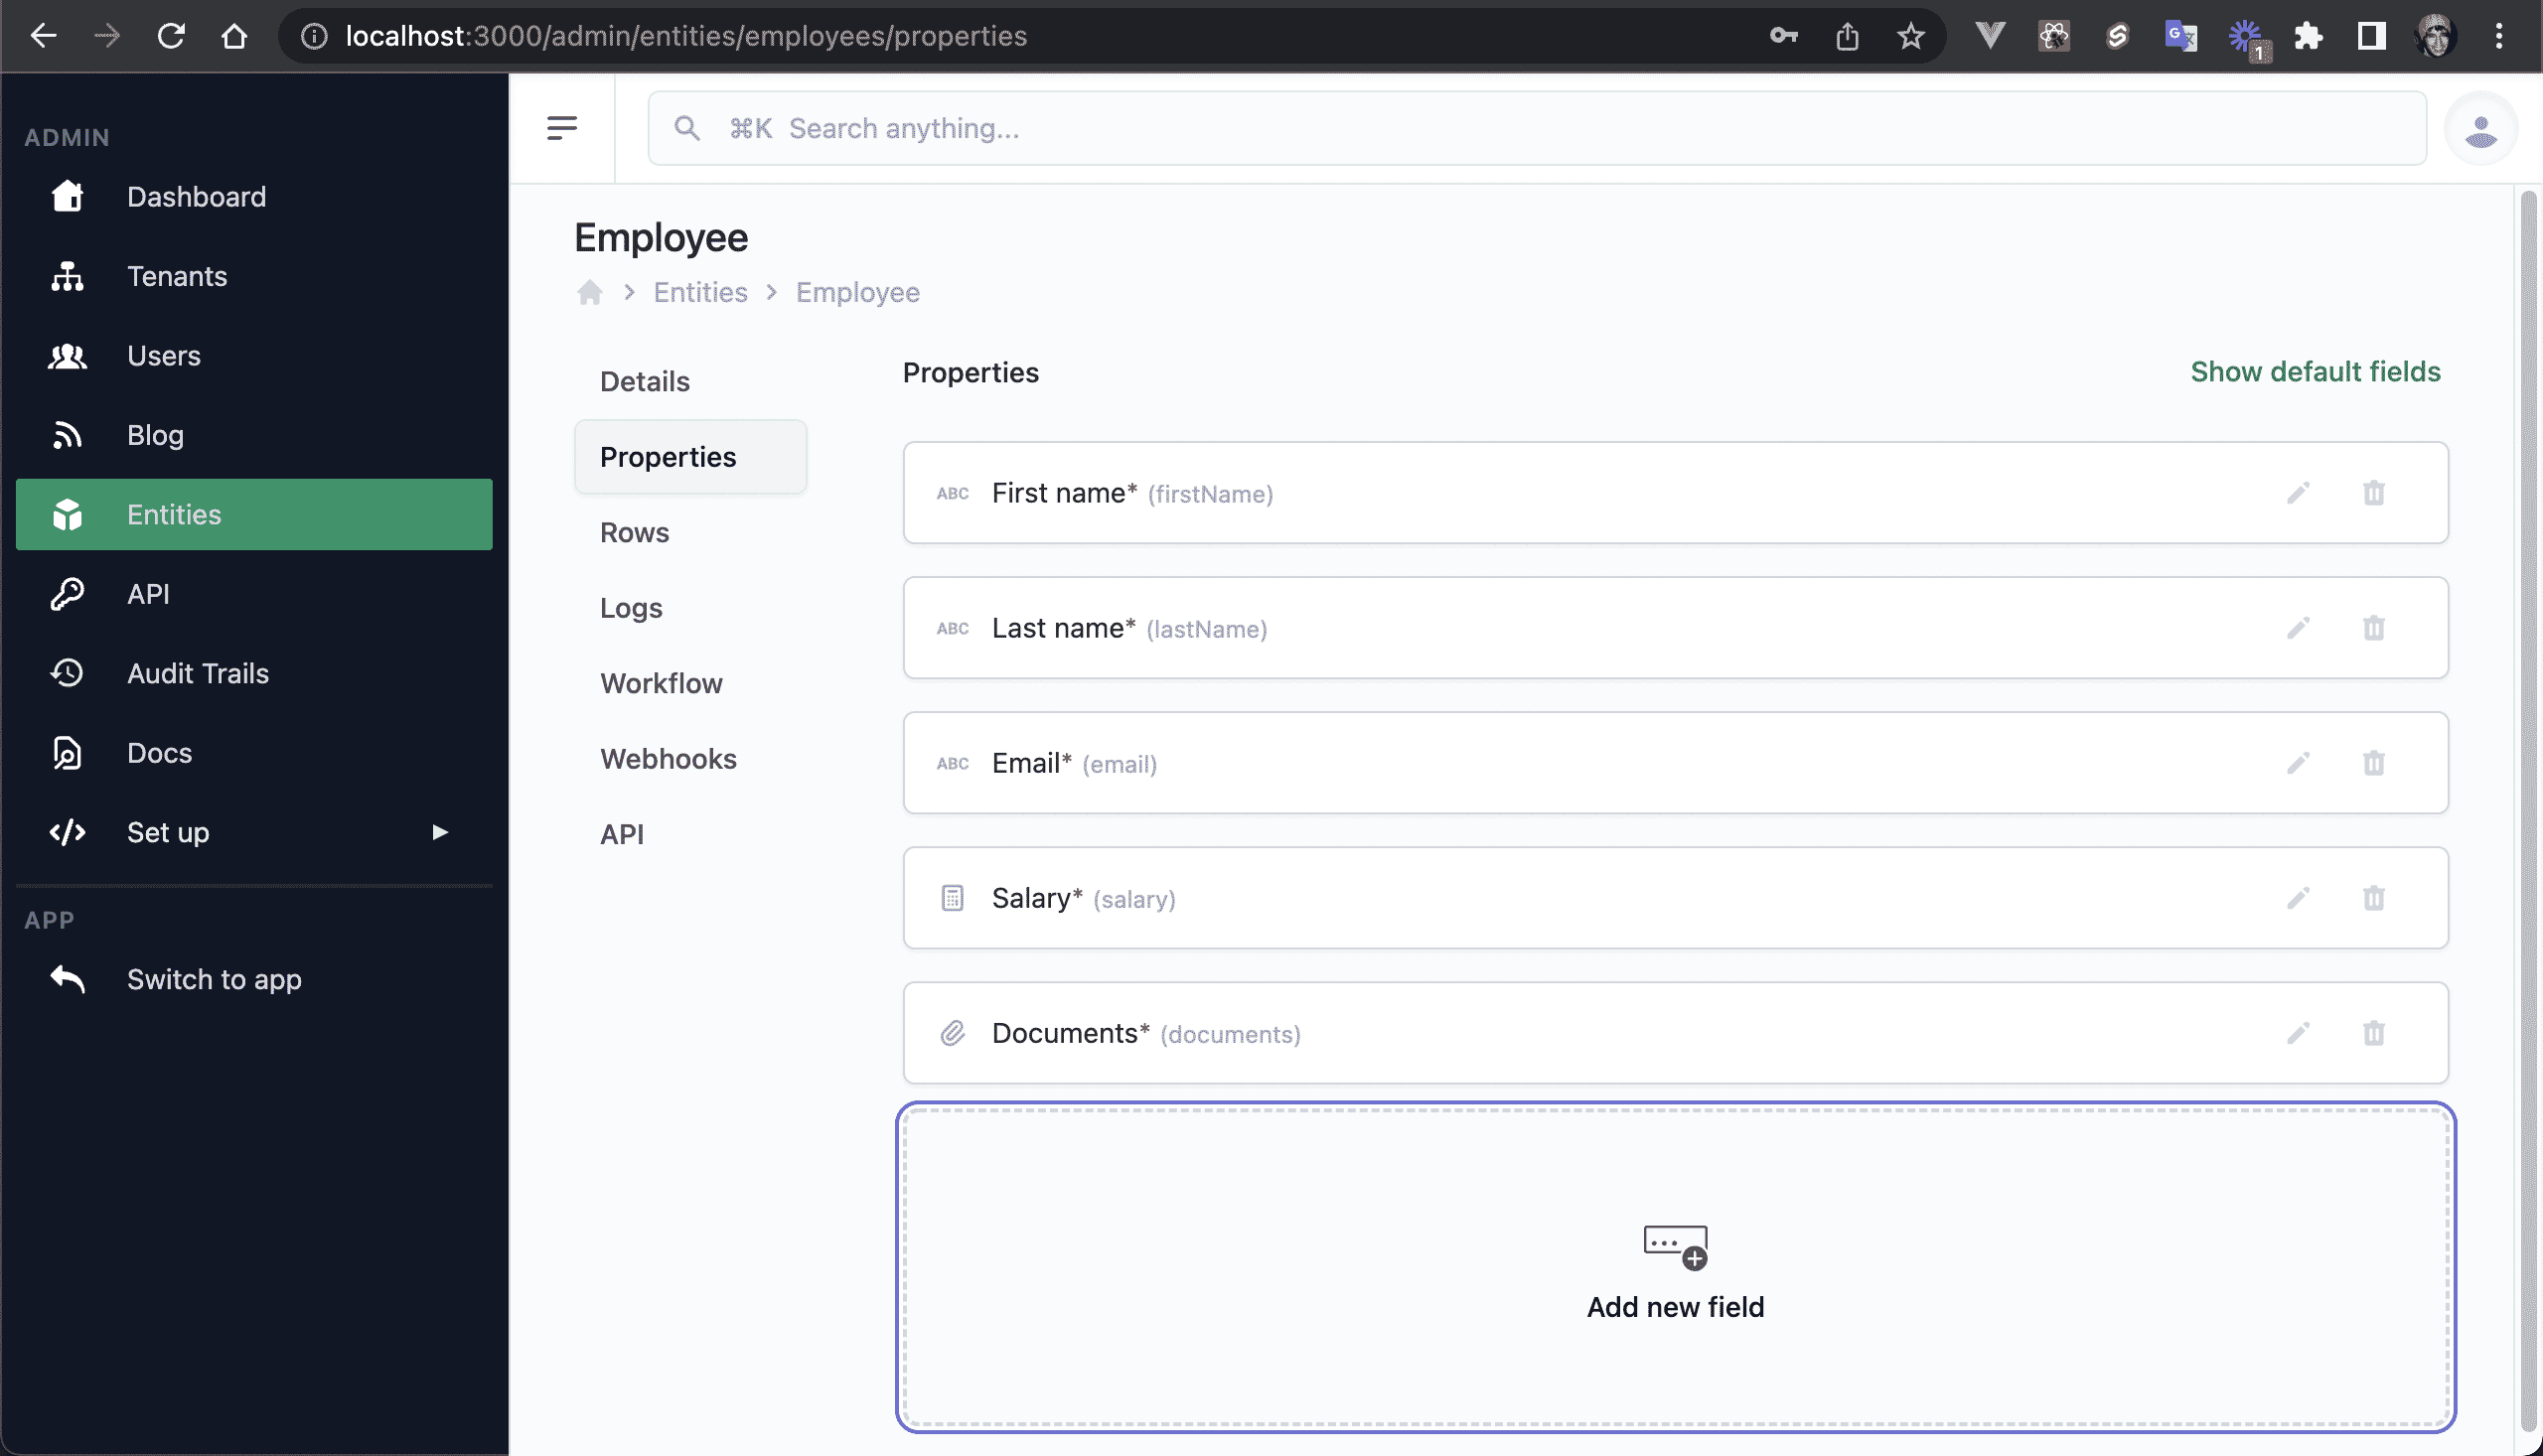
Let's say we want our SaaS users to add employee's documents, we need a property of type "MEDIA".
💿 7.1. Log out, log in as your admin user, go to "Entities", and click on the Employee properties cell.
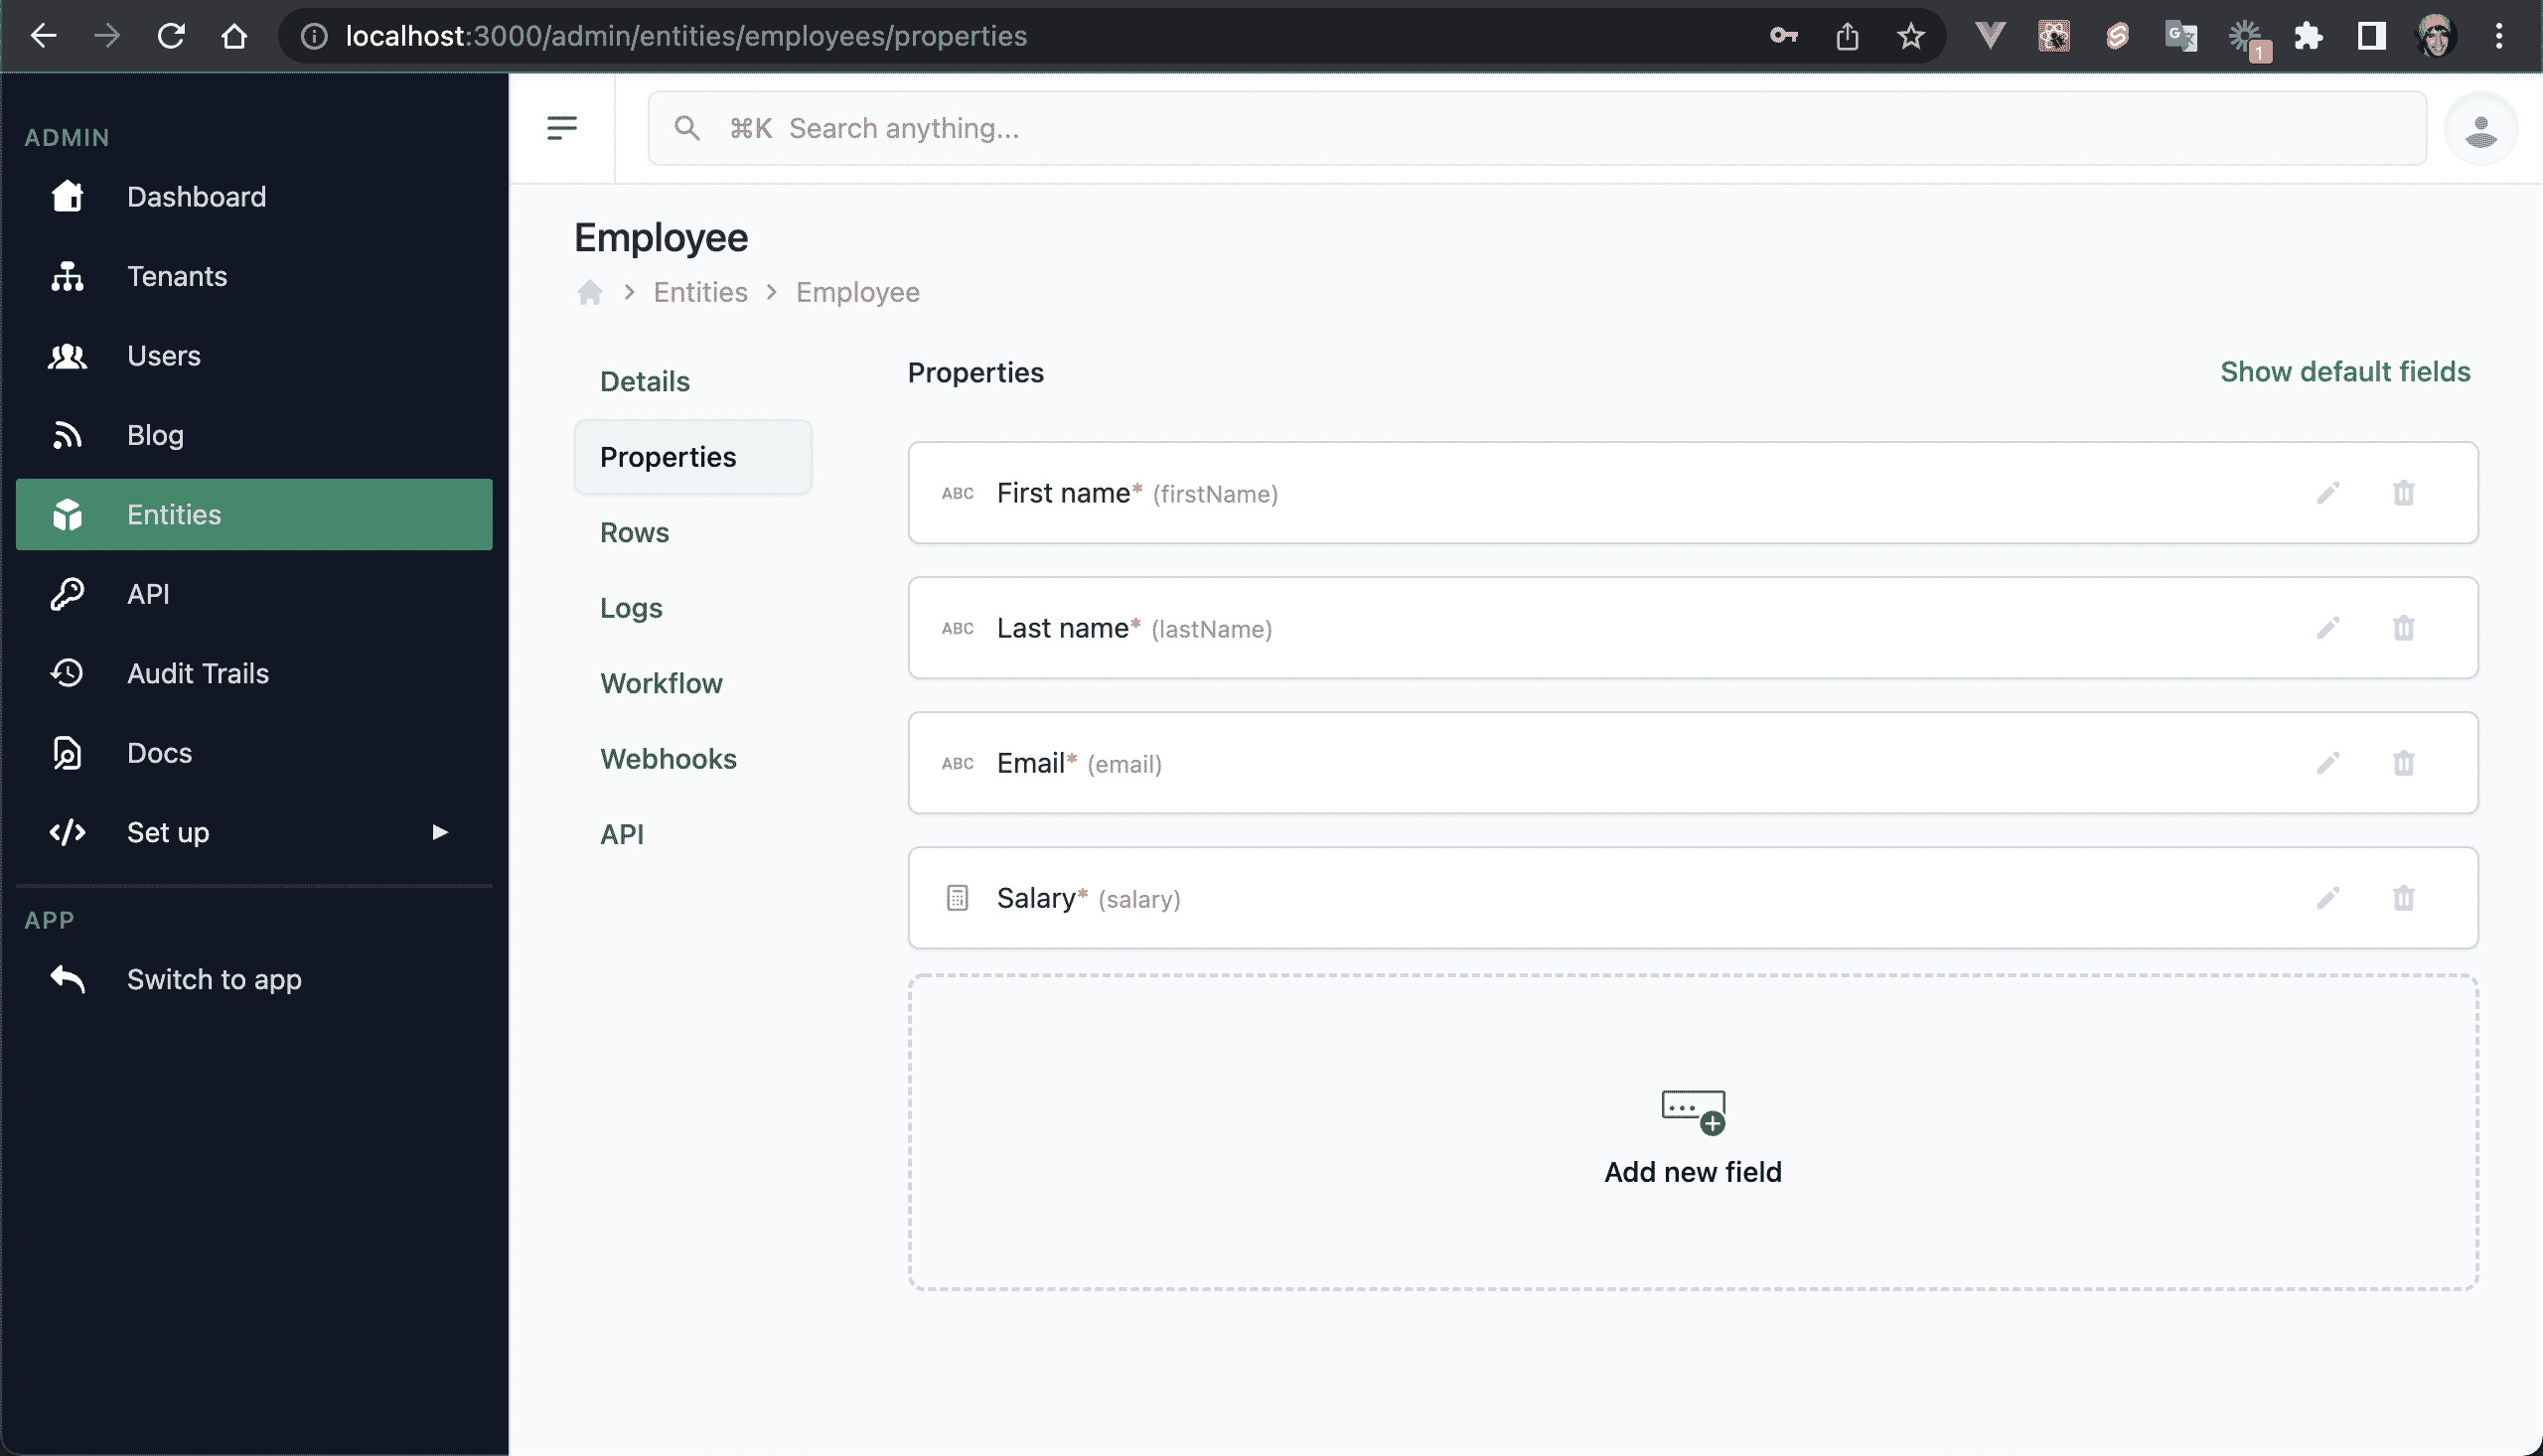
💿 7.2. Click on "Add new field" and set the following values.
Define these values:
Type: Media.
Title: Documents.
Name: documents.
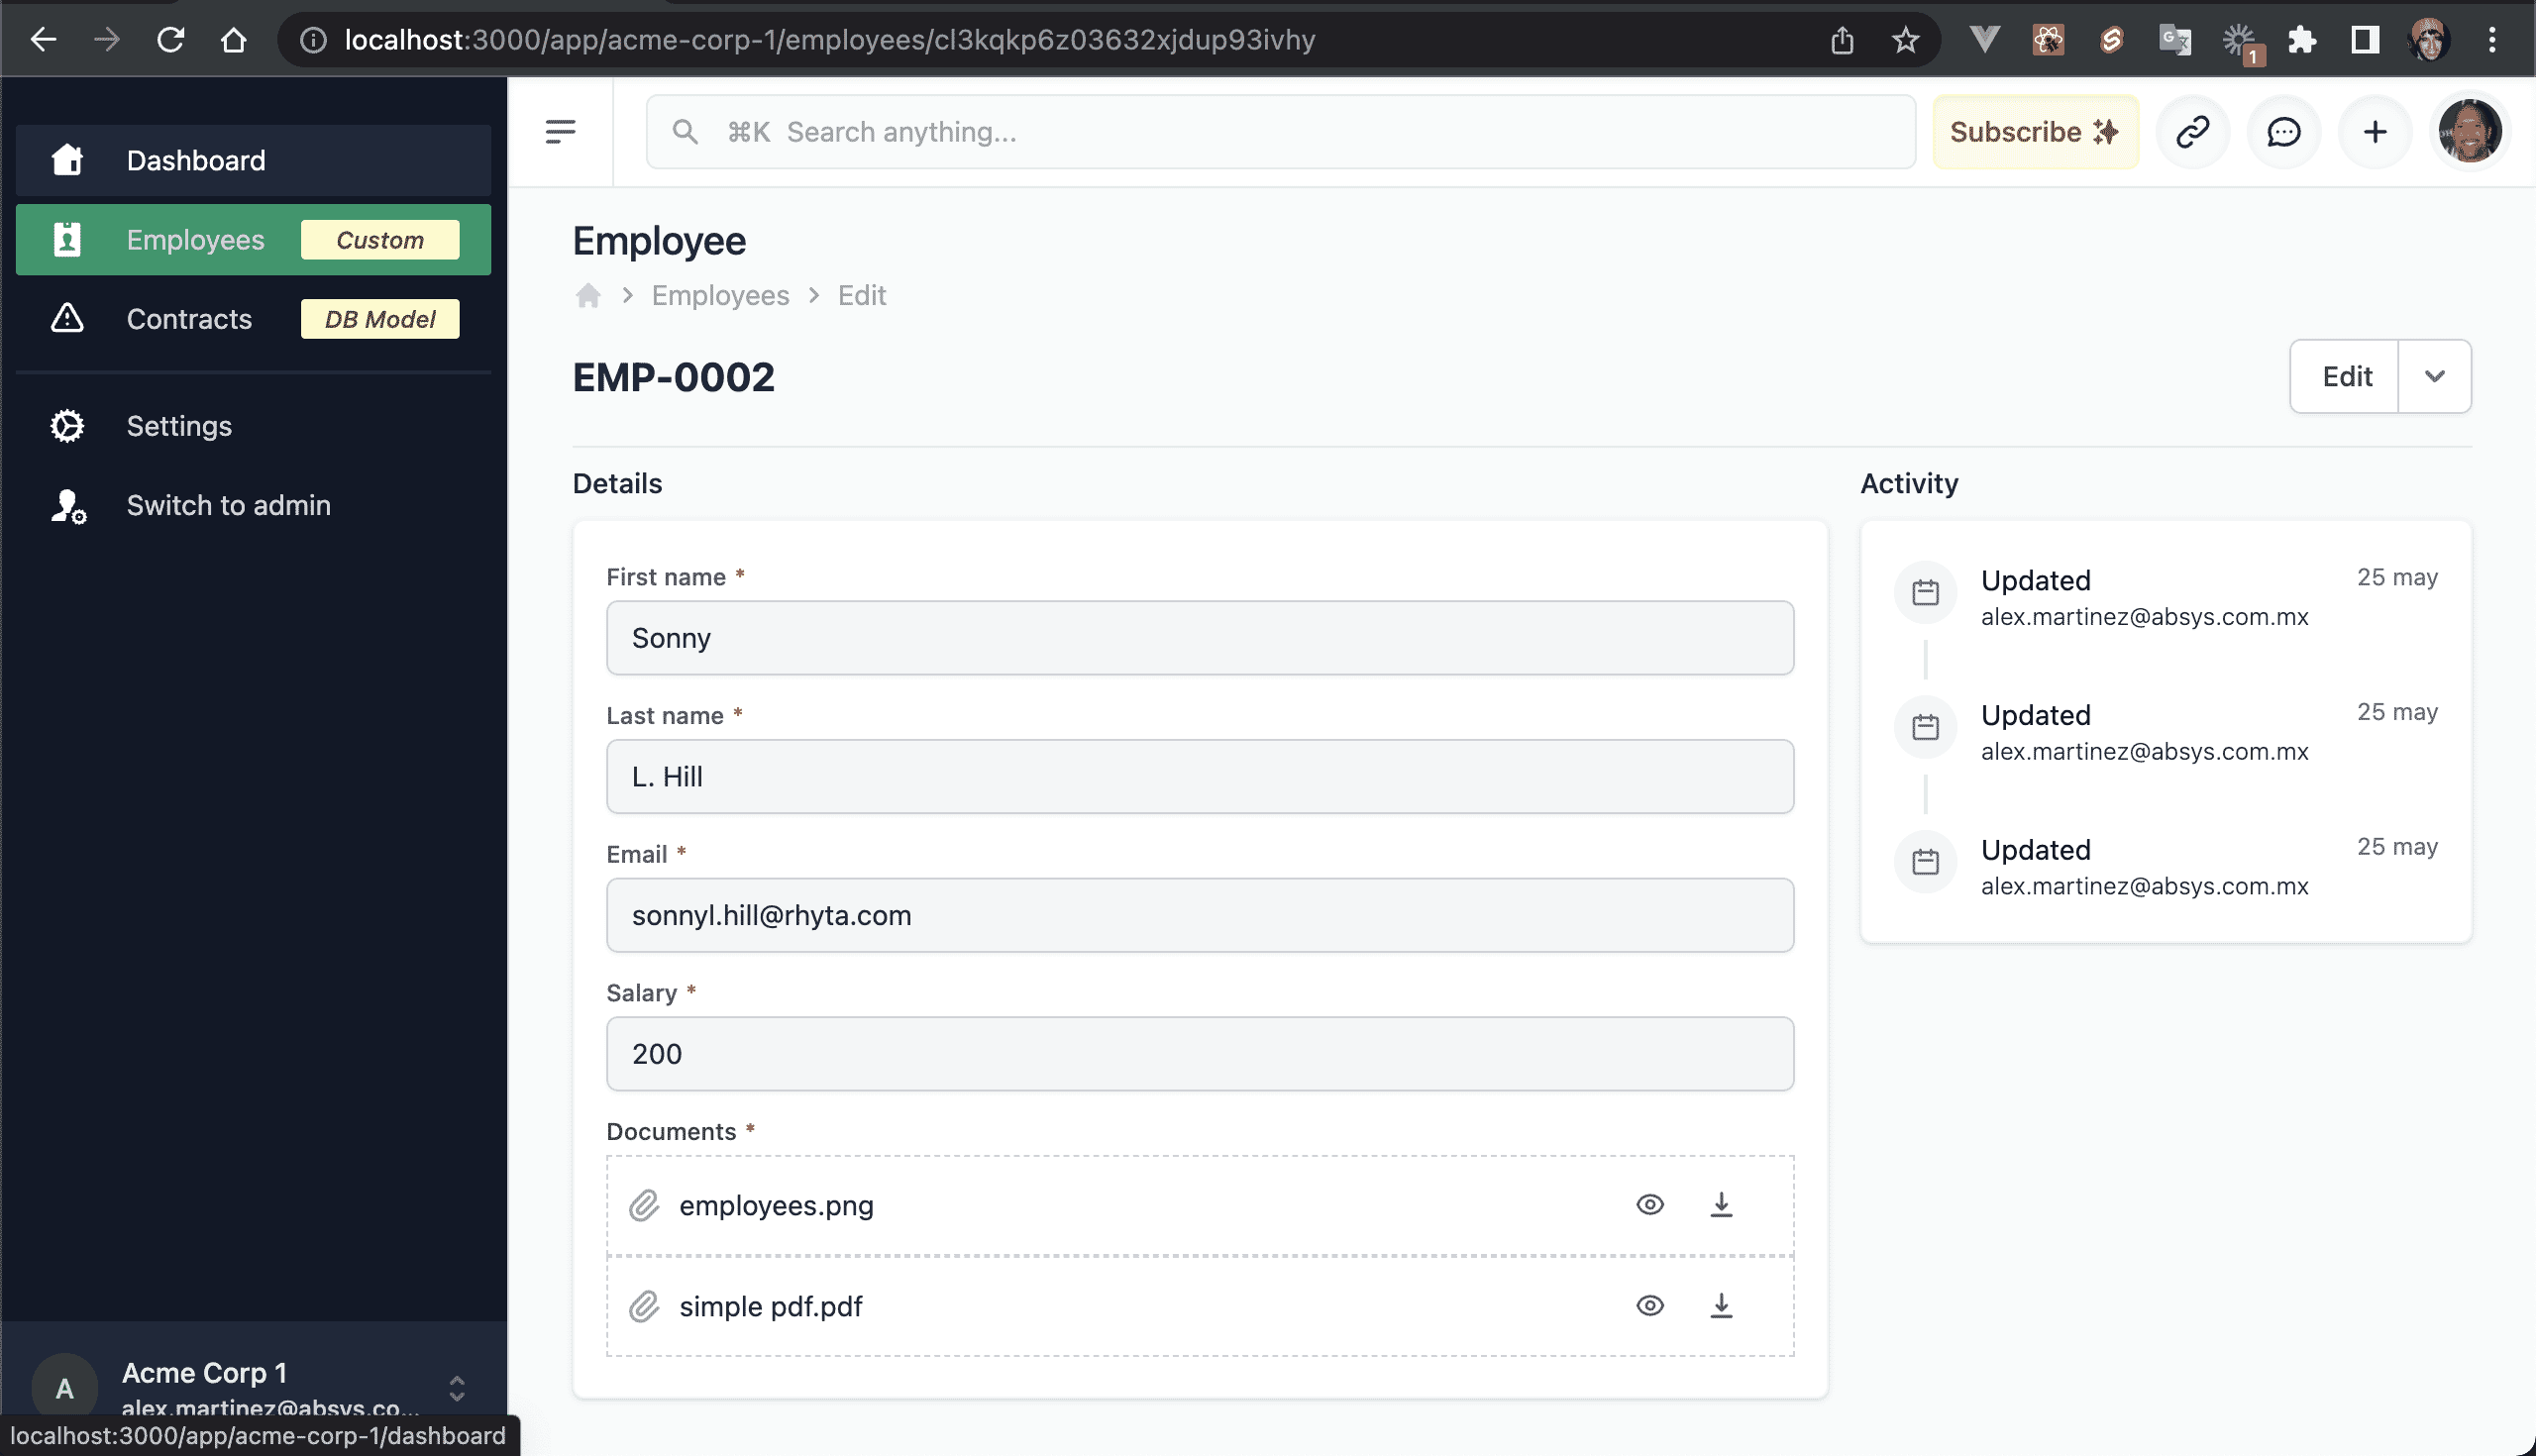
💿 7.3. Click on the "Switch to app" sidebar item, or log out and log in as your tenant user.
💿 7.4. Go to "Employees", and click on "New".
💿 7.4. Edit any employee, and add 1 PDF and 1 image to the new property field (Documents).
WARNING
Currently, there are 2 supported file type preview: PDF's and images (click on the eye icon to preview a file).
8. Adding Employees to Google Sheets using Webhooks
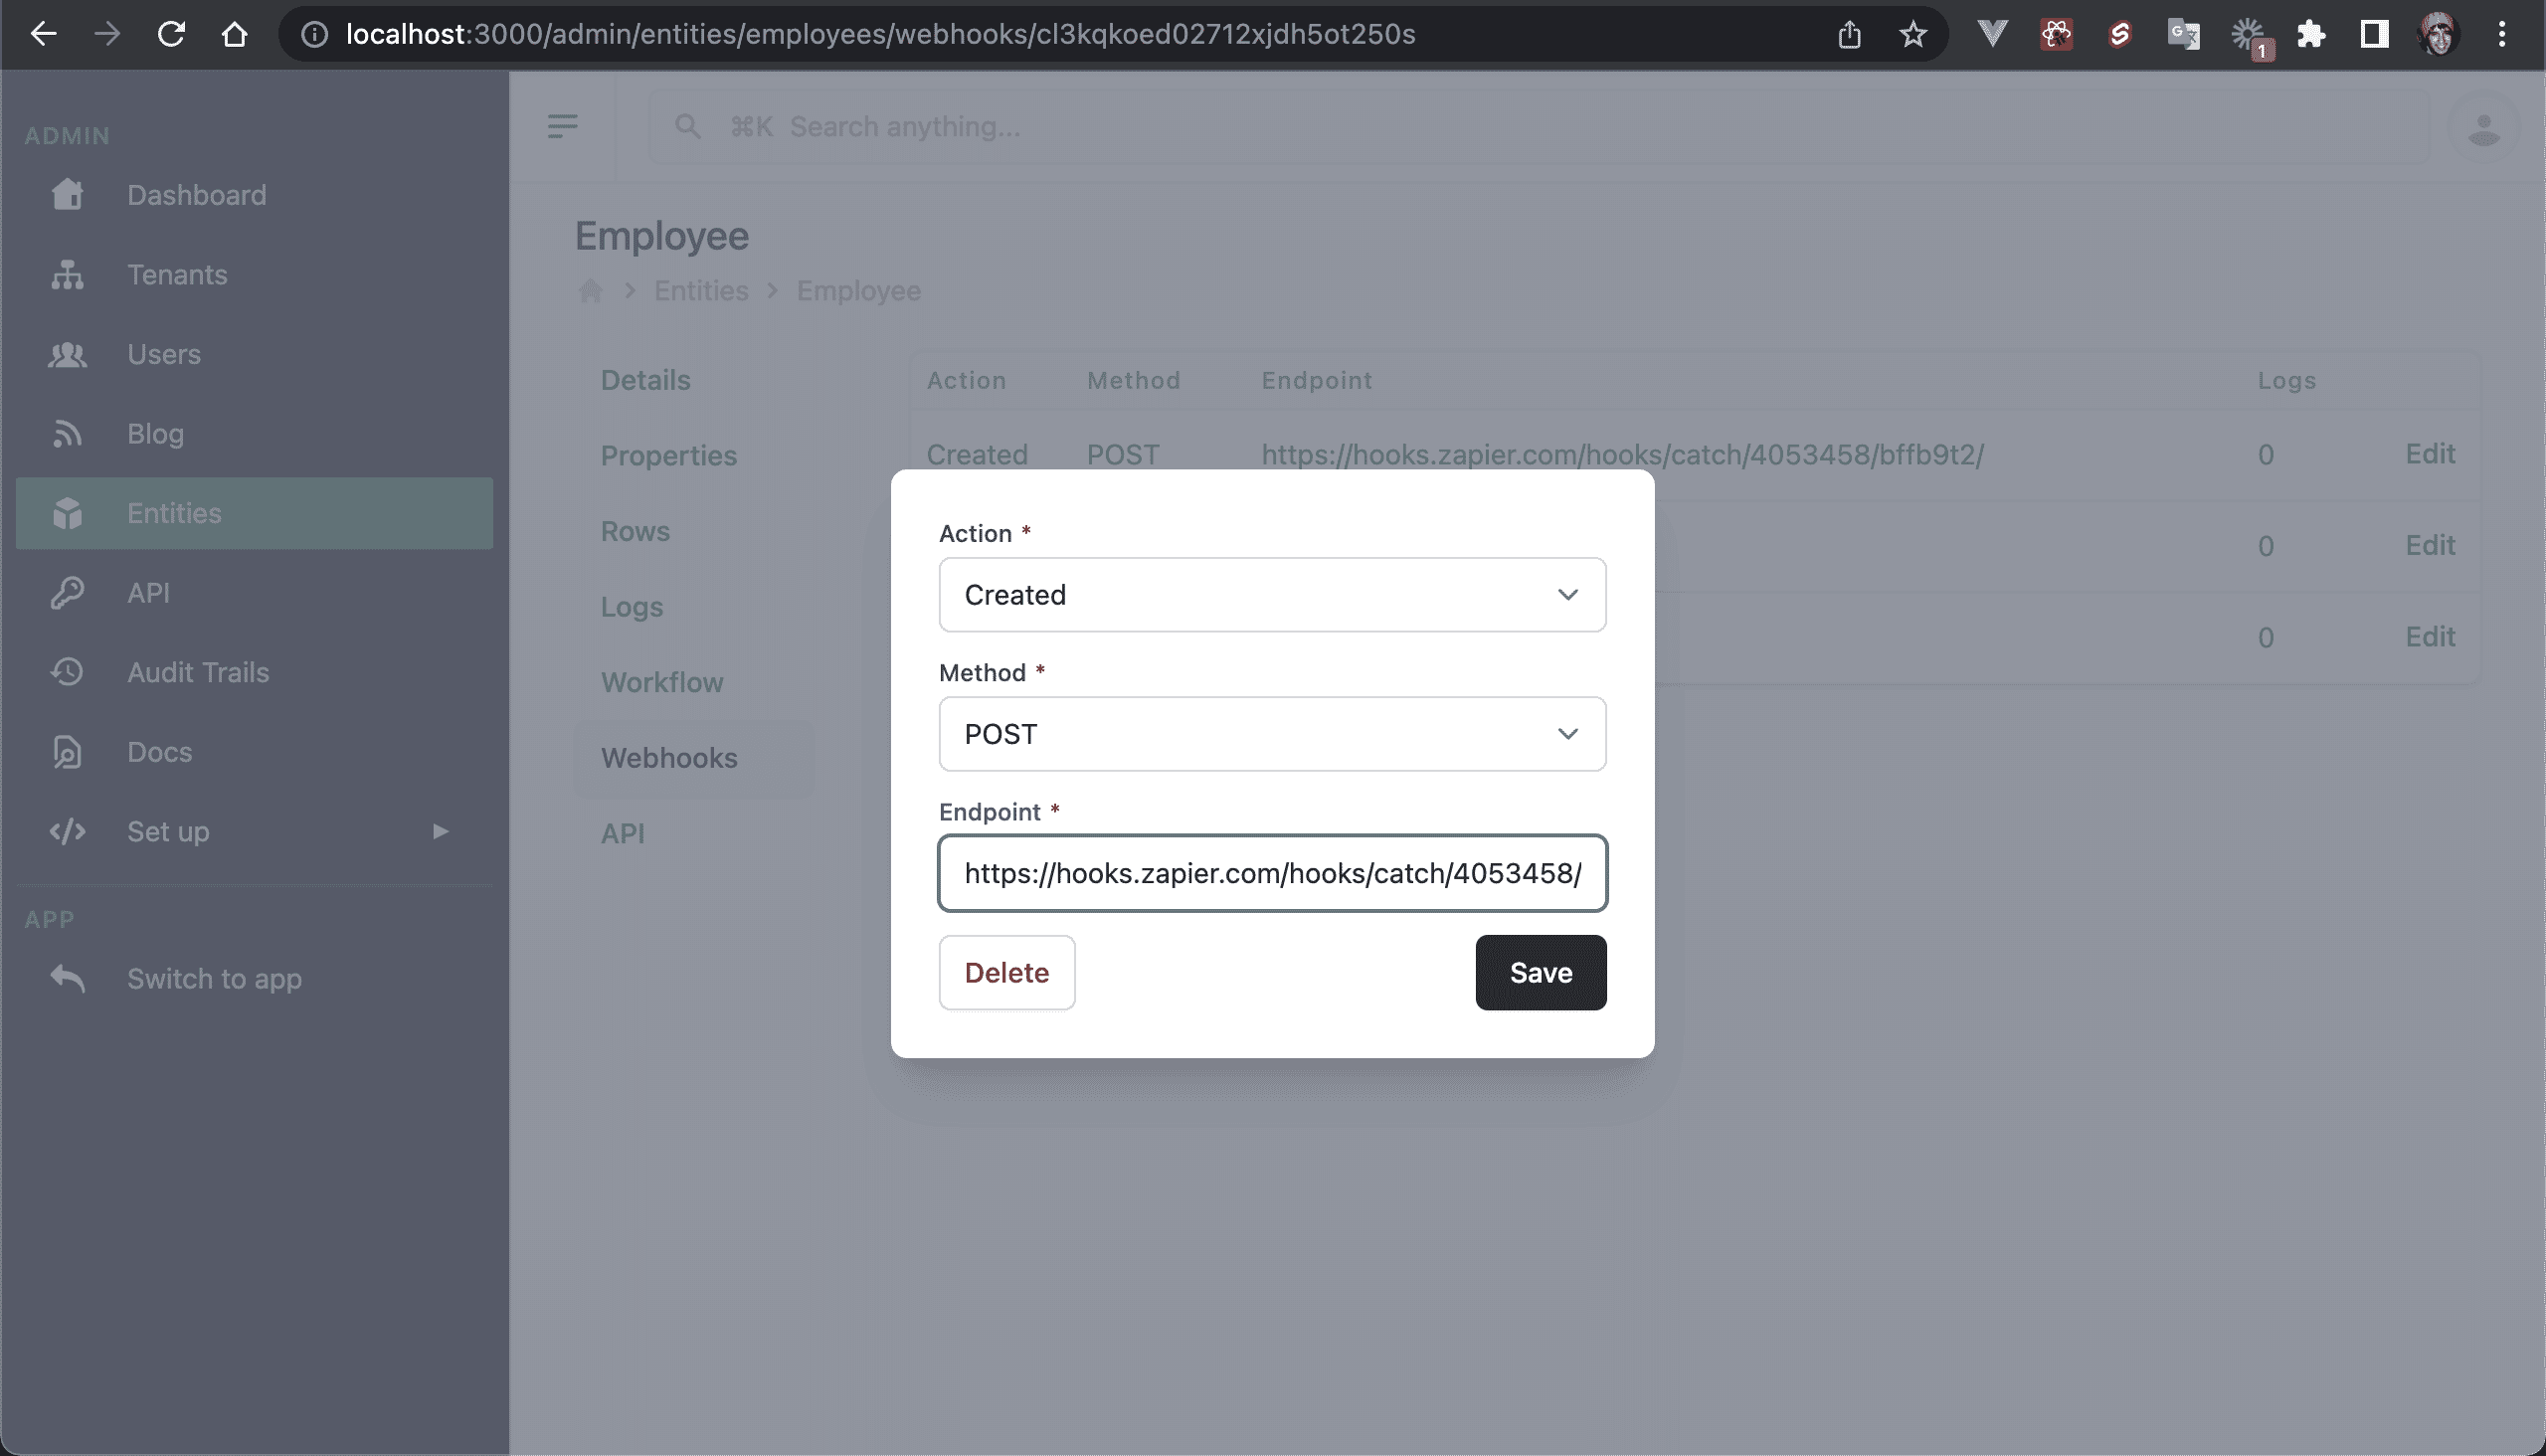
💿 8.1. As an admin user, go to /admin/entities/employees/webhooks.
As you can see, there are 3 supported events for Webhooks: Created, Updated, and Deleted. But you can add your own, just use the createRowLog function with a custom action.

💿 8.2. In a new tab, create a new Webhooks by Zapier zap, with the Trigger Event: Catch Hook.
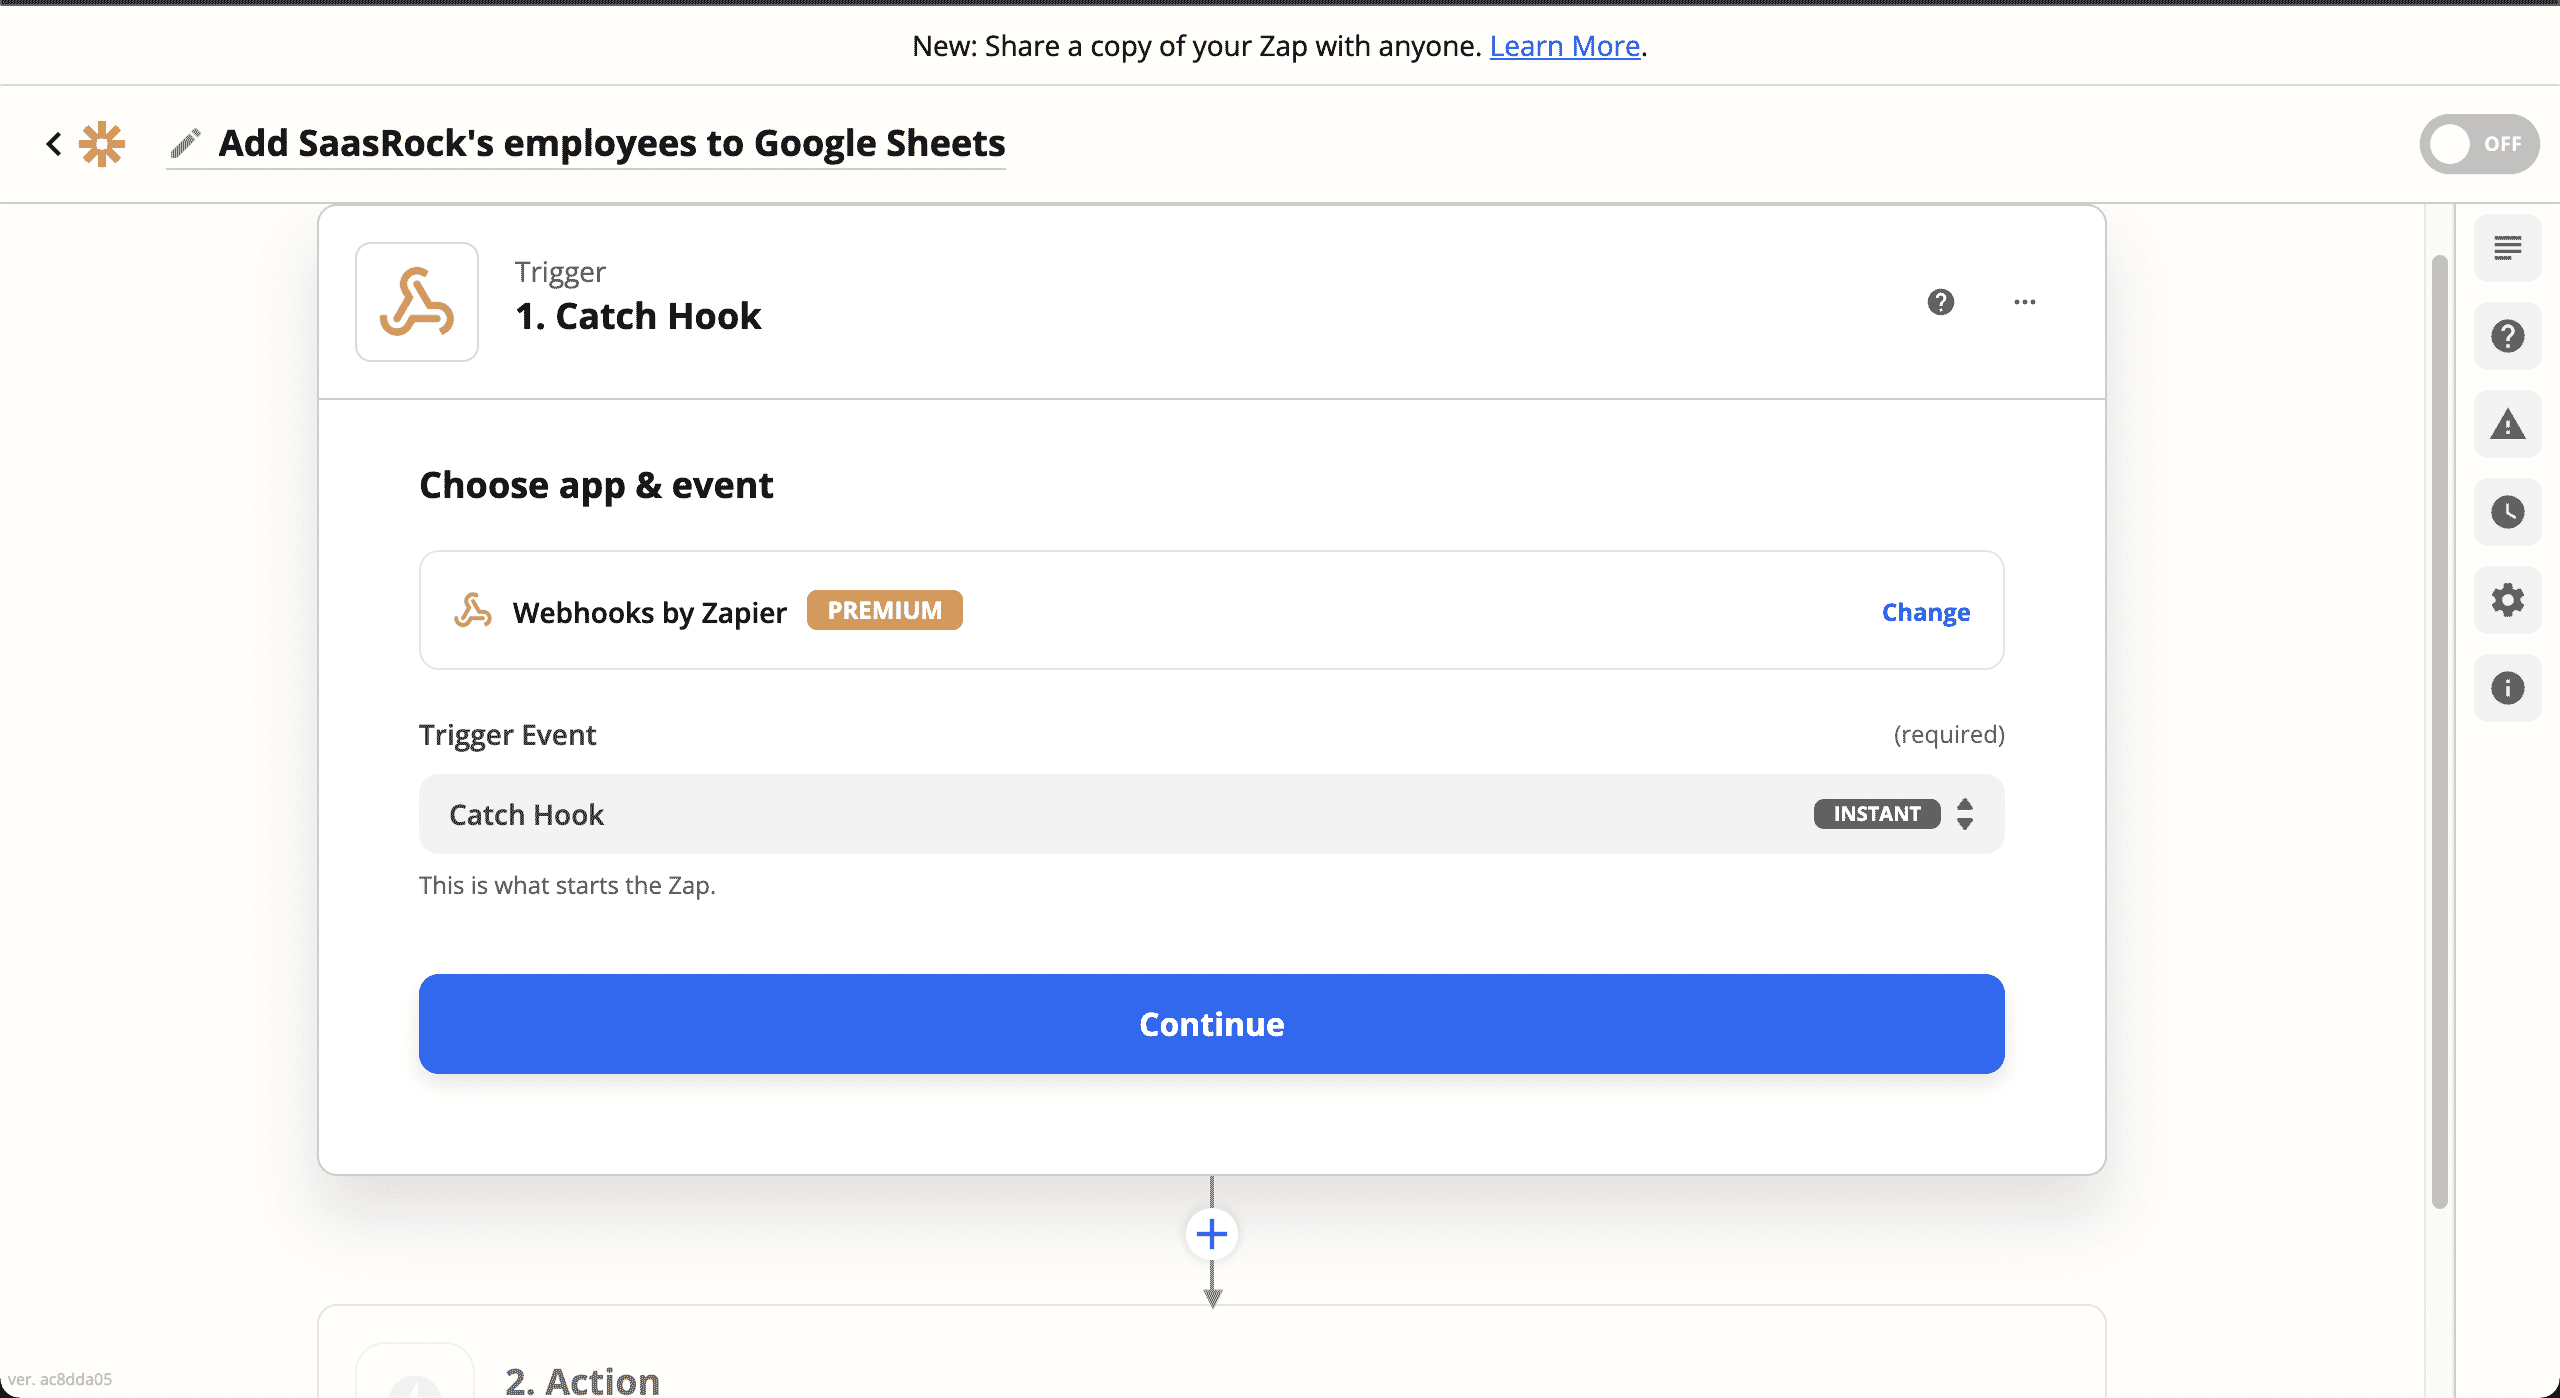
💿 8.3. Copy the Custom Webhook URL.
💿 8.4. Go back to the Employee's Webhooks and click on Edit for the Created event.
💿 8.5. Paste the Zapier Custom Webhook URL hook on the Endpoint field, and save.
💿 8.6. Create another Employee at the /app portal.
This should call the webhook endpoint.
NOTE
Customize the webhook calls on the callEntityWebhooks function.
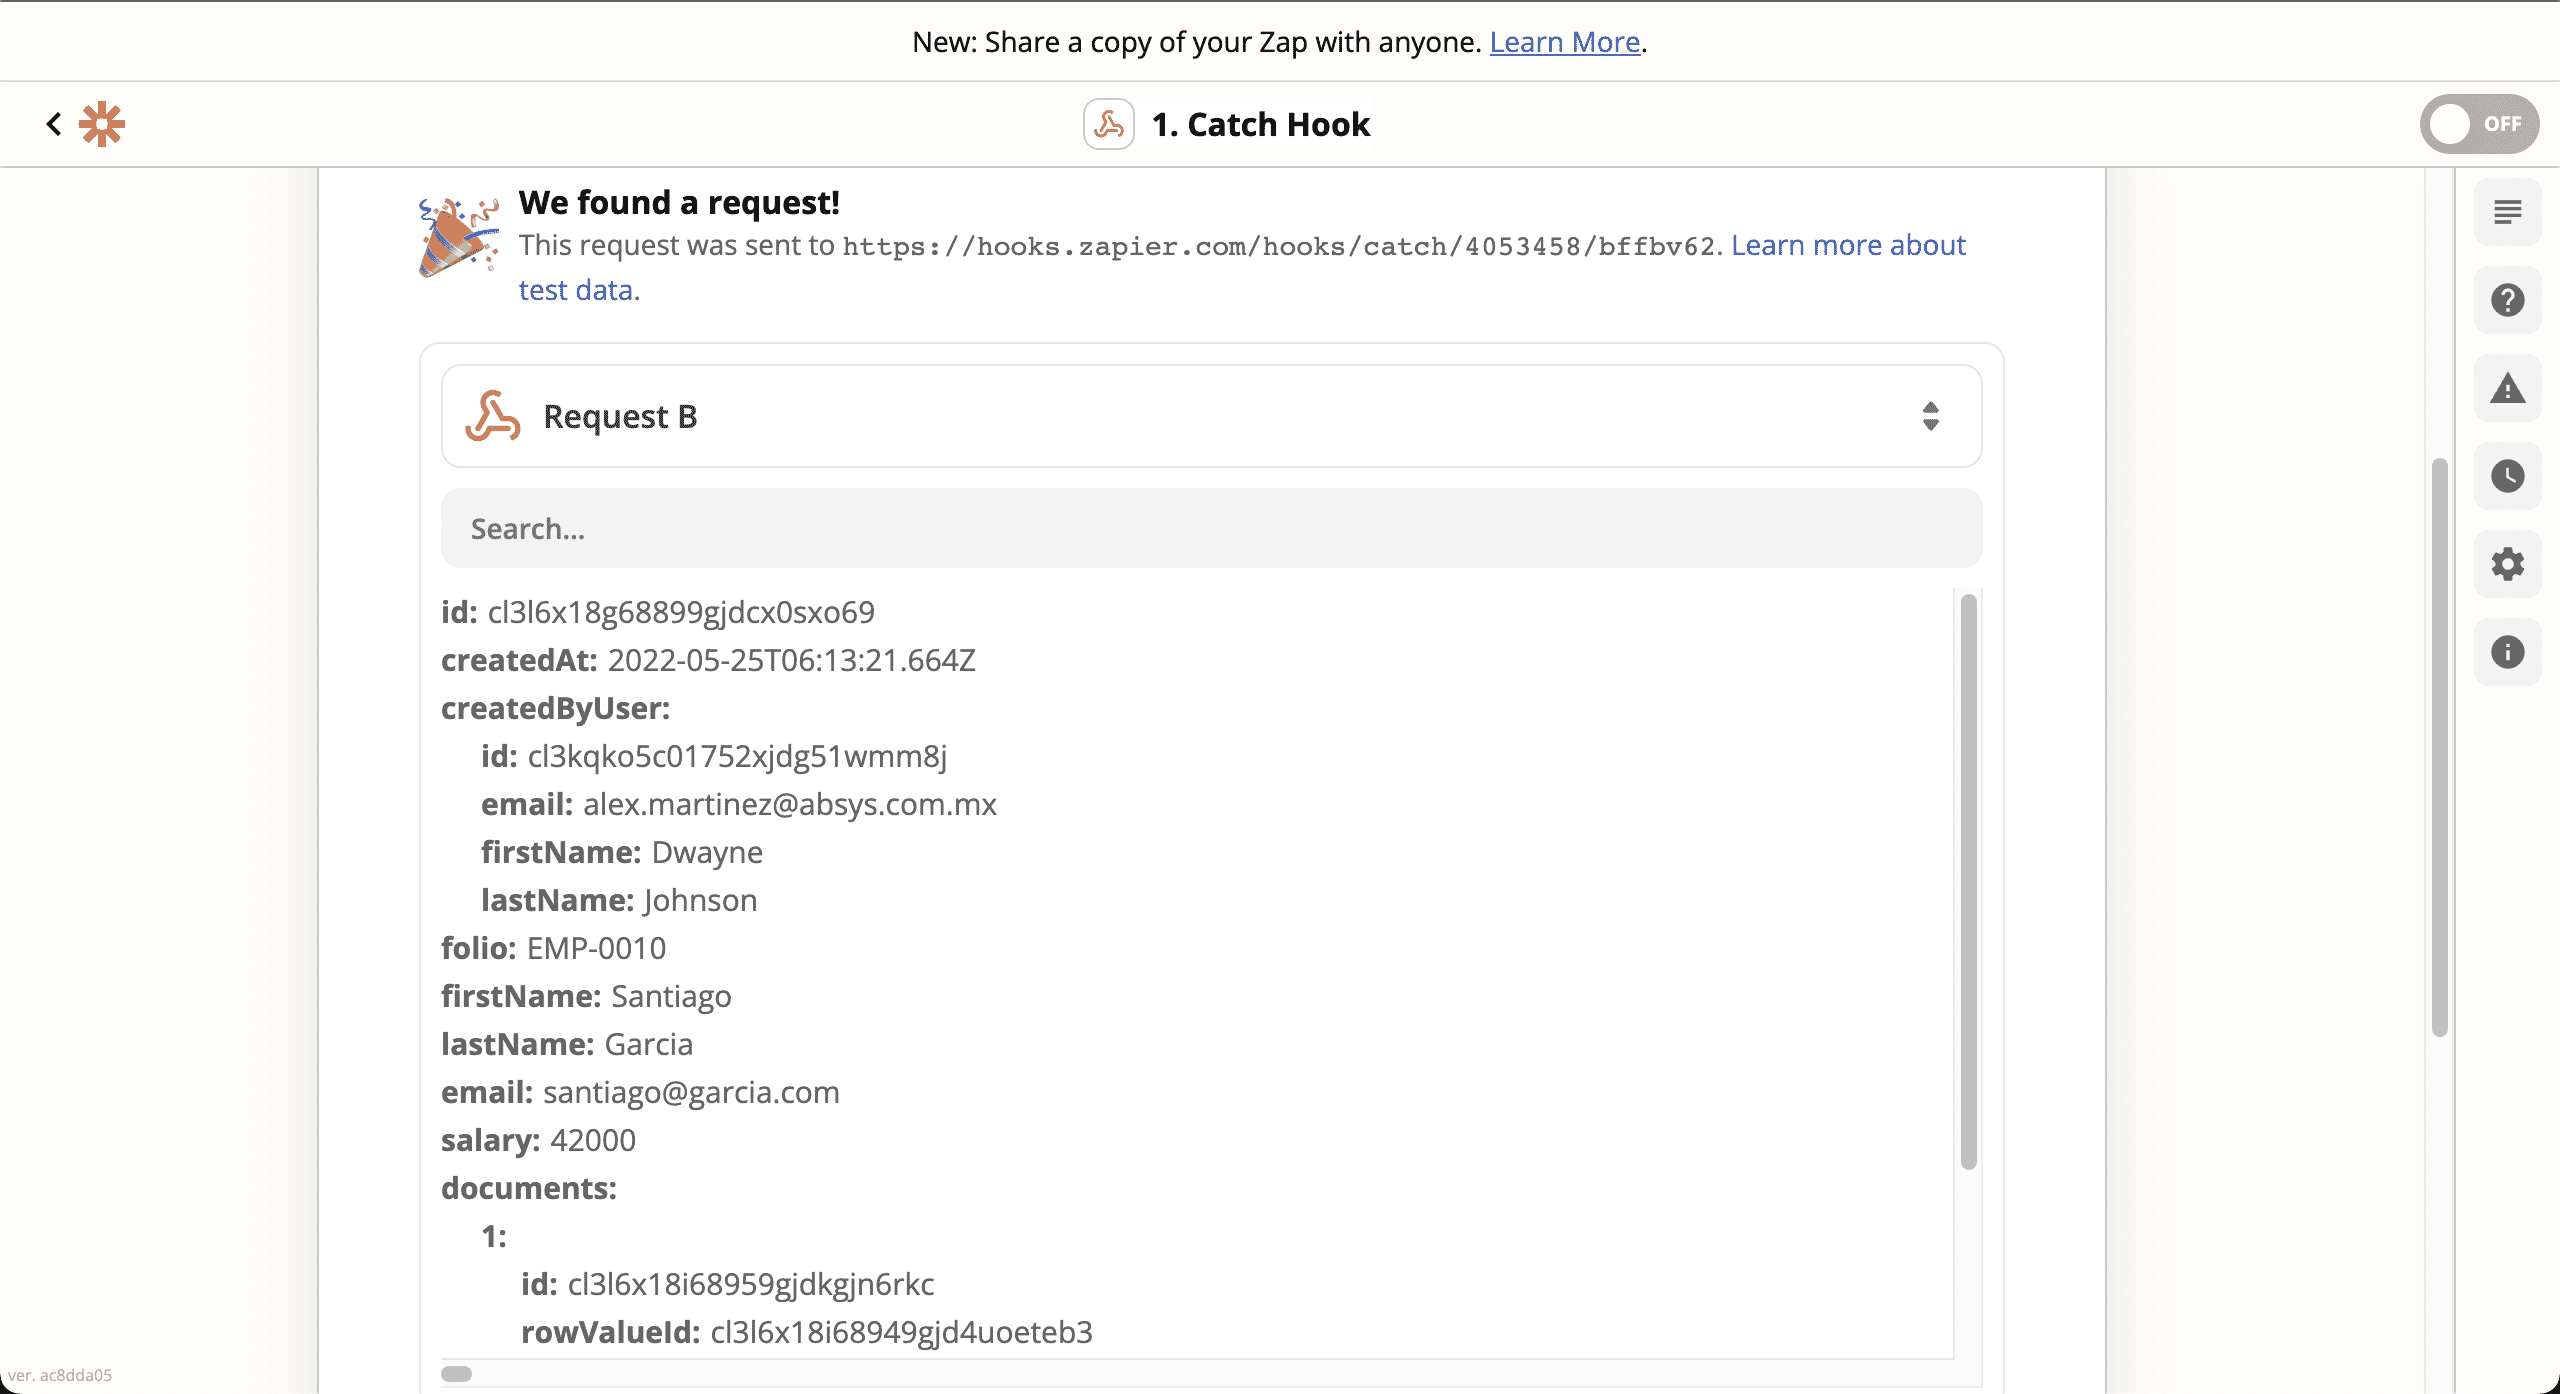
💿 8.7. Go back to the Zapier's zap creator, and test the trigger.
As you can see, the webhook call was received successfully.
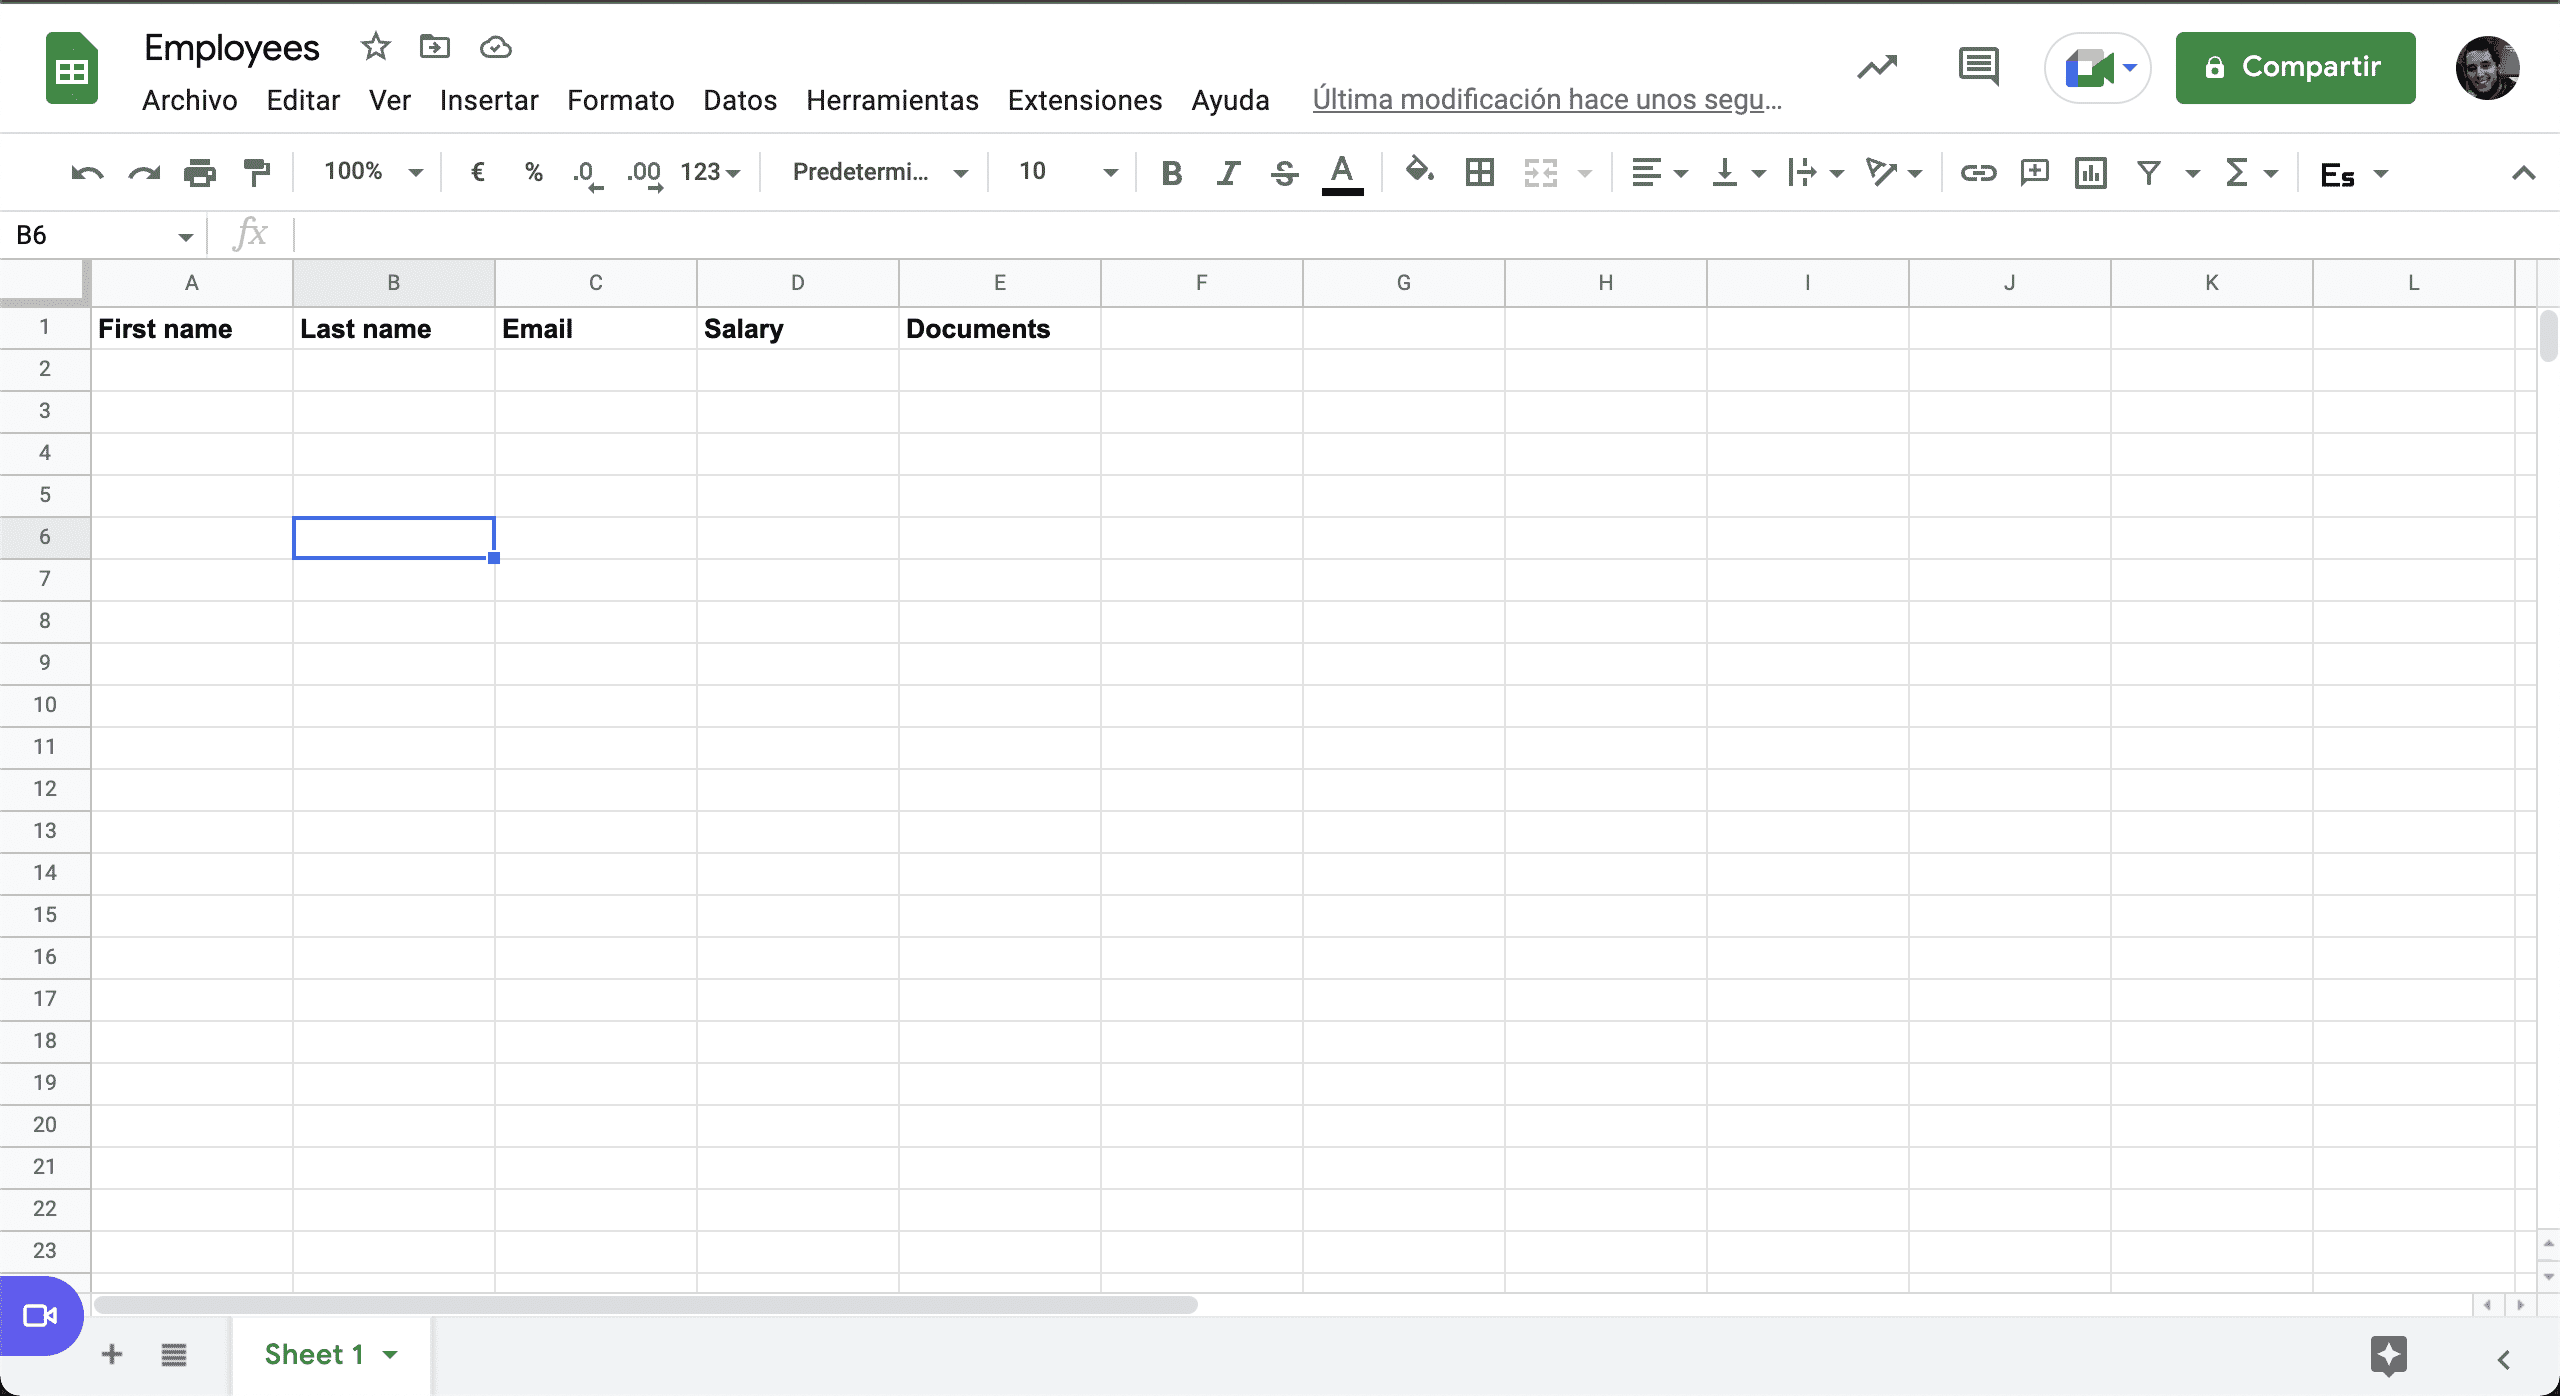
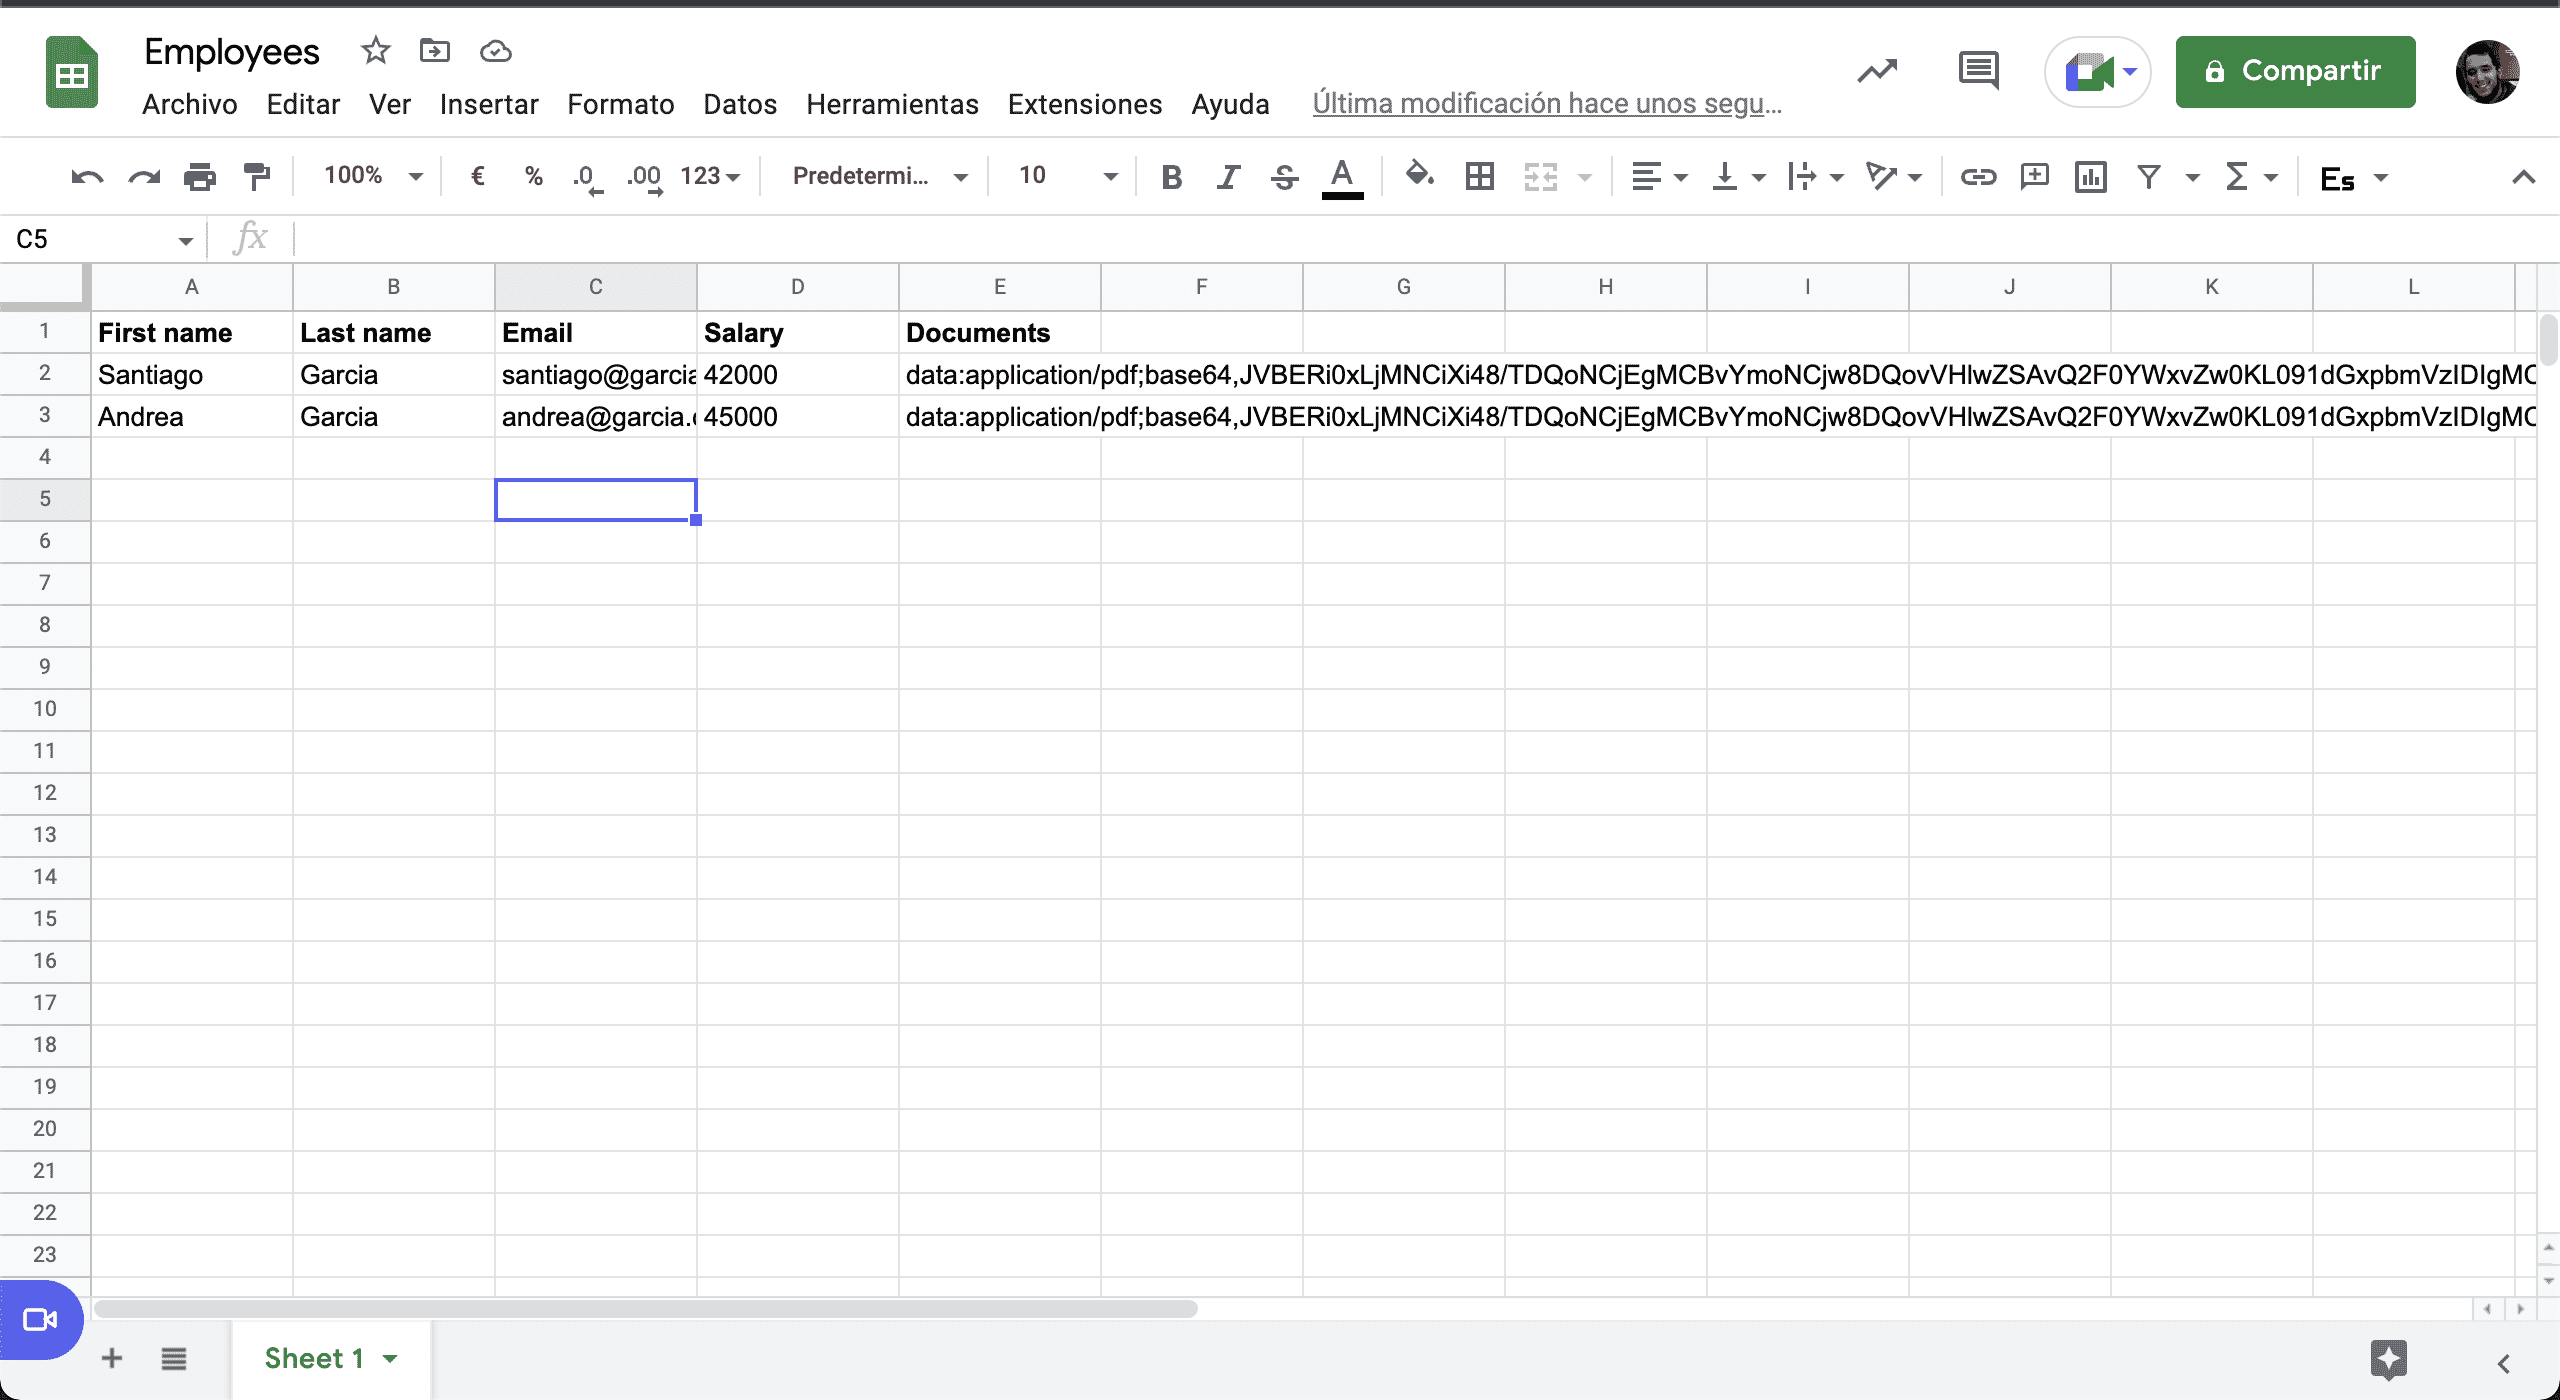
💿 8.8. Create a Google Sheet document on Google Drive, name it "Employees", and add the headers: First name, Last name, Email, Salary, and Documents.
💿 8.9. Select the "Create Spreadsheet Row" Google Sheets Action.
NOTE
You can hook with any application you want: Notion, Airtable, Dropbox...
💿 8.10. Select your sheet, and link the corresponding properties, and turn on your Zap.
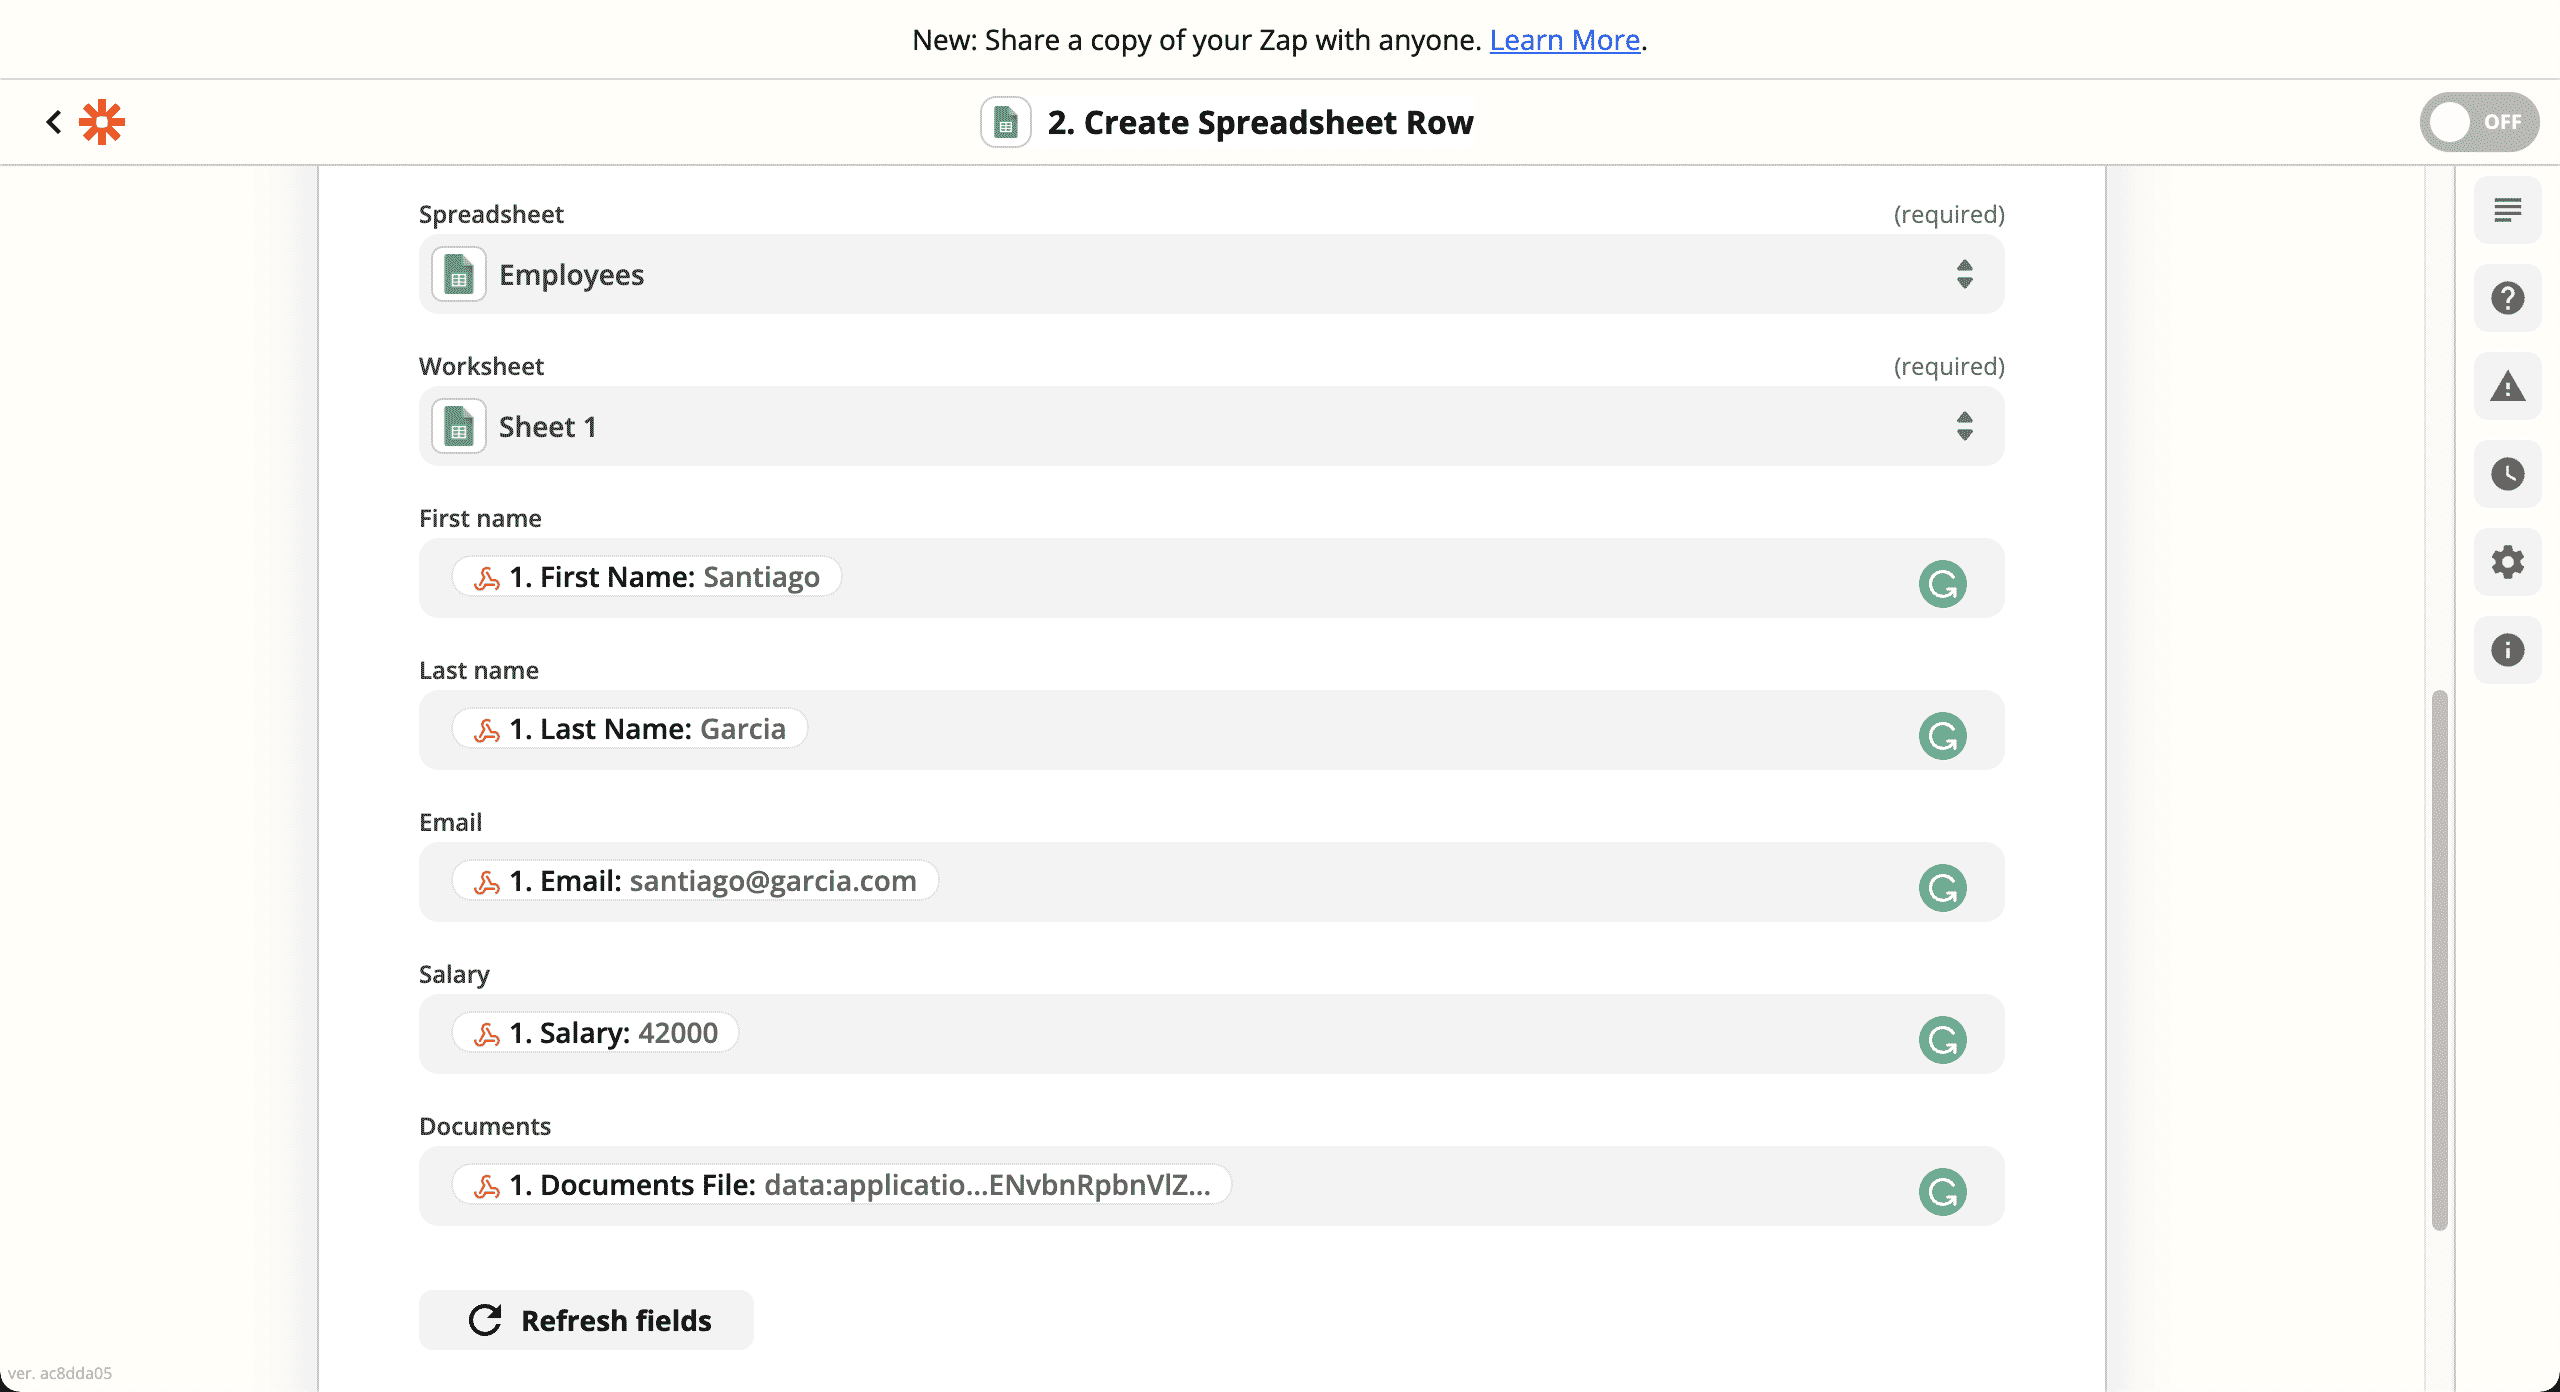
💿 8.11. Finally, add another employee and verify that the webhook is called.
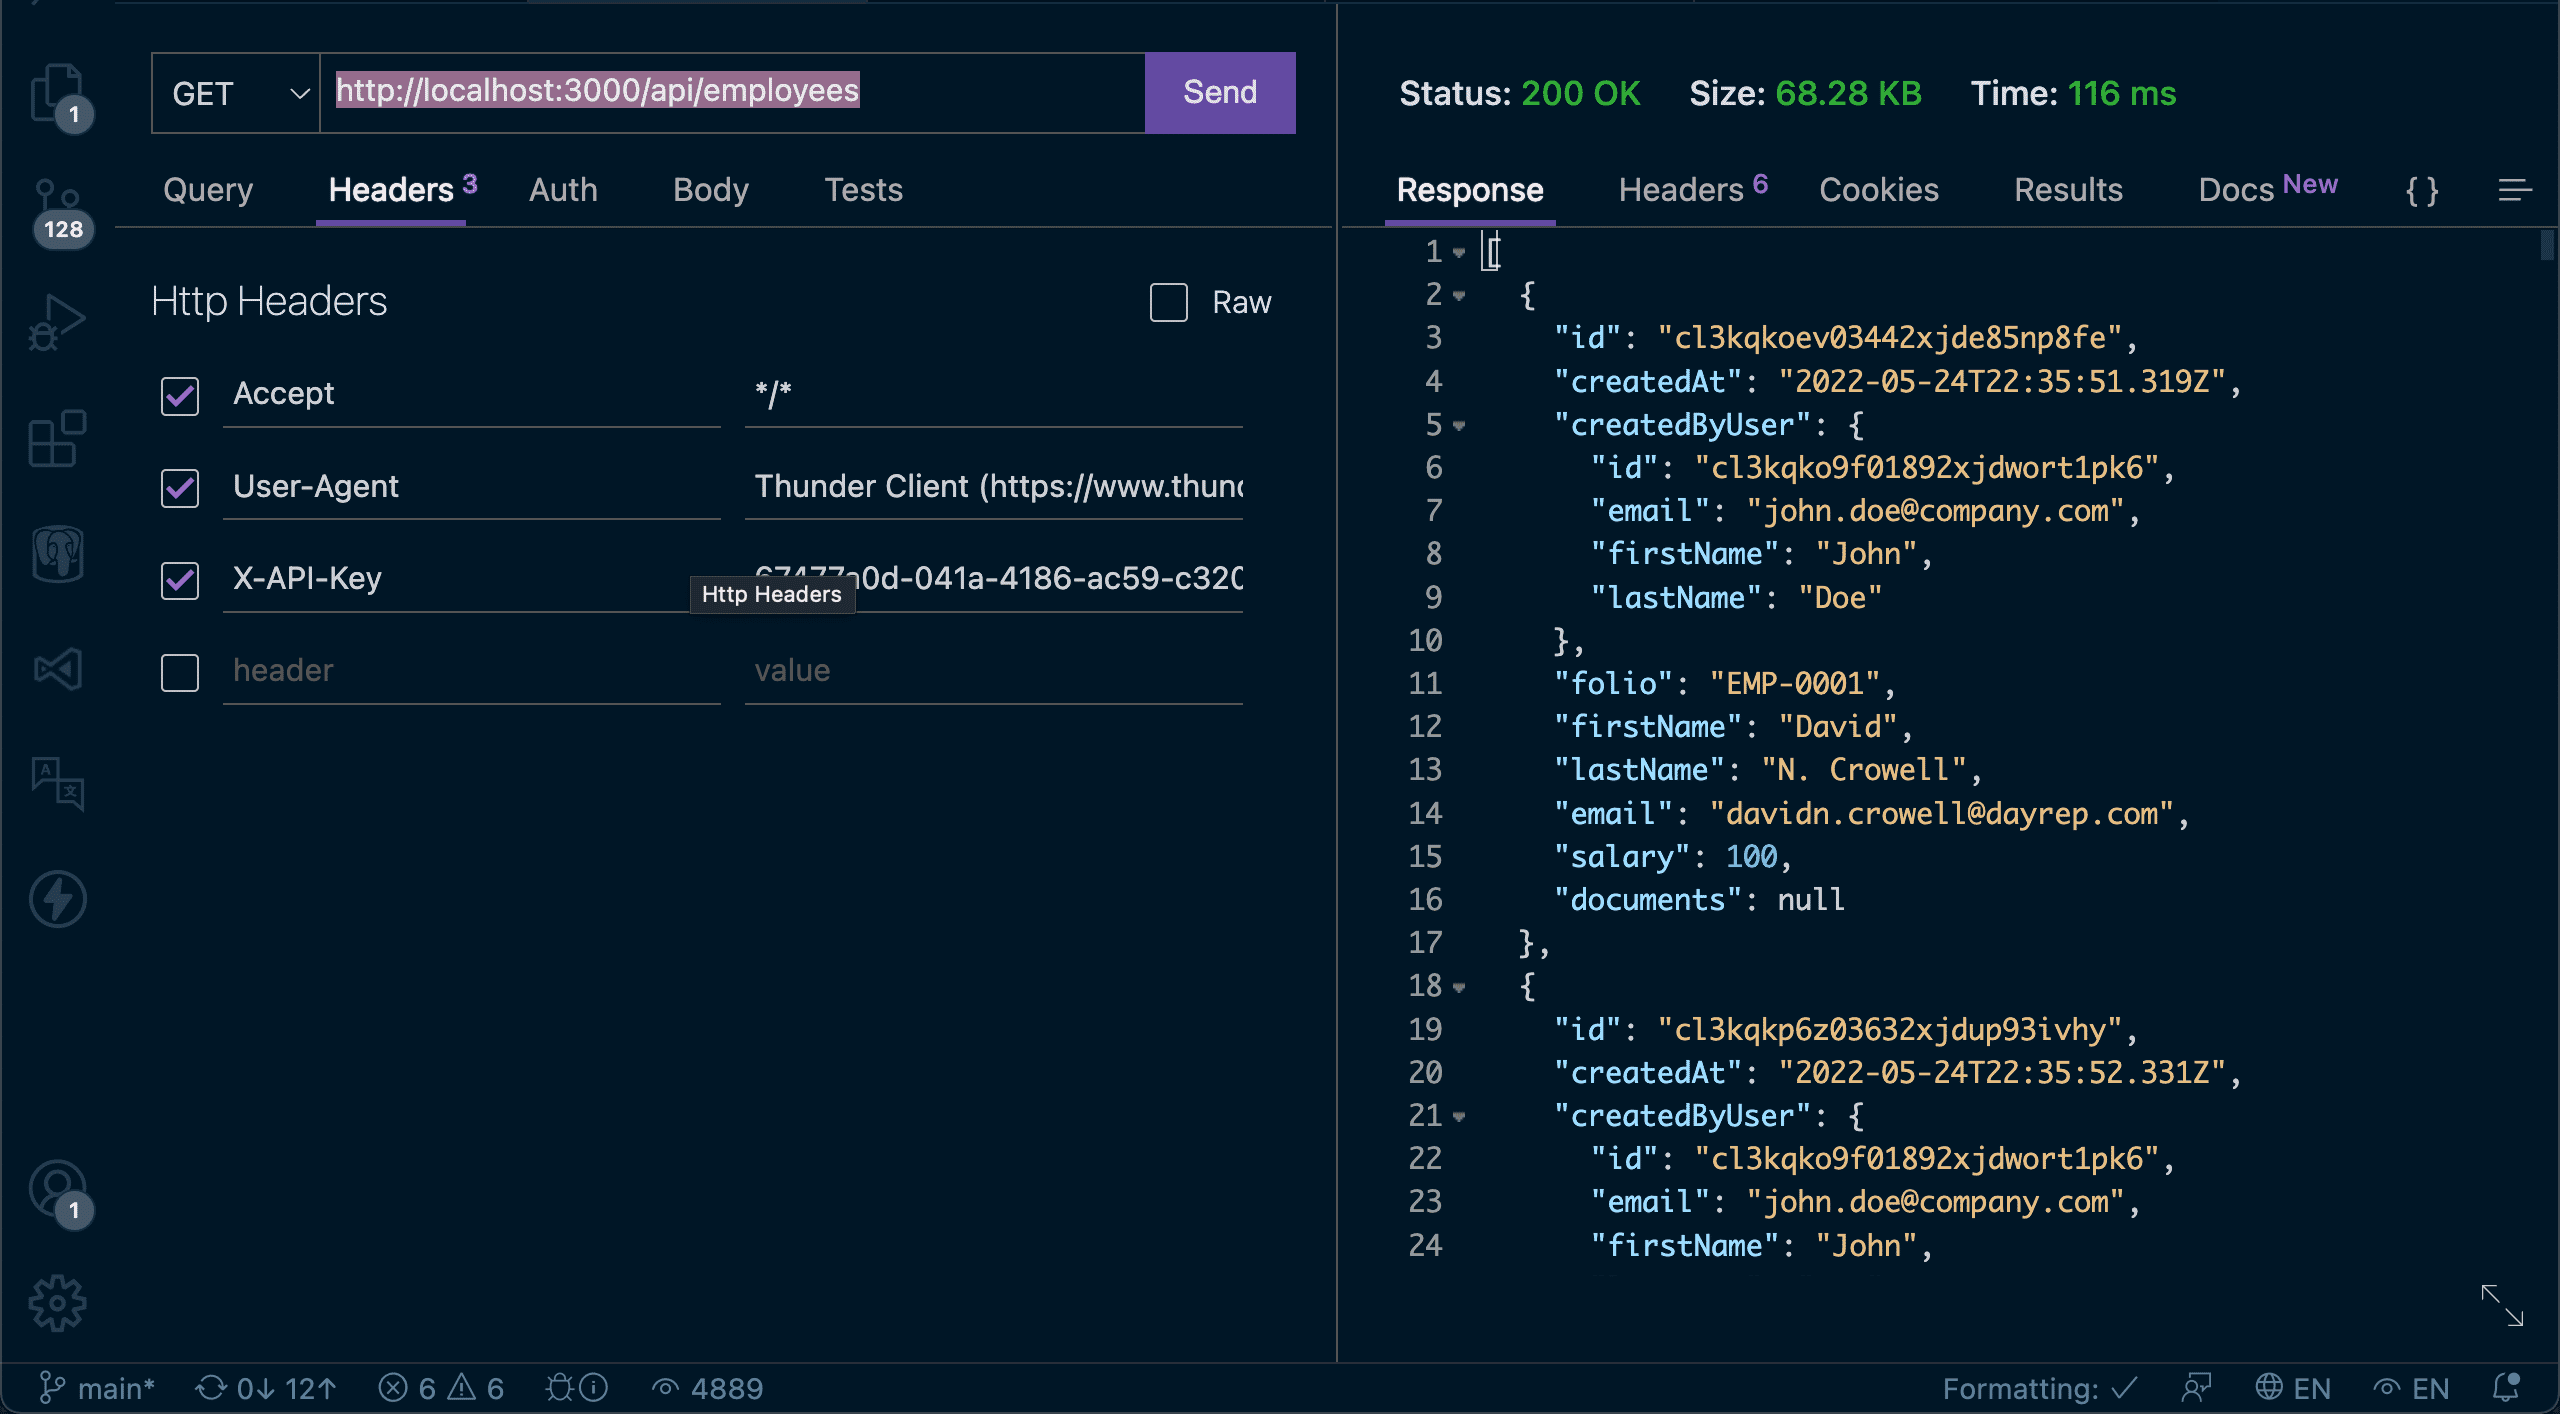
9. Using the autogenerated API
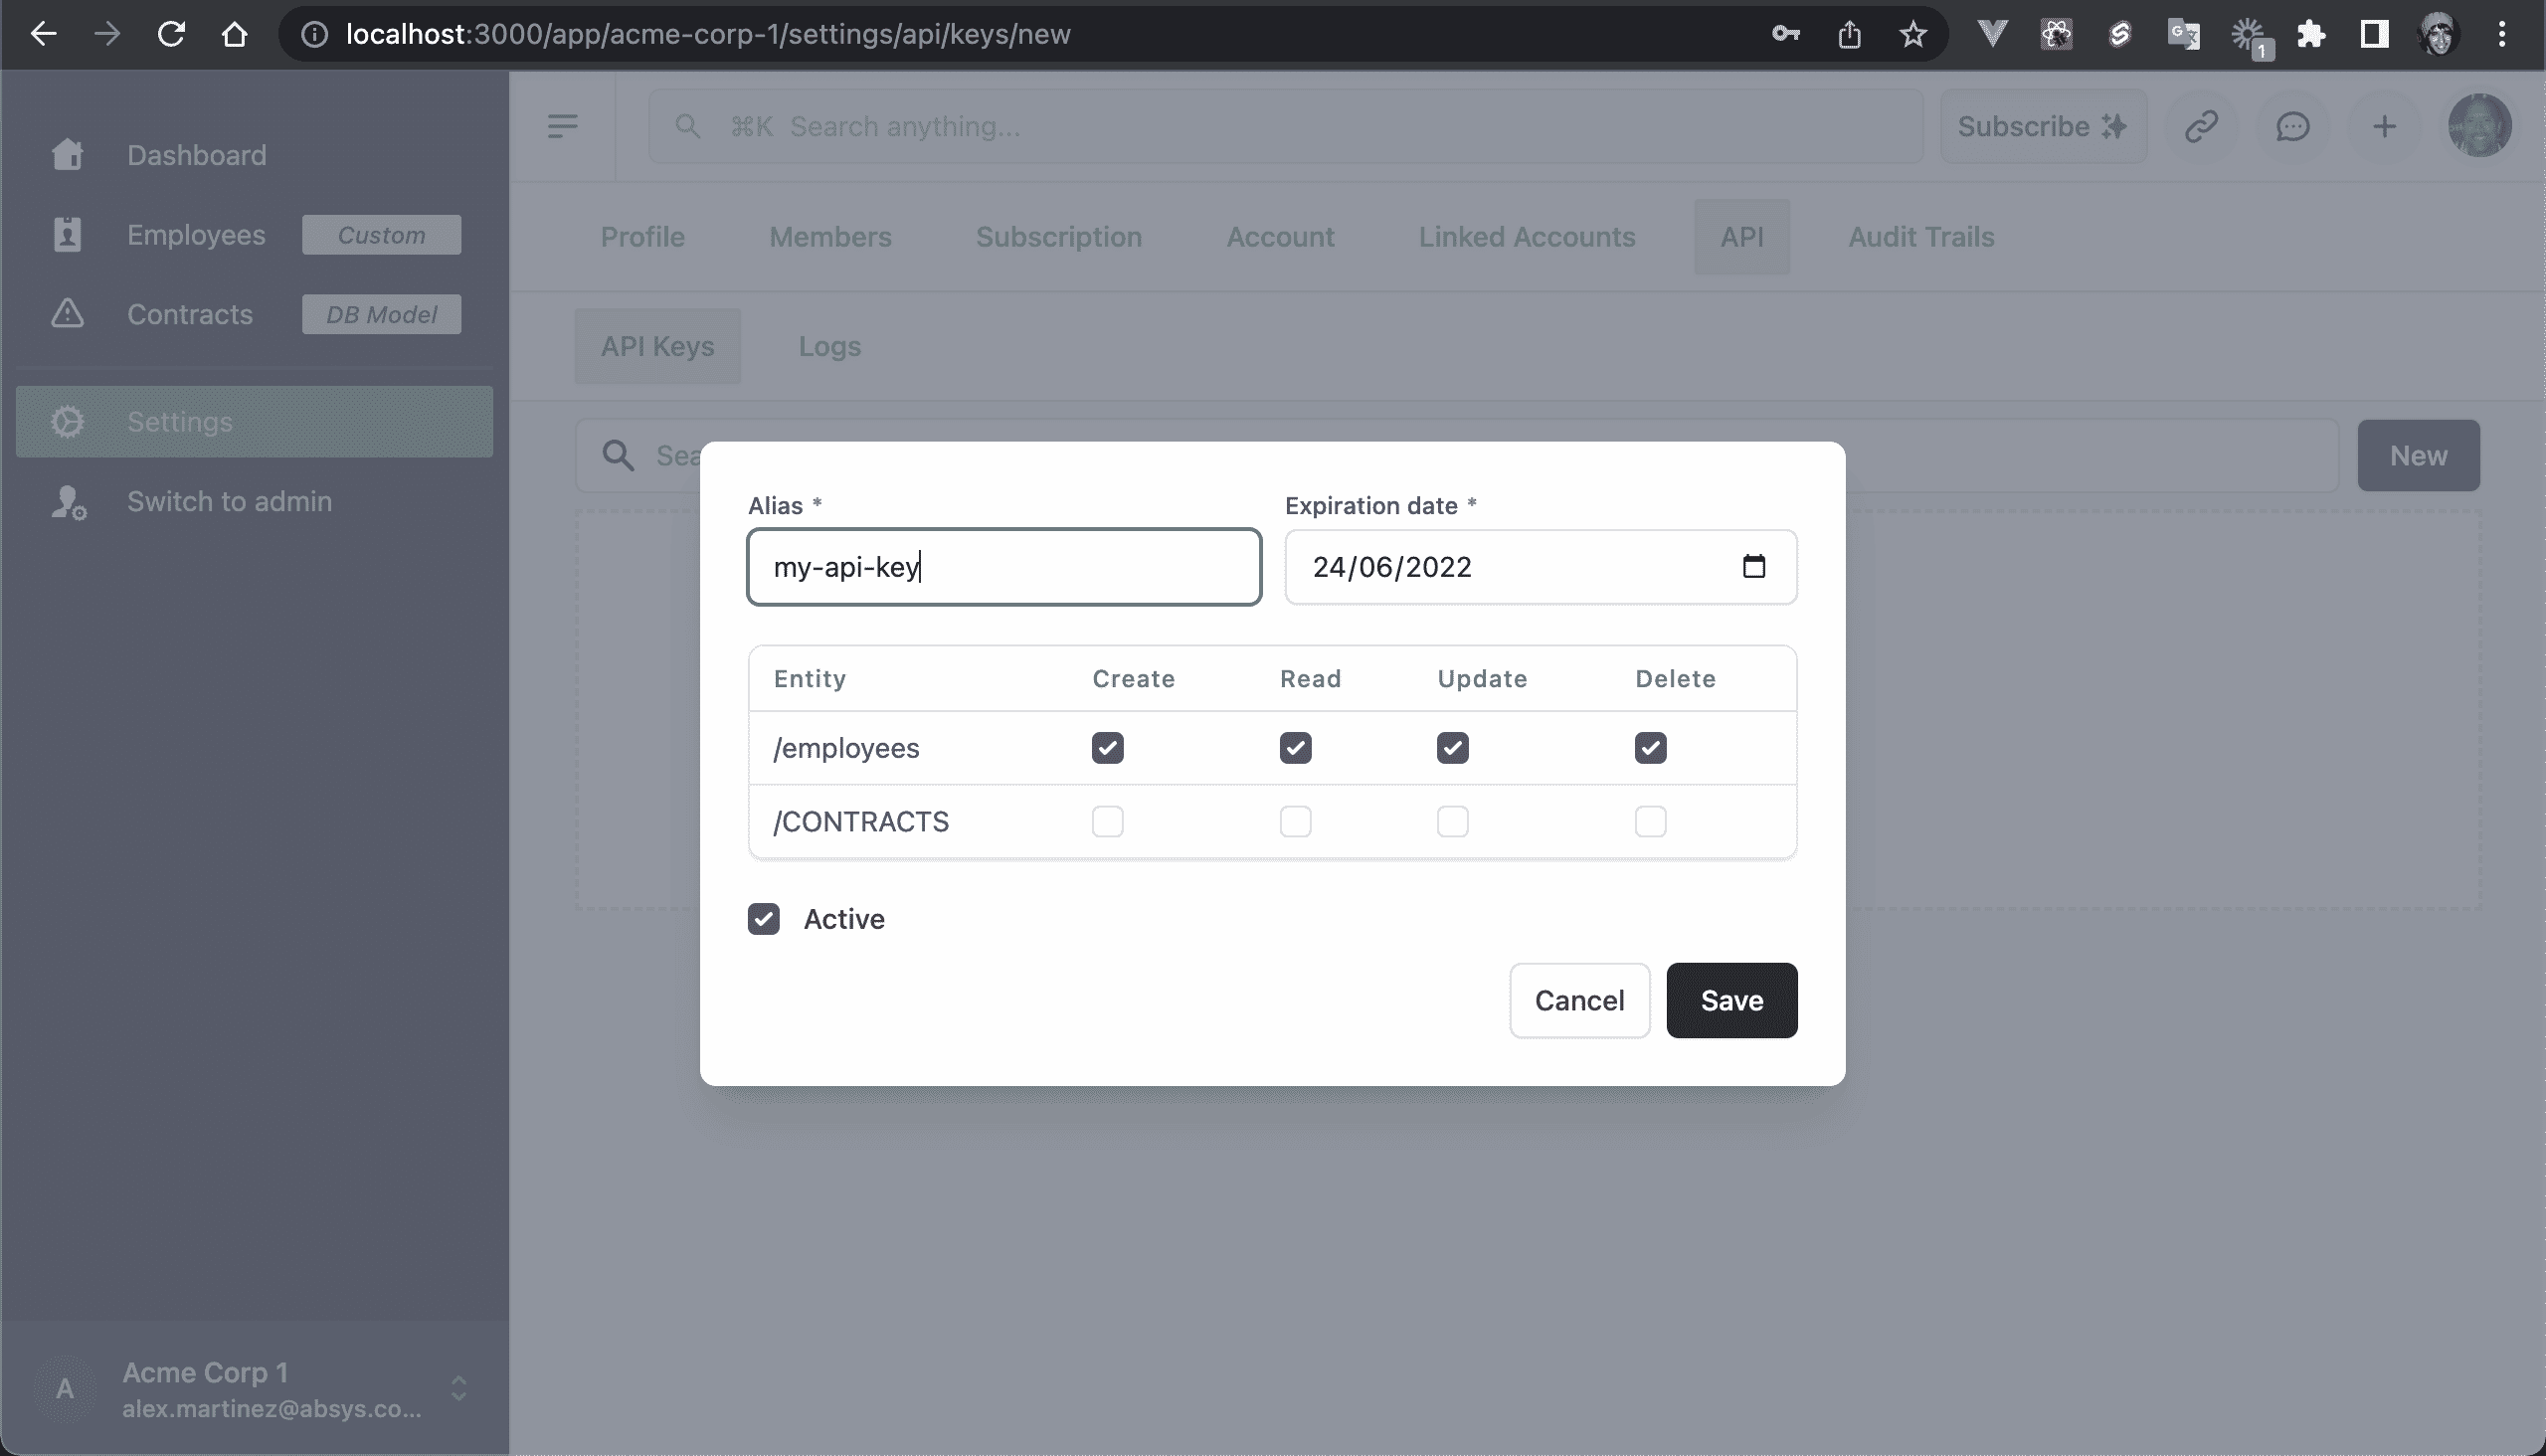
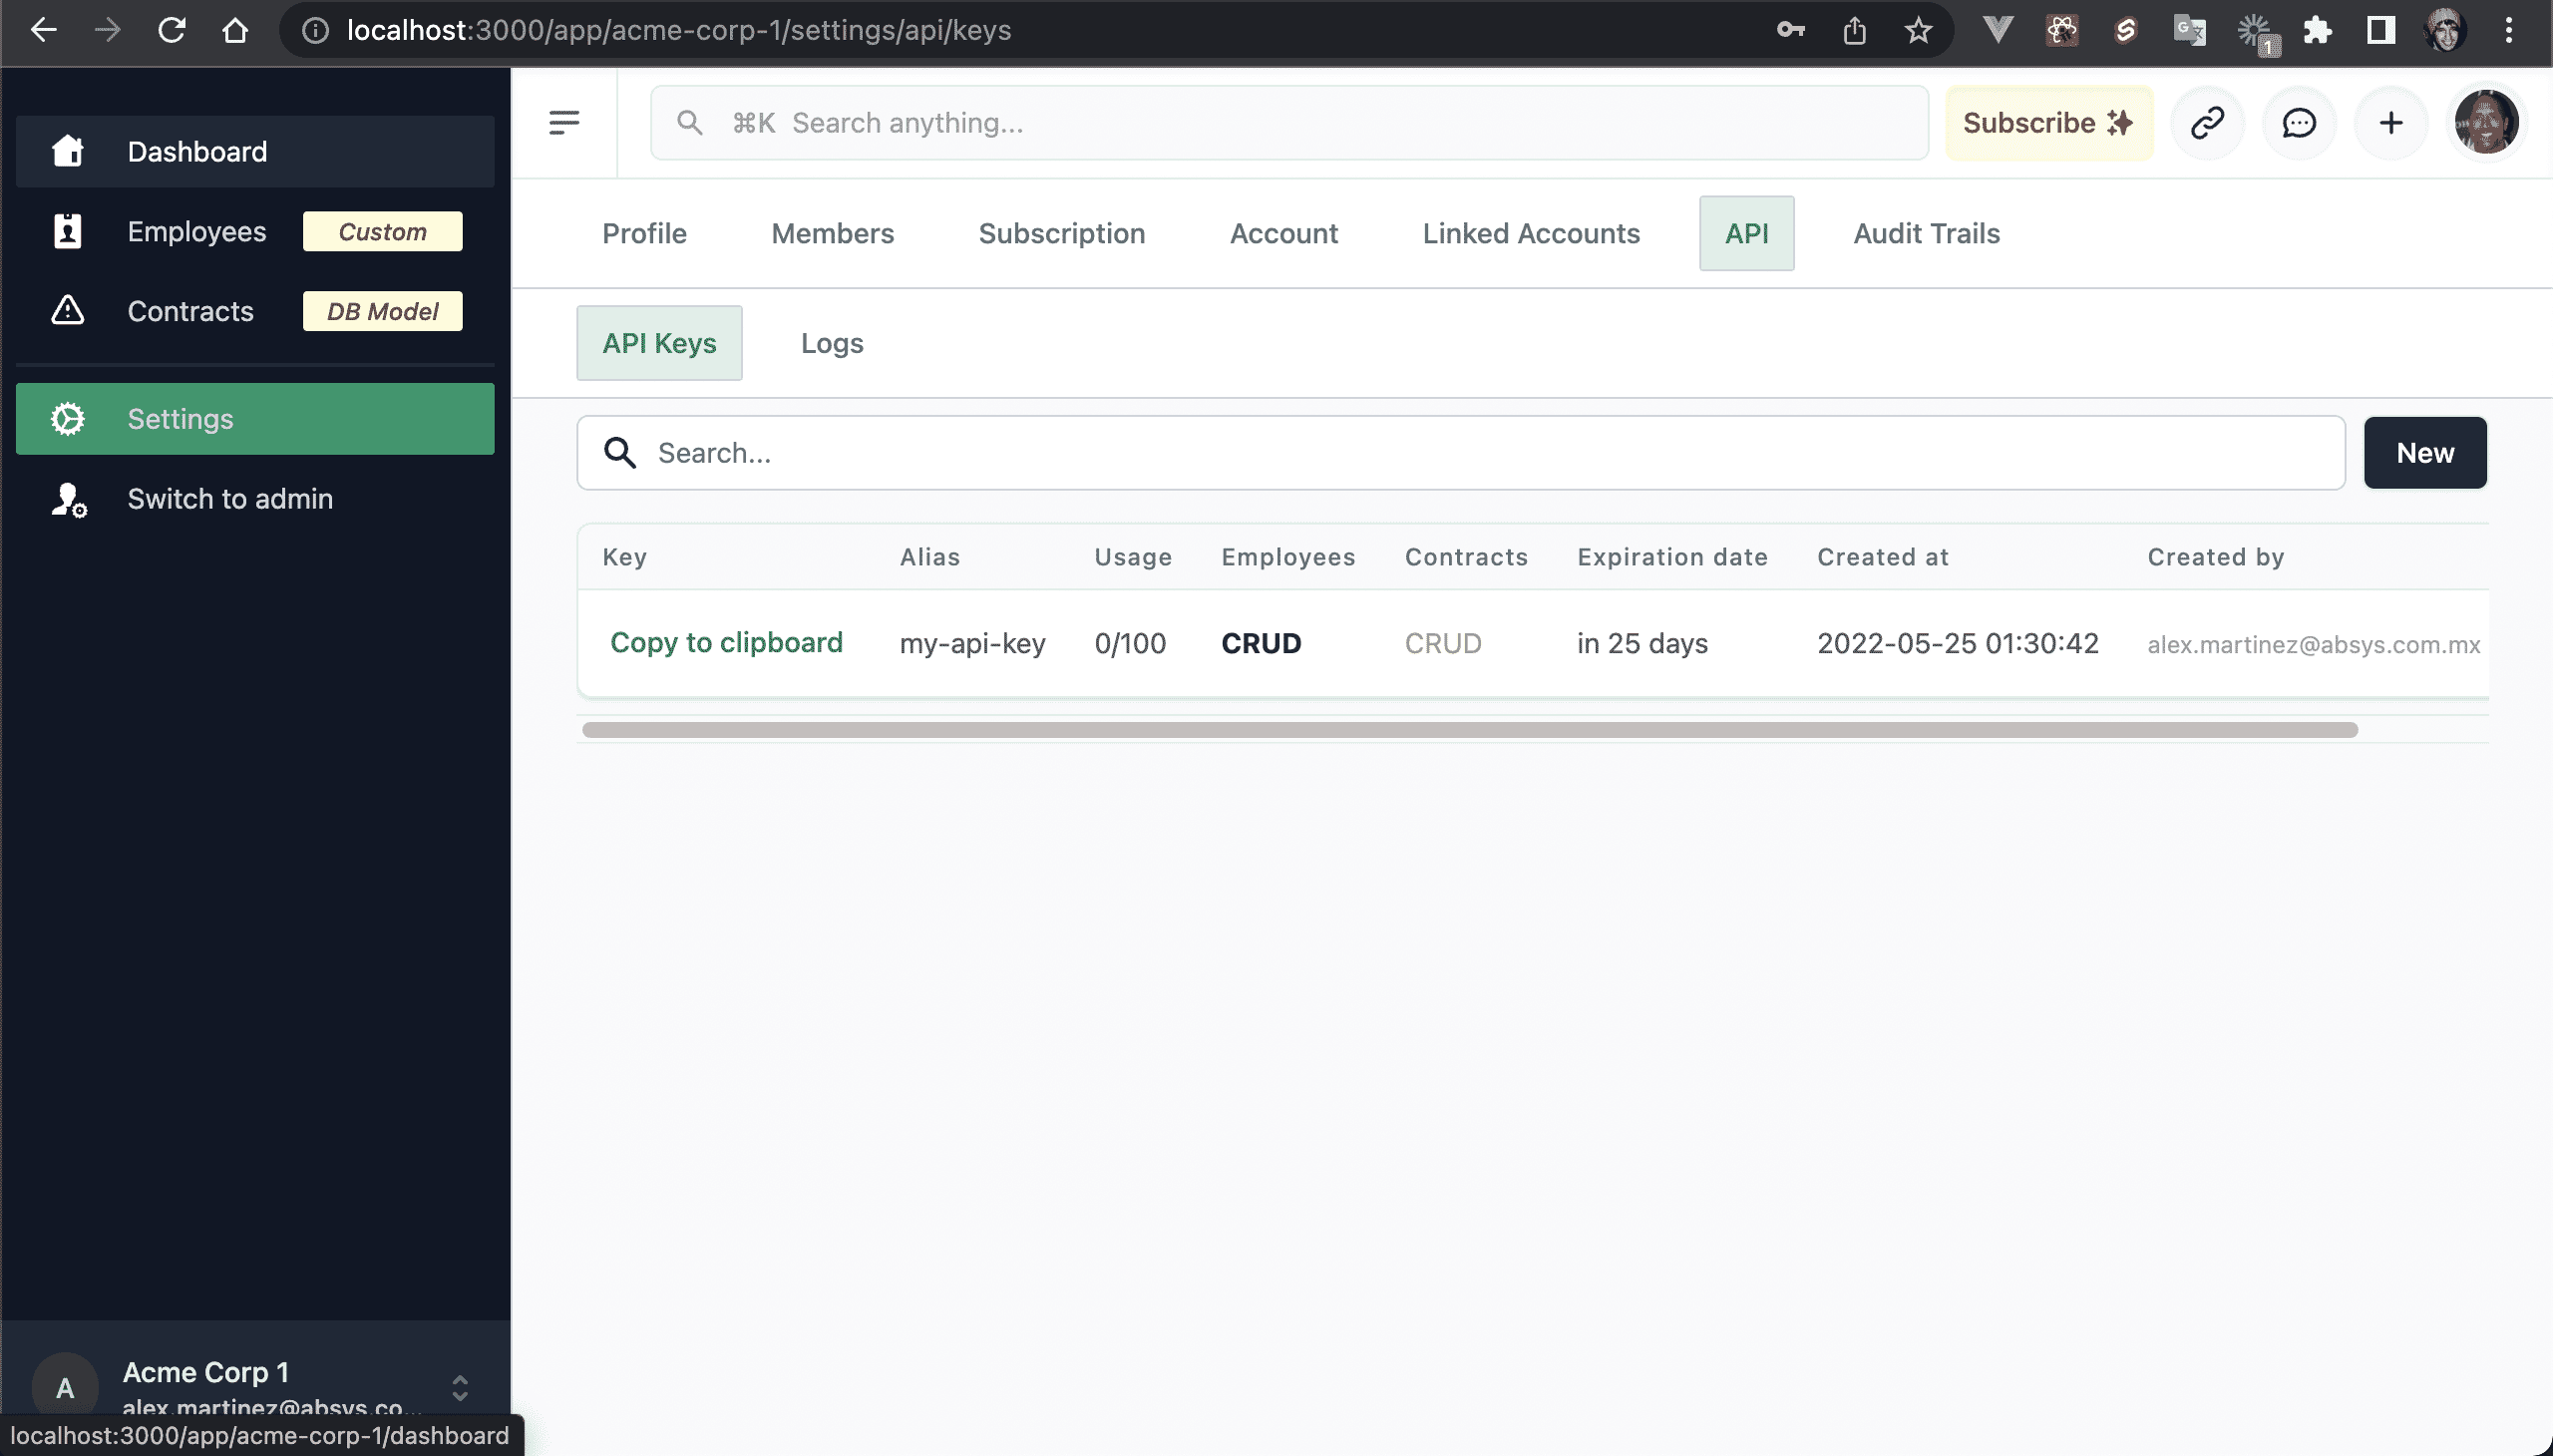
💿 9.1. As a tenant user, generate a new API Key at /app/:tenant/settings/api/keys/new.
💿 9.2. Click on Copy to clipboard, and save it somewhere (you'll use it on step 9.4).
💿 9.3. Install Thunder Client for VS Code.
💿 9.4. Create a new request with the following values:
Method: GET.
Headers: add the "X-API-Key" header with your API Key (generated in step 9.2).
💿 9.5. Call the API by clicking "Send".
💿 9.6. Test the POST, GET (/:id), PUT, and DELETE methods as you might expect them to work (or follow this guide).
10. Customizing the Views and Forms
The Contract model is the best of both worlds, Custom Entity and Custom Views and Forms.
If you want to create another database model from scratch, follow this guide.
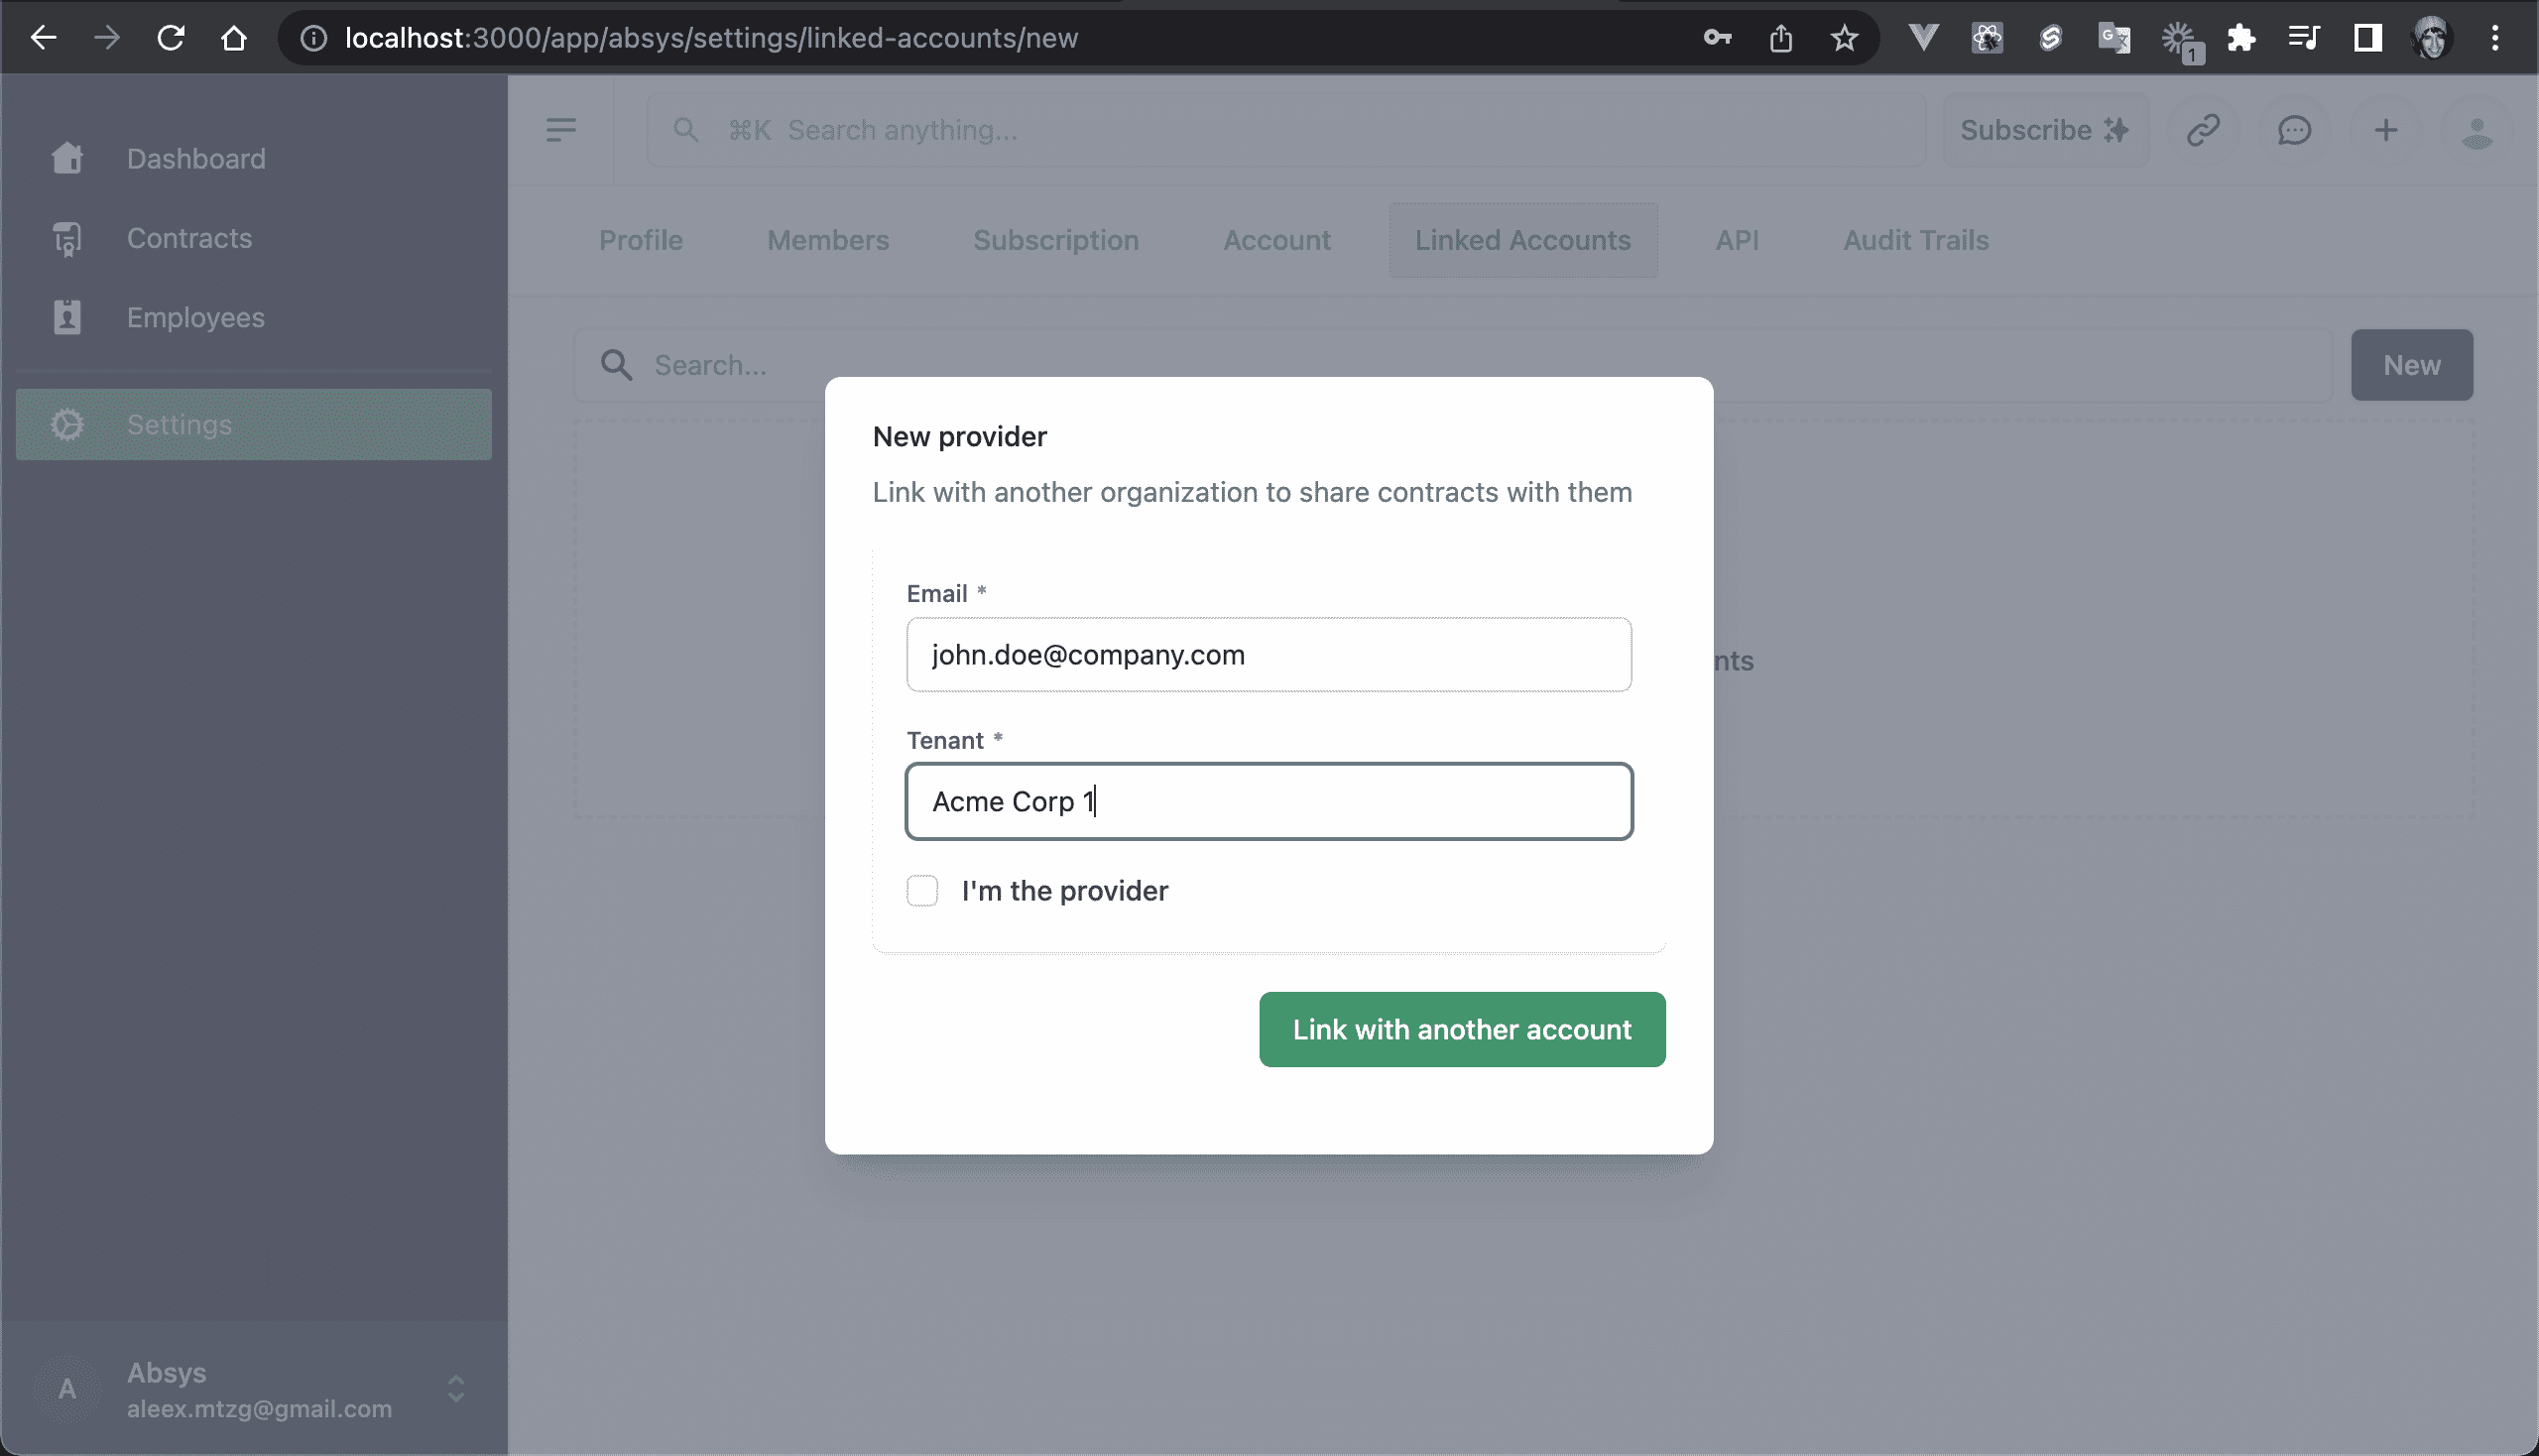
💿 10.1. Go to "Settings → Linked Accounts → New", and create a link:
Email: john.doe@company.com
Account: Acme Corp 1
You could also create another account with a valid email to get the following email:

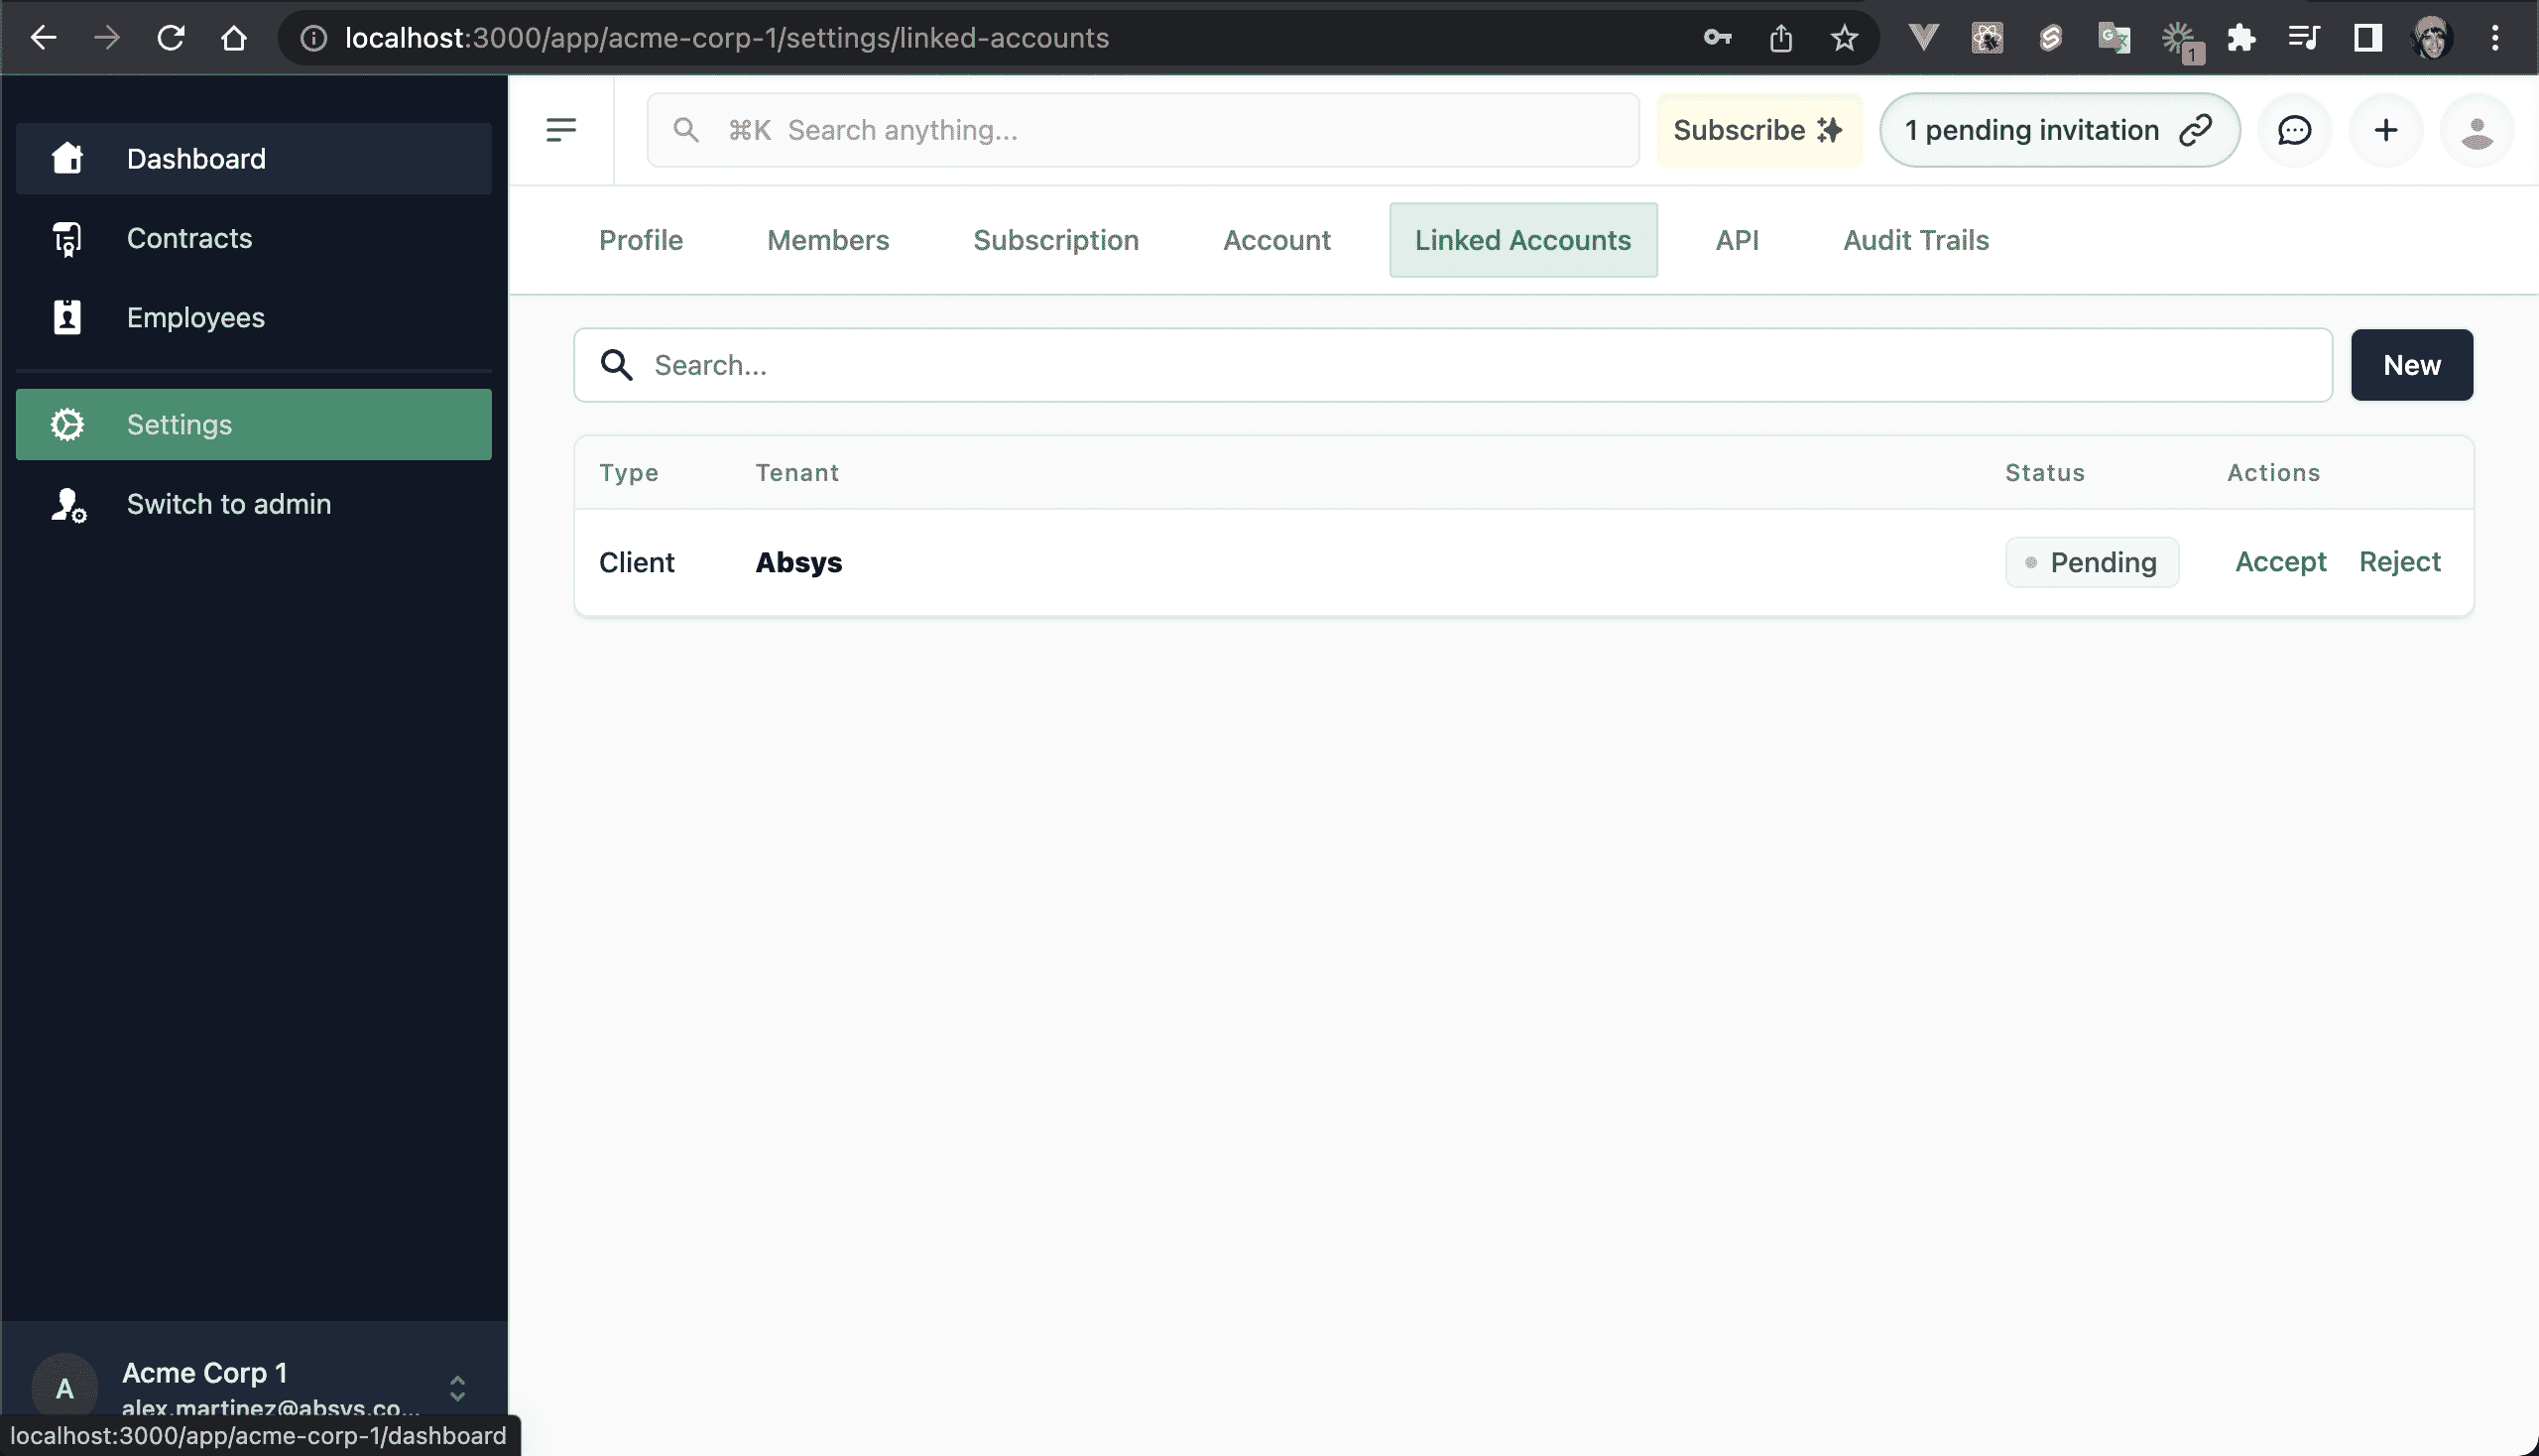
💿 10.2. Log in as that tenant, and accept the invitation.
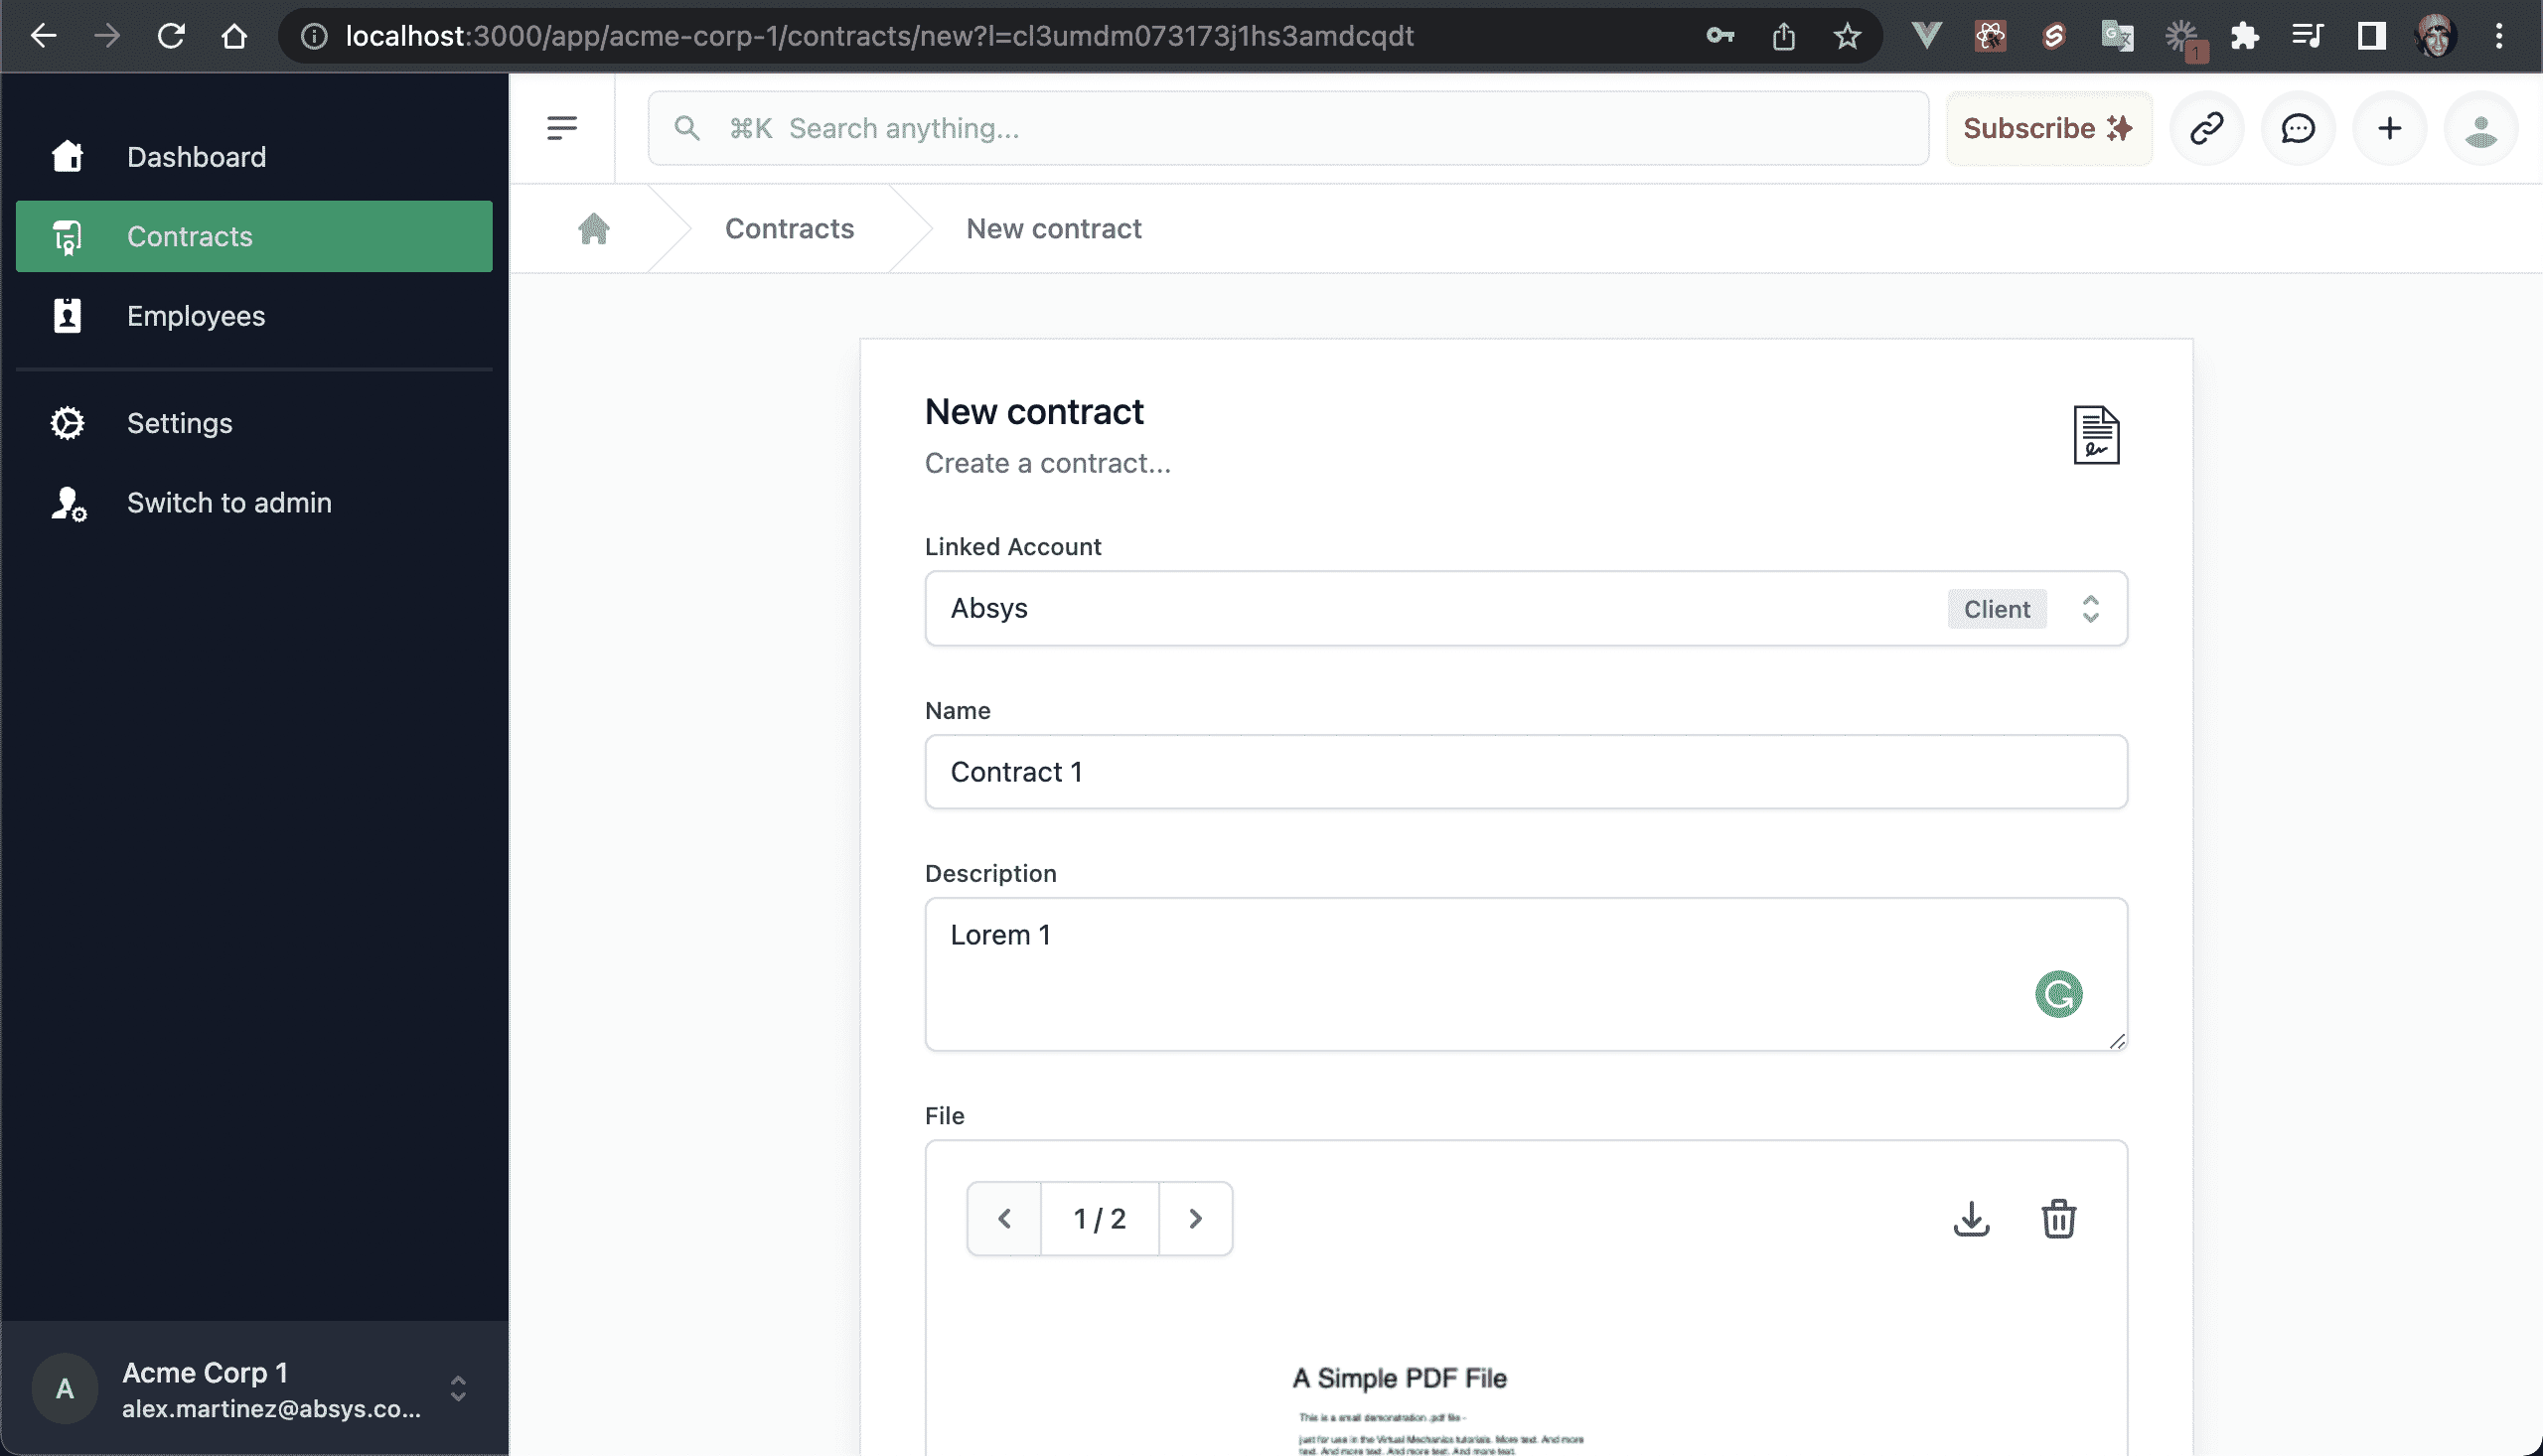
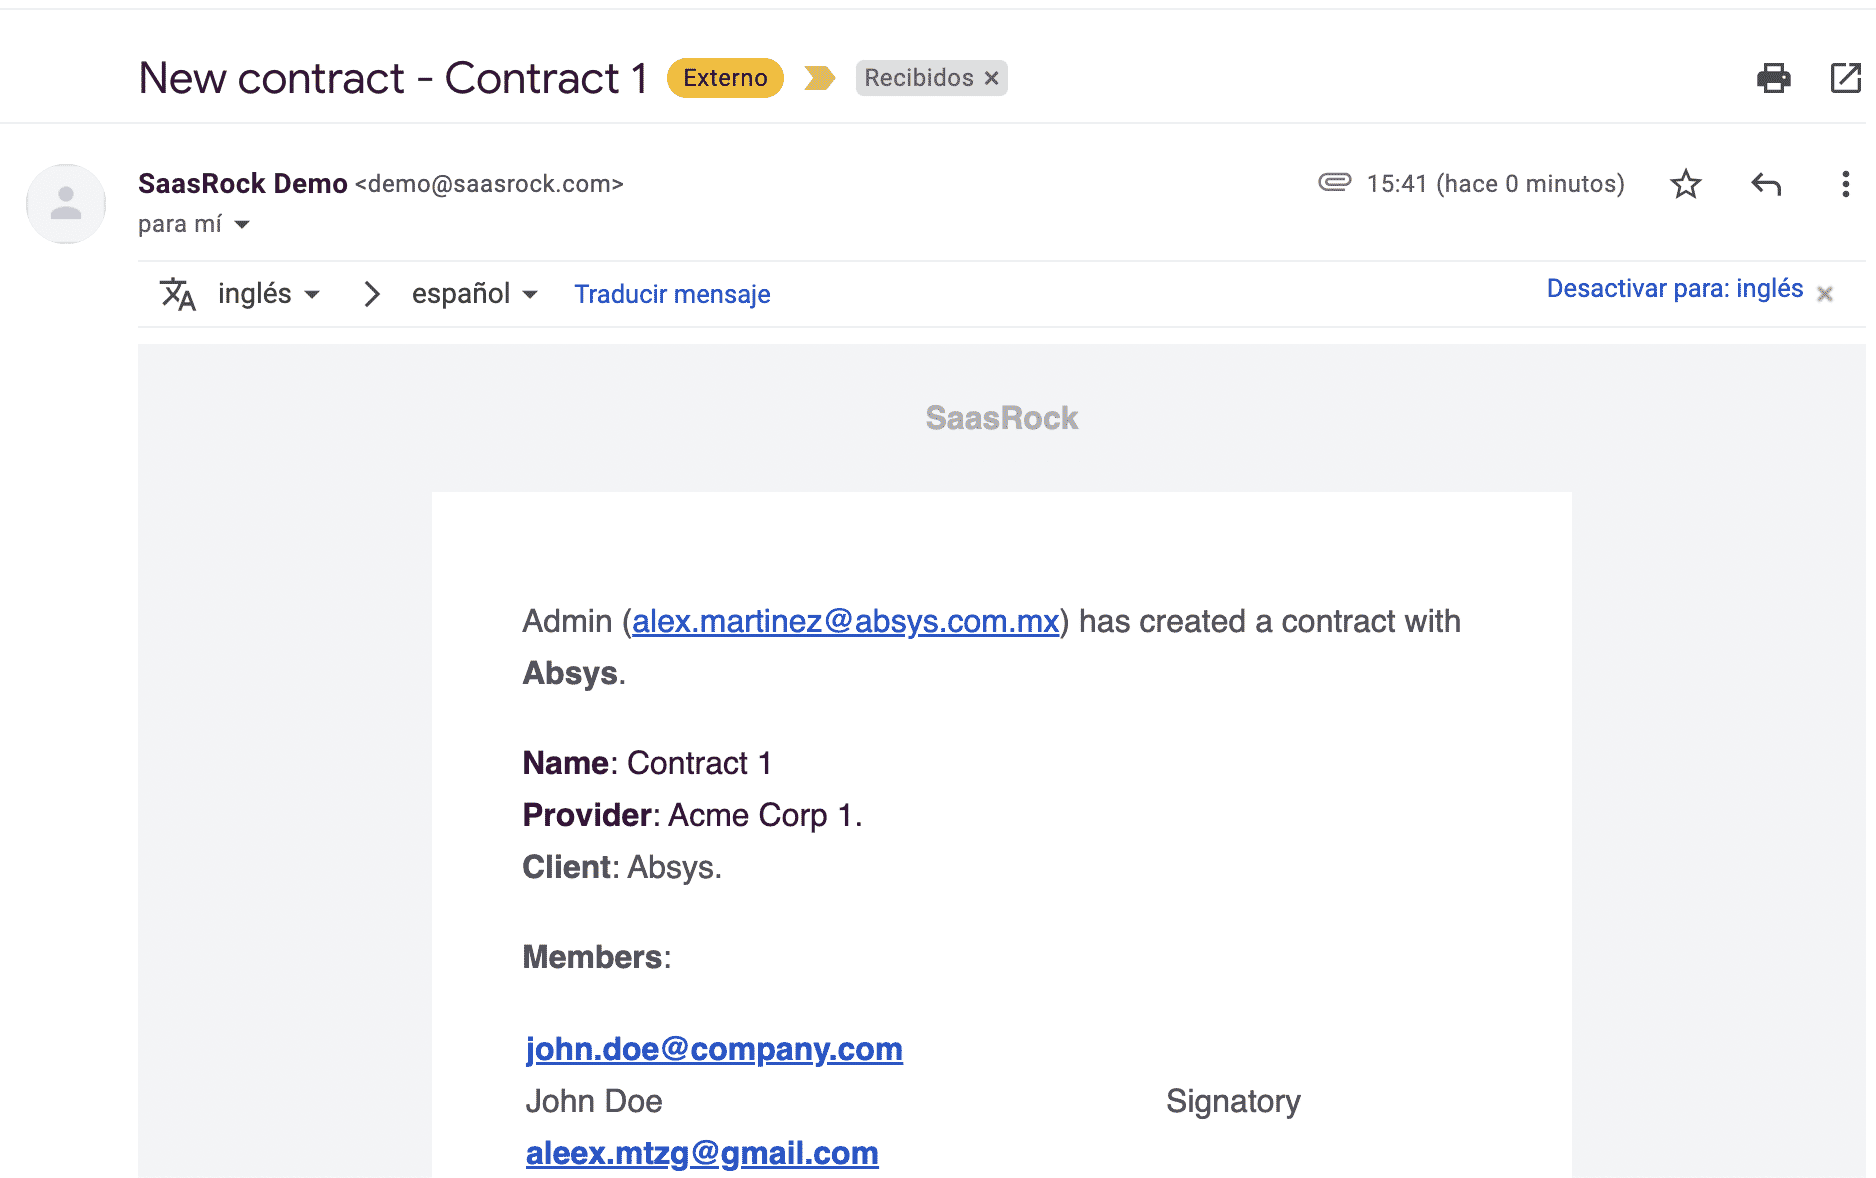
💿 10.3. Create a contract:
Linked Account: Created linked account
Name: Contract 1
Description: Lorem ipsum...
File: Any PDF file
Signatories: Select 2 signatories (required)
Employees: Select at least 1 employee (optional)
Once created, you should get an email:
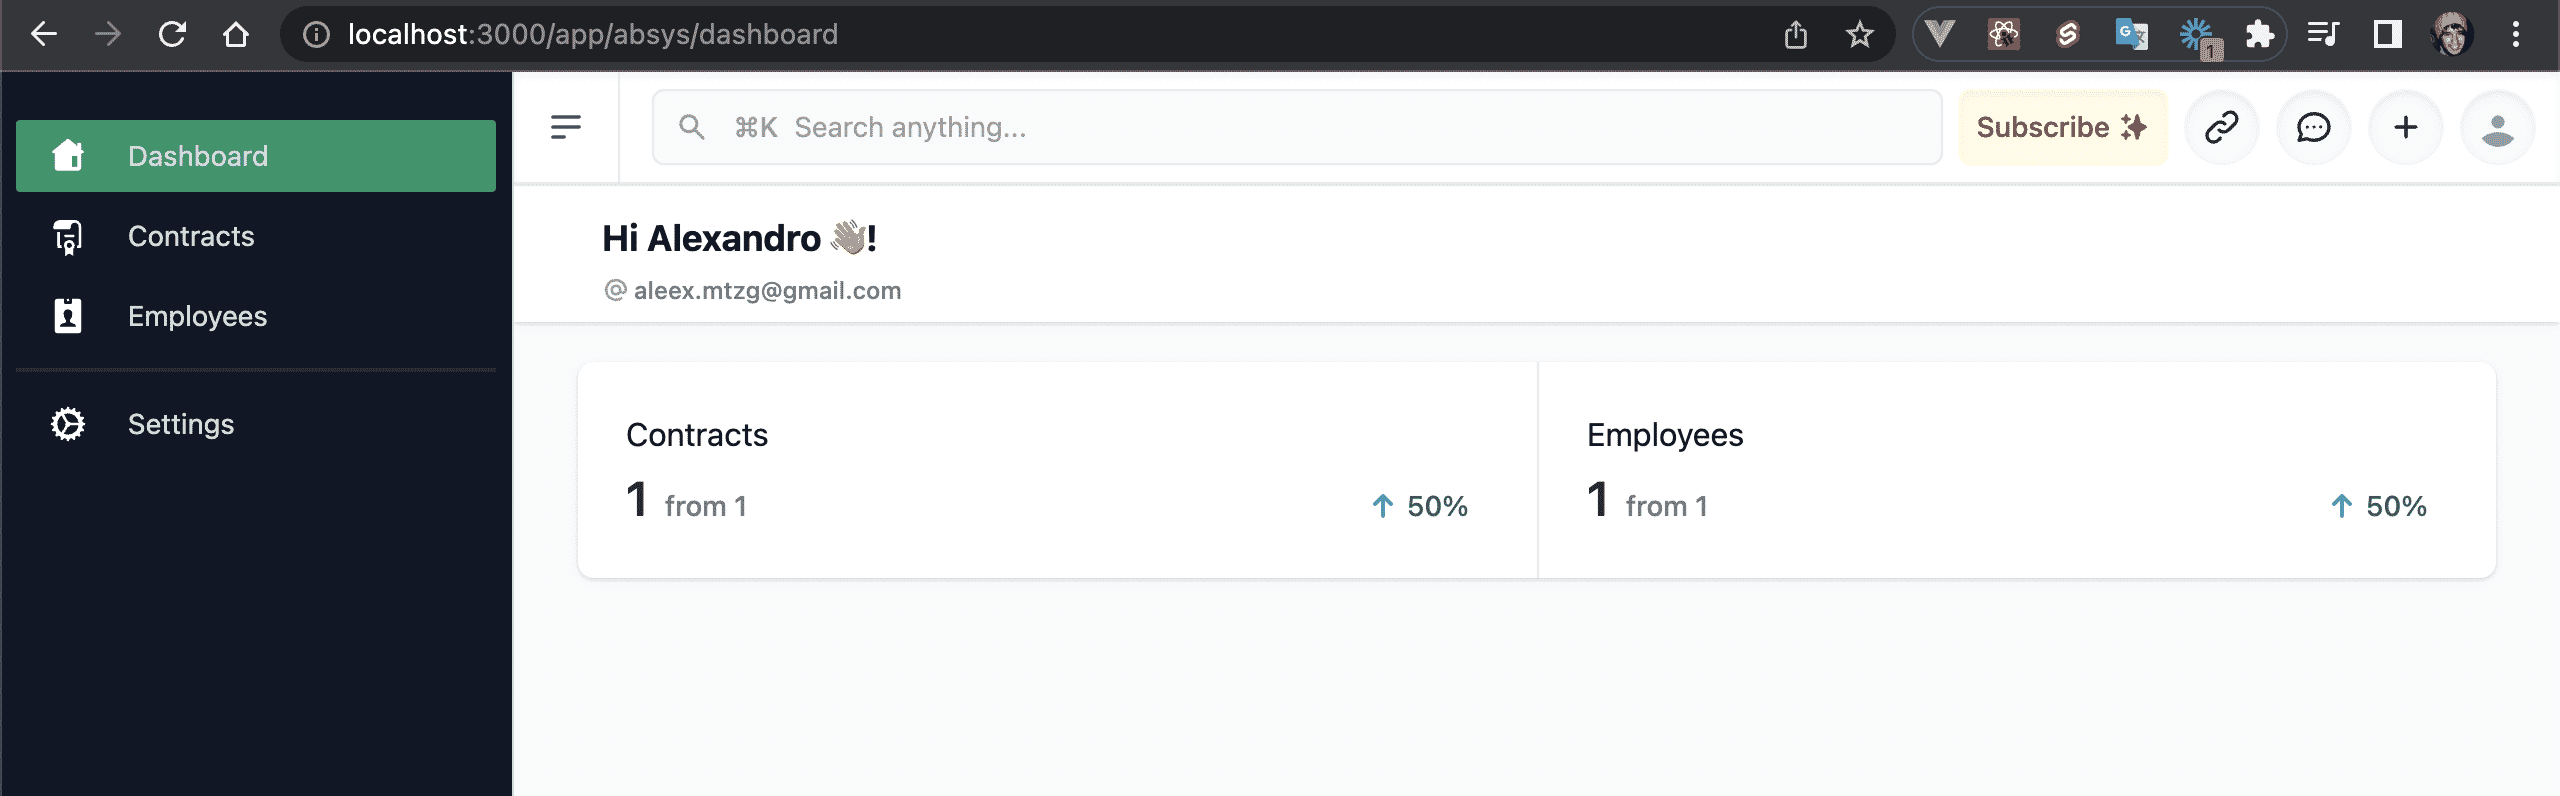
💿 10.4. Finally, go to your dashboard.
You should have at least 2 stats: Total Employees and Total Contracts.
I hope this quick guide was useful! Let me know if you have any questions.
